Browse Category

VMware

VMware products

Properly cleaning up VCF bundles

With all the recent releases for VCF i noticed that my file system was getting full and once the updates are complete i wanted to reclaim all that used space.

The first step was to identify the Bundle ID. We can find this by going to the bundle itself and checking out the details by clicking on View Details

For example this specific Bundle ID is 86da0038-b68d-4368-8be1-576568a68c54

At this point i had to log in to the sddc manager and issue the following command:

/opt/vmware/vcf/lcm/lcm-app/bin/bundle_cleanup.py 86da0038-b68d-4368-8be1-576568a68c54

We can also specify multiple bundle IDs:

/opt/vmware/vcf/lcm/lcm-app/bin/bundle_cleanup.py 96368be7-554c-40d1-81ef-3ad0b47c16f0 7d5af5d8-0f01-4fc5-b22b-c805f5cd00fb cf4ab52f-b999-4f6a-8c29-2db829110925

I hope this helps

Upgrading VCF 5.x to VCF 5.1.1 Step by Step

With the release of of VCF 5.1.1 I wanted to get my lab upgraded. The release blog can be found here and the release notes are here

Please note that some of the components within the VCF will still need additional upgrading. Please read the release notes for additional details.

We can start by going to Inventory -> Workload Domains -> Select the domain -> Update/Patches -> Select the VCF version -> Download now. If you do not see the newest releases go to Administration -> Online Depot and add a VMware Customer Connect account that has access to perform downloads.

The next step is to upgrade VCF by going to Inventory -> Workload Domains -> Select the workload domain -> Update/Patches -> Select the cloud foundation version we’re upgrading to and click on Update Now for the VMware Cloud Foundation Update 5.1.1

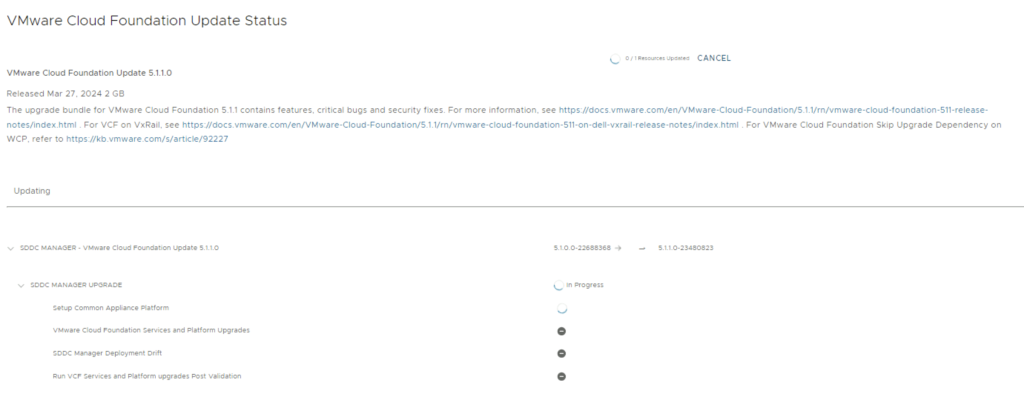
Next we are taken to the Upgrade page where we can follow the upgrade for each one of the components

Once the upgrade is complete we can click Finish to be returned back to the main screen

Because we are changing the SDDC-Manager versions i would strongly recommend to clear cache and log back in before going forward.

Next step is to upgrade NSX-T installation to NSX-T 4.1.2.3. The release notes can be found here.

We can also download it directly from the workload domain by going to Inventory -> Workload Domains -> Select the domain -> Update/Patches -> Download now

Once the download is complete we can proceed with updating the NSX components by clicking on the update now

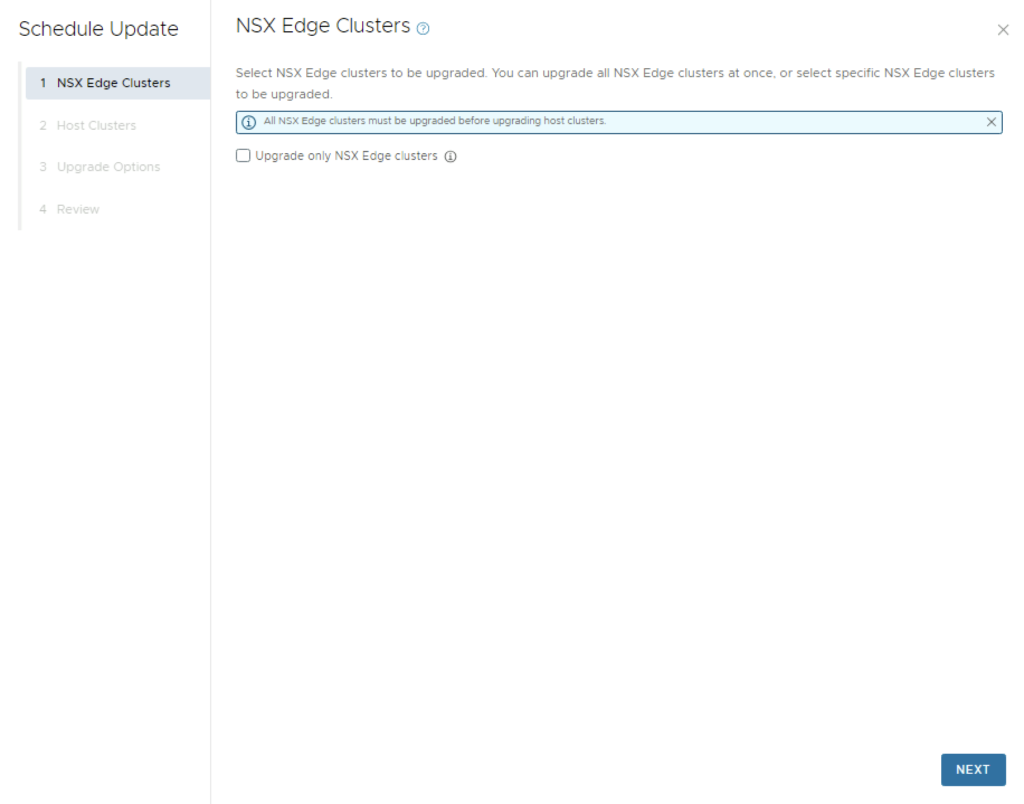
Make the proper selection and click next

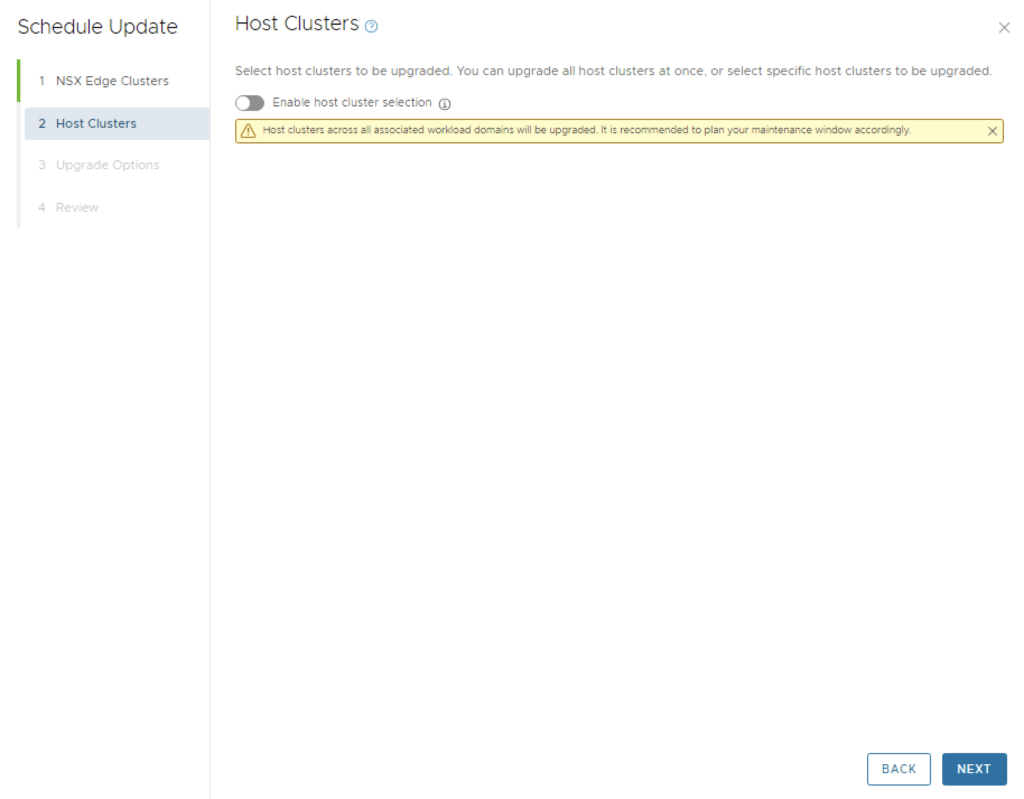
Make the proper selection and click next

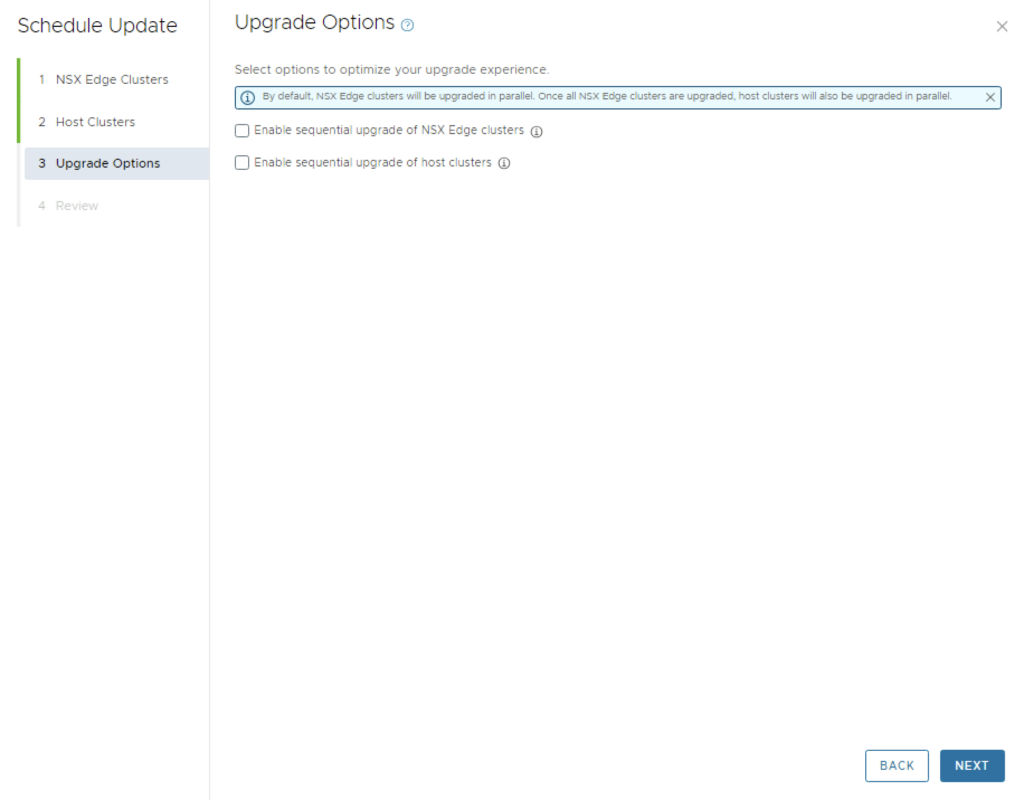
Make the proper selection and click next

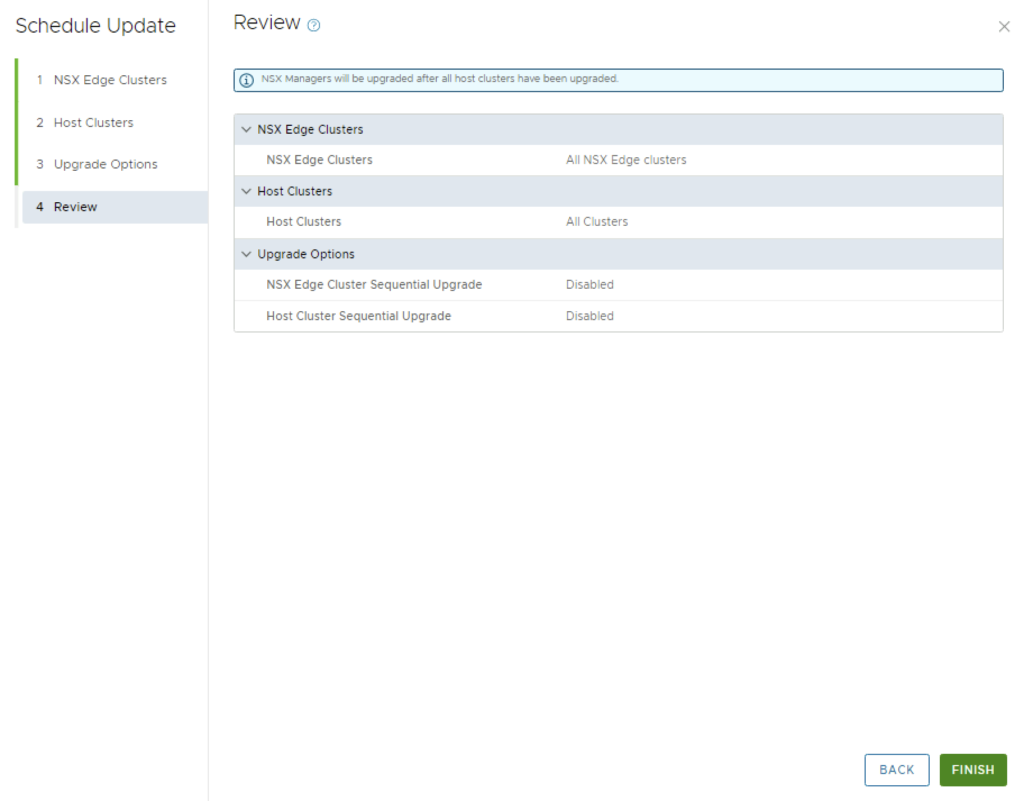
Review the options and click on Finish

The upgrade will go thought upgrading the NSX edges. We can view the upgrade status by clicking on view status

Once the upgrade is complete we can proceed with the vCenter Upgrade. VCF 5.1.1 comes with vCenter Server 8.0 Updated 2b. The release notes can be found here. We can go to Inventory -> Workload Domains -> Select the workload domain -> Update/Patches -> Under Available updates click on Download now.

Once the download is complete we can click on Update now

Confirm that we have a backup

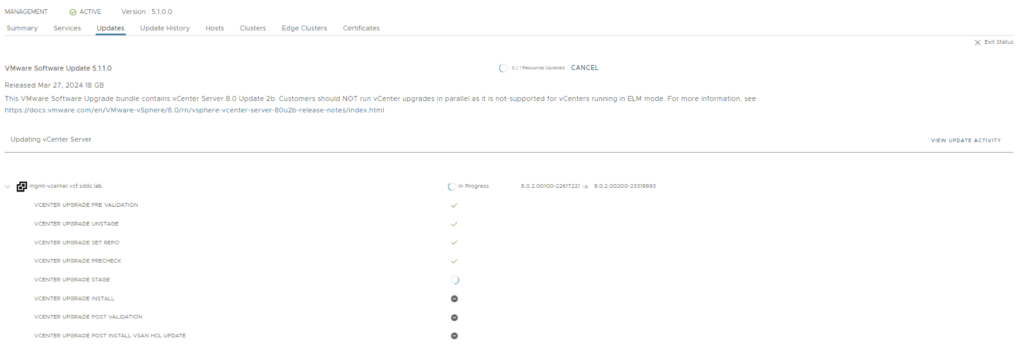
We can follow the status of the upgrade by clicking on the view status tab

Here we can see the different components that are getting upgraded

Once the upgrade is complete we are taken back to the previous page where we can see that the ESXi servers are next. The release notes can be found here. Click on Download Now.

Once the download is complete we can click on Update now

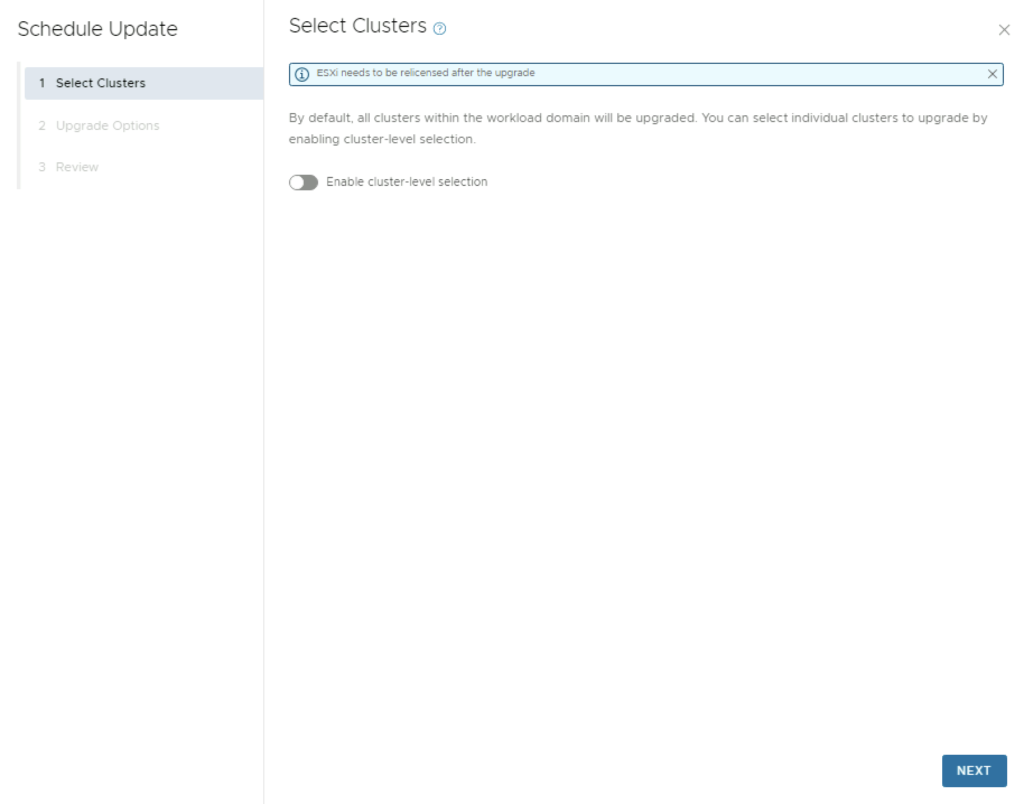
If we have multiple clusters we can enable Cluster-level selection and select the specific cluster(s) we want to upgrade.

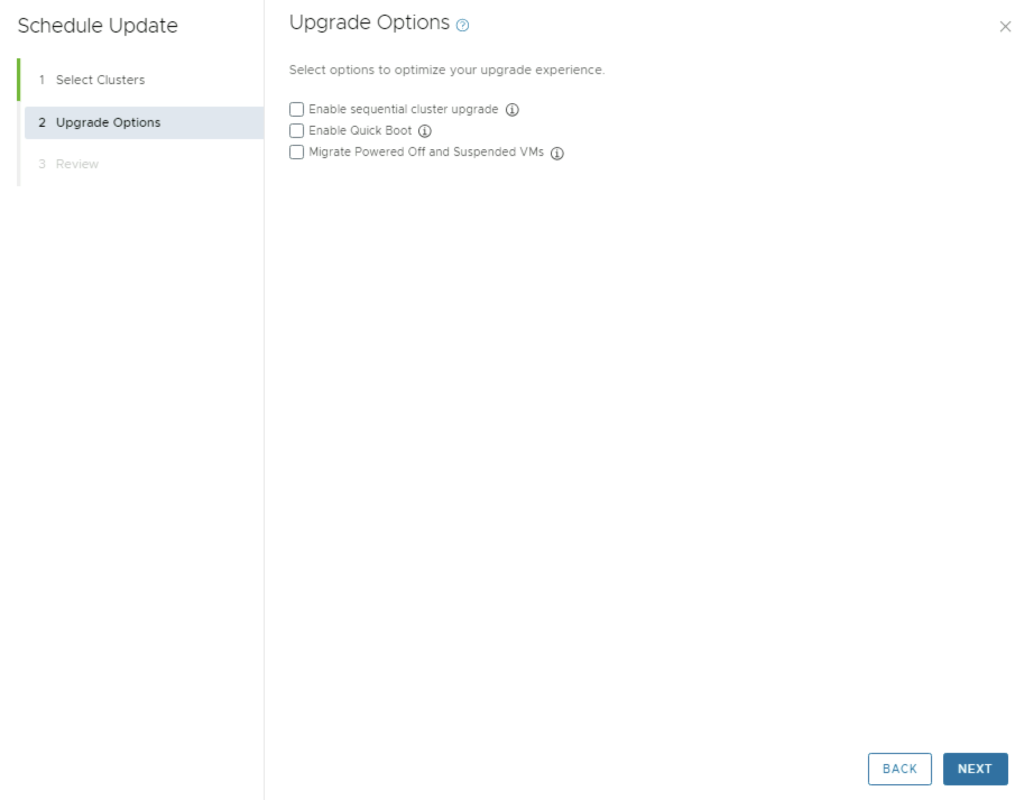
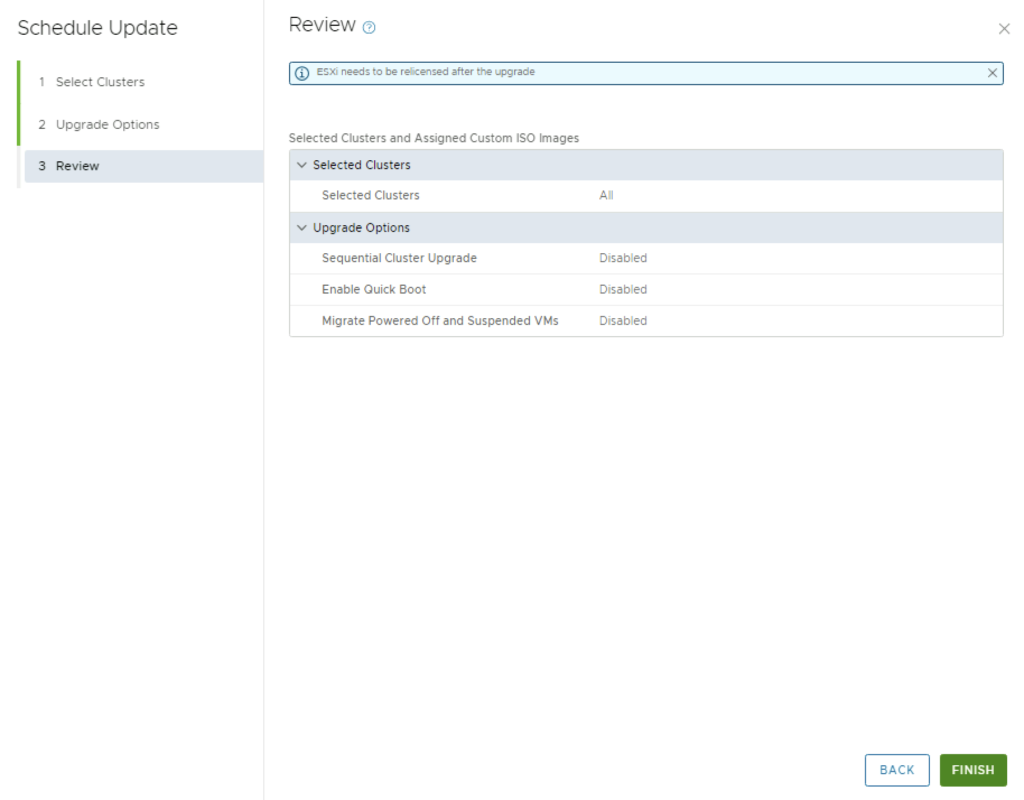
We can also enable sequential cluster upgrade, quick boot and the ability to evacuate offline VMs part of the maintenance. Click Next

We get to review the options once again before we click finish to to submit the task

Once submitted we can view the status by clicking on View Status

And with that we are finished with the workload domain. We can follow the same steps for the other domains

Don’t forget to clean up the download bundles by following the steps from my other blog here

VCF depot build numbers

Bundle	Product Version	Size	Bundle	Component	Bundle Type
bundle-111778	5.1.1.0	605.7	ESX_HOST-8.0.2-23305546	PATCH	
bundle-111779	5.1.1.0	11381.3	NSX_T_MANAGER-4.1.2.3.0-23382408	PATCH	
bundle-111777	5.1.1.0	0	SDDC_MANAGER_VCF-5.1.1.0-23480823	PATCH	(Drift)
bundle-111776	5.1.1.0	2331.6	SDDC_MANAGER_VCF-5.1.1.0-23480823	PATCH	
bundle-111781	5.1.1.0	17064.2	VCENTER-8.0.2.00200-23319993	PATCH	
bundle-111780	5.1.1.0	14664.6	NSX_T_MANAGER-4.1.2.3.0-23382408	INSTALL	
bundle-111782	5.1.1.0	10742.4	VCENTER-8.0.2.00200-23319993	INSTALL	
bundle-110346	5.1.1.0	1847.9	VRSLCM-8.16.0-23377566	INSTALL	
bundle-99536	5.1.0.0	640	ESX_HOST-8.0.2-22380479	PATCH	
bundle-99541	5.1.0.0	10500.4	NSX_T_MANAGER-4.1.2.1.0-22667789	PATCH	
bundle-99539	5.1.0.0	2089.2	SDDC_MANAGER_VCF-5.1.0.0-22688368	PATCH	
bundle-99540	5.1.0.0	0	SDDC_MANAGER_VCF-5.1.0.0-22688368	PATCH	(Drift)
bundle-99537	5.1.0.0	16801.6	VCENTER-8.0.2.00100-22617221	PATCH	
bundle-99542	5.1.0.0	14606.2	NSX_T_MANAGER-4.1.2.1.0-22667789	INSTALL	
bundle-99538	5.1.0.0	10493	VCENTER-8.0.2.00100-22617221	INSTALL	
bundle-98366	5.1.0.0	1817.8	VRSLCM-8.14.0-22630472	INSTALL	
bundle-94375	5.0.0.1	2044.9	SDDC_MANAGER_VCF-5.0.0.1-22485660	PATCH	
bundle-94376	5.0.0.1	251.5	SDDC_MANAGER_VCF-5.0.0.1-22485660	PATCH	(Drift)
bundle-80035	5.0.0.0	599.5	ESX_HOST-8.0.1-21813344	PATCH	
bundle-80031	5.0.0.0	10089.9	NSX_T_MANAGER-4.1.0.2.0-21761691	PATCH	
bundle-80030	5.0.0.0	251.3	SDDC_MANAGER_VCF-5.0.0.0-21822418	PATCH	(Drift)
bundle-80029	5.0.0.0	2044.7	SDDC_MANAGER_VCF-5.0.0.0-21822418	PATCH	
bundle-80033	5.0.0.0	9867.6	VCENTER-8.0.1.00100-21815093	PATCH	
bundle-80032	5.0.0.0	13874.6	NSX_T_MANAGER-4.1.0.2.0-21761691	INSTALL	
bundle-80034	5.0.0.0	9867.6	VCENTER-8.0.1.00100-21815093	INSTALL	
bundle-79587	5.0.0.0	1091.8	VRSLCM-8.10.0-21331275	INSTALL	
bundle-83610	4.5.2.0	382.1	ESX_HOST-7.0.3-21930508	PATCH	
bundle-87318	4.5.2.0	8615.4	NSX_T_MANAGER-3.2.3.1.0-22104592	PATCH	
bundle-88445	4.5.2.0	2012.6	SDDC_MANAGER_VCF-4.5.2.0-22223457	PATCH	
bundle-88446	4.5.2.0	250.5	SDDC_MANAGER_VCF-4.5.2.0-22223457	PATCH	(Drift)
bundle-81146	4.5.2.0	6420	VCENTER-7.0.3.01500-21784236	PATCH	
bundle-87319	4.5.2.0	10618.2	NSX_T_MANAGER-3.2.3.1.0-22104592	INSTALL	
bundle-81147	4.5.2.0	8575.4	VCENTER-7.0.3.01500-21784236	INSTALL	
bundle-84015	4.5.2.0	1091.3	VRSLCM-8.10.0-21950667	INSTALL	
bundle-73789	4.5.1.0	381.8	ESX_HOST-7.0.3-21424296	PATCH	
bundle-73785	4.5.1.0	8402.7	NSX_T_MANAGER-3.2.2.1.0-21487560	PATCH	
bundle-77261	4.5.1.0	2150	SDDC_MANAGER_VCF-4.5.1.0-21682411	PATCH	
bundle-77262	4.5.1.0	250.2	SDDC_MANAGER_VCF-4.5.1.0-21682411	PATCH	(Drift)
bundle-73787	4.5.1.0	6419.8	VCENTER-7.0.3.01400-21477706	PATCH	
bundle-73786	4.5.1.0	10461.8	NSX_T_MANAGER-3.2.2.1.0-21487560	INSTALL	
bundle-73788	4.5.1.0	8575.1	VCENTER-7.0.3.01400-21477706	INSTALL	
bundle-61598	4.5.0.0	382.9	ESX_HOST-7.0.3-20328353	PATCH	
bundle-62768	4.5.0.0	8064	NSX_T_MANAGER-3.2.1.2.0-20541212	PATCH	
bundle-63600	4.5.0.0	247.6	SDDC_MANAGER_VCF-4.5.0.0-20612863	PATCH	(Drift)
bundle-63599	4.5.0.0	2106	SDDC_MANAGER_VCF-4.5.0.0-20612863	PATCH	
bundle-61594	4.5.0.0	6381.1	VCENTER-7.0.3.01000-20395099	PATCH	
bundle-62769	4.5.0.0	10053.7	NSX_T_MANAGER-3.2.1.2.0-20541212	INSTALL	
bundle-61596	4.5.0.0	8344.2	VCENTER-7.0.3.01000-20395099	INSTALL	
bundle-62801	4.5.0.0	1085.4	VRSLCM-8.8.2-20080494	INSTALL	
bundle-58347	4.4.1.1	10246.1	SDDC_MANAGER_VCF-4.4.1.1-19948546	PATCH	
bundle-58348	4.4.1.1	233.8	SDDC_MANAGER_VCF-4.4.1.1-19948546	PATCH	(Drift)
bundle-56937	4.4.1.0	395.5	ESX_HOST-7.0.3-19482537	PATCH	
bundle-57347	4.4.1.0	7127.2	NSX_T_MANAGER-3.1.3.7.4-19762317	PATCH	
bundle-57344	4.4.1.0	10246.2	SDDC_MANAGER_VCF-4.4.1.0-19766960	PATCH	
bundle-57346	4.4.1.0	233.8	SDDC_MANAGER_VCF-4.4.1.0-19766960	PATCH	(Drift)
bundle-55743	4.4.1.0	7139	VCENTER-7.0.3.00500-19480866	PATCH	
bundle-57348	4.4.1.0	8535.7	NSX_T_MANAGER-3.1.3.7.4-19762317	INSTALL	
bundle-55745	4.4.1.0	9202.7	VCENTER-7.0.3.00500-19480866	INSTALL	
bundle-52995	4.4.0.0	395.3	ESX_HOST-7.0.3-19193900	PATCH	
bundle-52980	4.4.0.0	7154.5	NSX_T_MANAGER-3.1.3.5.0-19068434	PATCH	
bundle-56535	4.4.0.0	230.4	SDDC_MANAGER_VCF-4.4.0.0-19617653	PATCH	(Drift)
bundle-53432	4.4.0.0	230.3	SDDC_MANAGER_VCF-4.4.0.0-19312029	PATCH	(Drift)
bundle-53431	4.4.0.0	10188.6	SDDC_MANAGER_VCF-4.4.0.0-19312029	PATCH	
bundle-52986	4.4.0.0	7223.8	VCENTER-7.0.3.00300-19234570	PATCH	
bundle-52611	4.4.0.0	905.6	VRSLCM-8.6.2-19221620	PATCH	
bundle-52982	4.4.0.0	8610	NSX_T_MANAGER-3.1.3.5.0-19068434	INSTALL	
bundle-52990	4.4.0.0	9244.9	VCENTER-7.0.3.00300-19234570	INSTALL	
bundle-52610	4.4.0.0	1111.3	VRSLCM-8.6.2-19221620	INSTALL	
bundle-52704	4.3.1.1	10695.5	SDDC_MANAGER_VCF-4.3.1.1-19235535	PATCH	
bundle-52705	4.3.1.1	230.5	SDDC_MANAGER_VCF-4.3.1.1-19235535	PATCH	(Drift)
bundle-47505	4.3.1.0	389.4	ESX_HOST-7.0.2-18426014	PATCH	
bundle-47501	4.3.1.0	7105.9	NSX_T_MANAGER-3.1.3.1.0-18504668	PATCH	
bundle-48392	4.3.1.0	230.5	SDDC_MANAGER_VCF-4.3.1.0-18624509	PATCH	(Drift)
bundle-48390	4.3.1.0	10336.5	SDDC_MANAGER_VCF-4.3.1.0-18624509	PATCH	
bundle-47503	4.3.1.0	5394	VCENTER-7.0.2.00500-18455184	PATCH	
bundle-47700	4.3.1.0	6207.1	VRA-8.5.0-18472703	PATCH	
bundle-47696	4.3.1.0	759.9	VRLI-8.4.1-18136317	PATCH	
bundle-47698	4.3.1.0	3141.6	VROPS-8.5.0-18255622	PATCH	
bundle-47703	4.3.1.0	847.8	VRSLCM-8.4.1-18537943	PATCH	
bundle-47502	4.3.1.0	8501.4	NSX_T_MANAGER-3.1.3.1.0-18504668	INSTALL	
bundle-47504	4.3.1.0	7383.3	VCENTER-7.0.2.00500-18455184	INSTALL	
bundle-47701	4.3.1.0	6632.3	VRA-8.5.0-18472703	INSTALL	
bundle-47695	4.3.1.0	1414.8	VRLI-8.4.1-18136317	INSTALL	
bundle-47697	4.3.1.0	2563.3	VROPS-8.5.0-18255622	INSTALL	
bundle-47702	4.3.1.0	1037.1	VRSLCM-8.4.1-18537943	INSTALL	
bundle-43745	4.3.0.0	390.1	ESX_HOST-7.0.2-17867351	PATCH	
bundle-46466	4.3.0.0	7123.1	NSX_T_MANAGER-3.1.3.0.0-18328989	PATCH	
bundle-47006	4.3.0.0	10331.2	SDDC_MANAGER_VCF-4.3.0.0-18433963	PATCH	
bundle-47008	4.3.0.0	230.3	SDDC_MANAGER_VCF-4.3.0.0-18433963	PATCH	(Drift)
bundle-46468	4.3.0.0	5394.4	VCENTER-7.0.2.00400-18356314	PATCH	
bundle-40064	4.3.0.0	6360.7	VRA-8.4.1-18054500	PATCH	
bundle-43778	4.3.0.0	742.7	VRLI-8.4.0-17828109	PATCH	
bundle-39857	4.3.0.0	2191.3	VROPS-8.4.0-17863947	PATCH	
bundle-40066	4.3.0.0	841.3	VRSLCM-8.4.1-18067607	PATCH	
bundle-40908	4.3.0.0	3478.7	WSA-3.3.5-18049997	PATCH	
bundle-46467	4.3.0.0	8568.5	NSX_T_MANAGER-3.1.3.0.0-18328989	INSTALL	
bundle-46469	4.3.0.0	7383.7	VCENTER-7.0.2.00400-18356314	INSTALL	
bundle-40080	4.3.0.0	6773.8	VRA-8.4.1-18054500	INSTALL	
bundle-43777	4.3.0.0	1414.2	VRLI-8.4.0-17828109	INSTALL	
bundle-43774	4.3.0.0	2538.2	VROPS-8.4.0-17863947	INSTALL	
bundle-40906	4.3.0.0	1032.7	VRSLCM-8.4.1-18067607	INSTALL	
bundle-40907	4.3.0.0	4180.7	WSA-3.3.5-18049997	INSTALL	
bundle-42515	4.2.1.0	6995.1	NSX_T_MANAGER-3.1.2.0.0-17883596	PATCH	
bundle-42906	4.2.1.0	209.3	SDDC_MANAGER_VCF-4.2.1.0-18016307	PATCH	(Drift)
bundle-42905	4.2.1.0	10142.7	SDDC_MANAGER_VCF-4.2.1.0-18016307	PATCH	
bundle-42521	4.2.1.0	5114.4	VCENTER-7.0.1.00301-17956102	PATCH	
bundle-42519	4.2.1.0	8394.9	NSX_T_MANAGER-3.1.2.0.0-17883596	INSTALL	
bundle-42522	4.2.1.0	7722.8	VCENTER-7.0.1.00301-17956102	INSTALL	
bundle-37983	4.2.0.0	369	ESX_HOST-7.0.1-17551050	PATCH	
bundle-32810	4.2.0.0	7057.7	NSX_T_MANAGER-3.1.0.0.0-17107167	PATCH	
bundle-37979	4.2.0.0	10070	SDDC_MANAGER_VCF-4.2.0.0-17559673	PATCH	
bundle-37982	4.2.0.0	209.3	SDDC_MANAGER_VCF-4.2.0.0-17559673	PATCH	(Drift)
bundle-35321	4.2.0.0	5140.8	VCENTER-7.0.1.00200-17327517	PATCH	
bundle-31385	4.2.0.0	5706	VRA-8.2.0-17018654	PATCH	
bundle-31221	4.2.0.0	687.3	VRLI-8.2.0-16957702	PATCH	
bundle-31219	4.2.0.0	2560.1	VROPS-8.2.0-16949153	PATCH	
bundle-32076	4.2.0.0	947	VRSLCM-8.2.0-17513665	PATCH	
bundle-32079	4.2.0.0	3286.2	WSA-3.3.4-17498518	PATCH	
bundle-32811	4.2.0.0	8427.7	NSX_T_MANAGER-3.1.0.0.0-17107167	INSTALL	
bundle-35322	4.2.0.0	7749.3	VCENTER-7.0.1.00200-17327517	INSTALL	
bundle-30921	4.2.0.0	6515.4	VRA-8.2.0-16980951	INSTALL	
bundle-32927	4.2.0.0	1325.1	VRLI-8.2.0-16957702	INSTALL	
bundle-30919	4.2.0.0	2861.4	VROPS-8.2.0-16949153	INSTALL	
bundle-32074	4.2.0.0	1138.9	VRSLCM-8.2.0-17513665	INSTALL	
bundle-32078	4.2.0.0	4115.3	WSA-3.3.4-17498518	INSTALL	
bundle-33257	4.1.0.1	343.9	ESX_HOST-7.0.1-17168206	PATCH	
bundle-33416	4.1.0.1	9787.6	SDDC_MANAGER_VCF-4.1.0.1-17206953	PATCH	
bundle-52820	4.1.0.1	1132.9	SDDC_MANAGER_VCF-4.1.0.1-17206953	PATCH	(Drift)
					

How to use: Downloading specific VCF bundles via CLI

Upgrading VMware Aria Automation Config to 8.16.2

In this post i will go over upgrading my 8.x SSC appliance to 8.16.2. As a pre requirement we do need to have VMware Aria Suite Lifecycle upgraded to 8.16. Instructions can be found here. The upgrade does not include the latest PSPACK that contains the 8.16.2 Aria Automation Config release. Instructions to get the PSPACK can be found on my other blog post here.

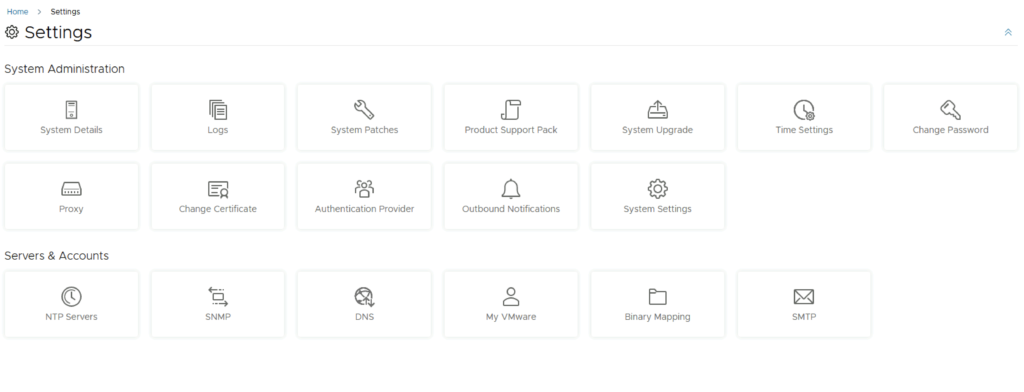
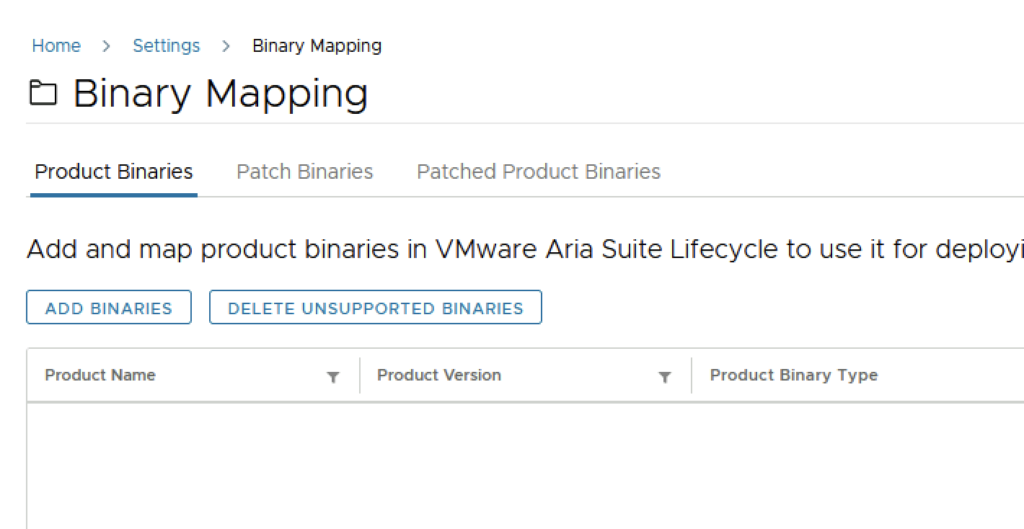
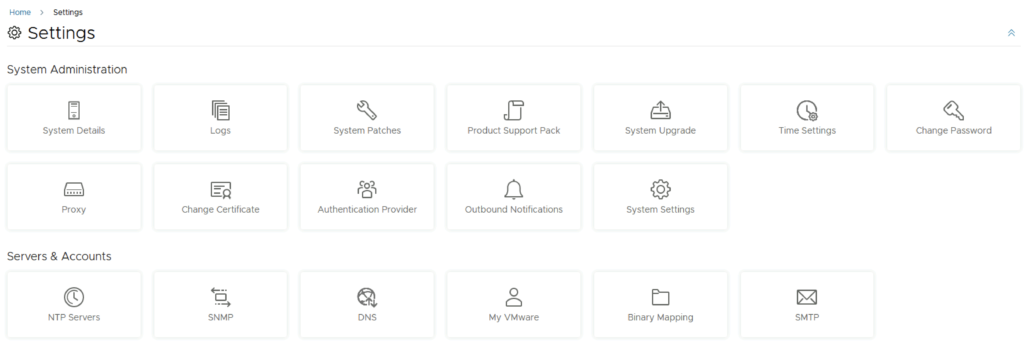
To get started we can go to VMware Aria Suite Lifecycle -> Lifecycle Operations -> Settings -> Binary Mapping. (If you haven’t added your My VMware credentials you will need to do that first by going to VMware Aria Suite Lifecycle -> Lifecycle Operations -> Settings -> My VMware)

Click on Add Binaries under Product Binaries

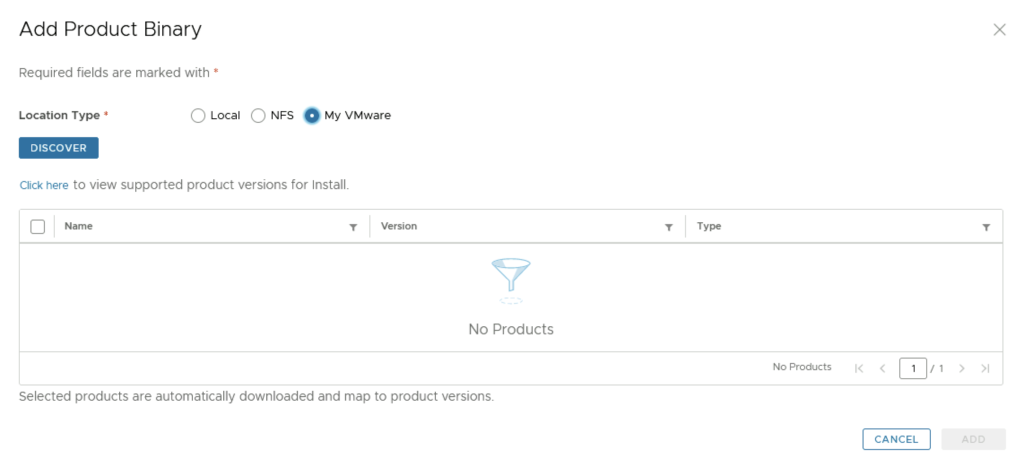
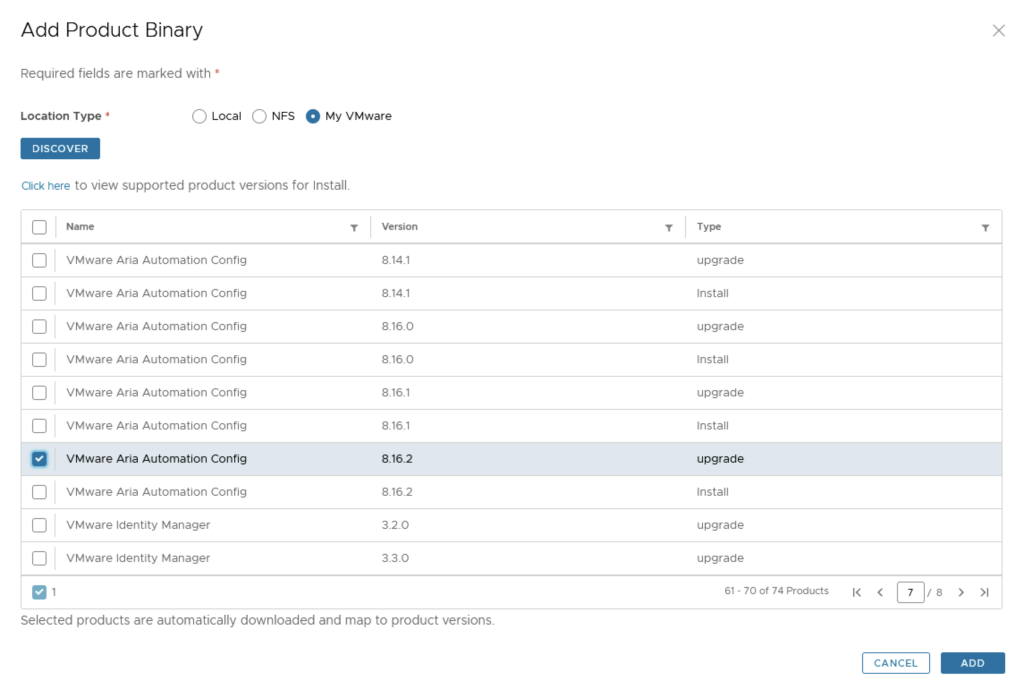
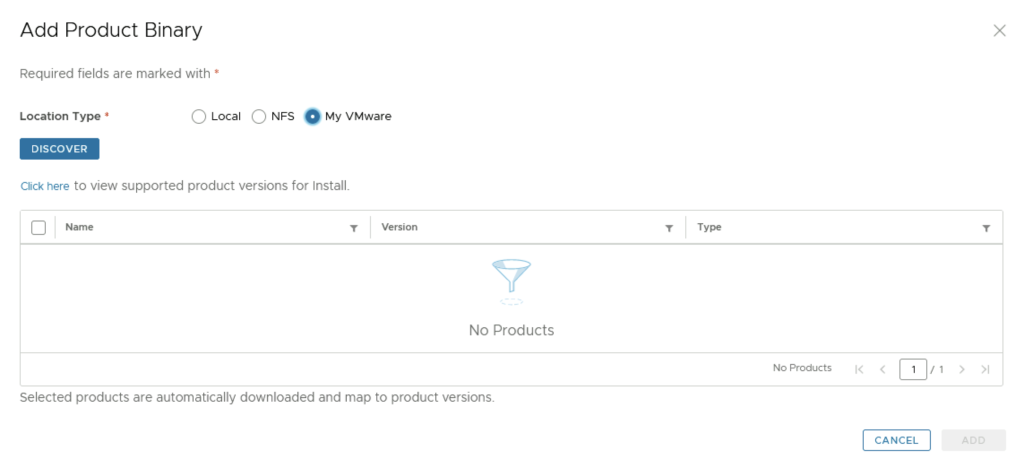
Select My VMware and click on Discover

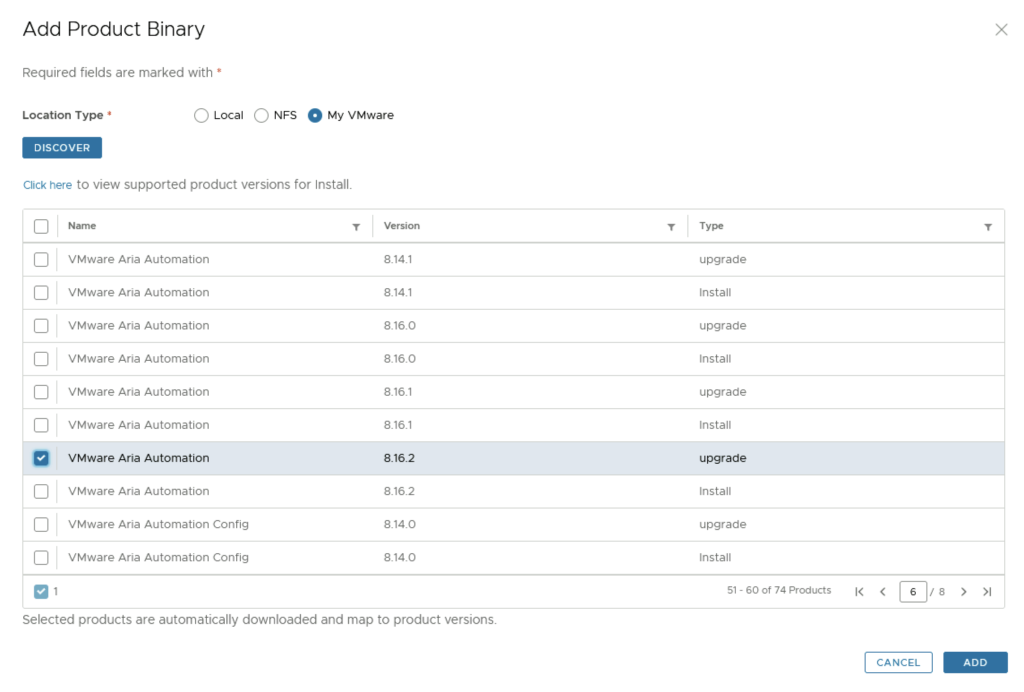
We can see a list of binaries that have been discovered. We can select what we need and click on Add

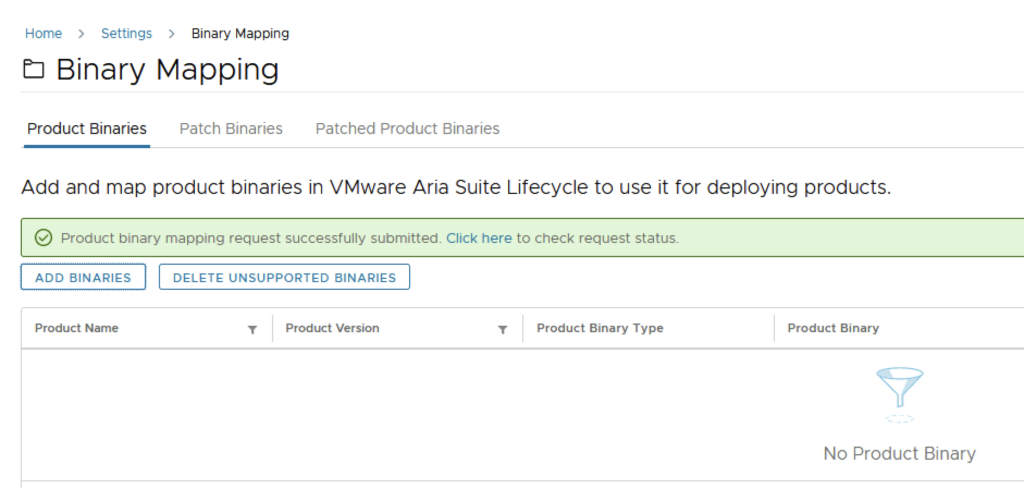
This will create a request and start downloading the package. To view the progress we can click on the Click Here hyperlink

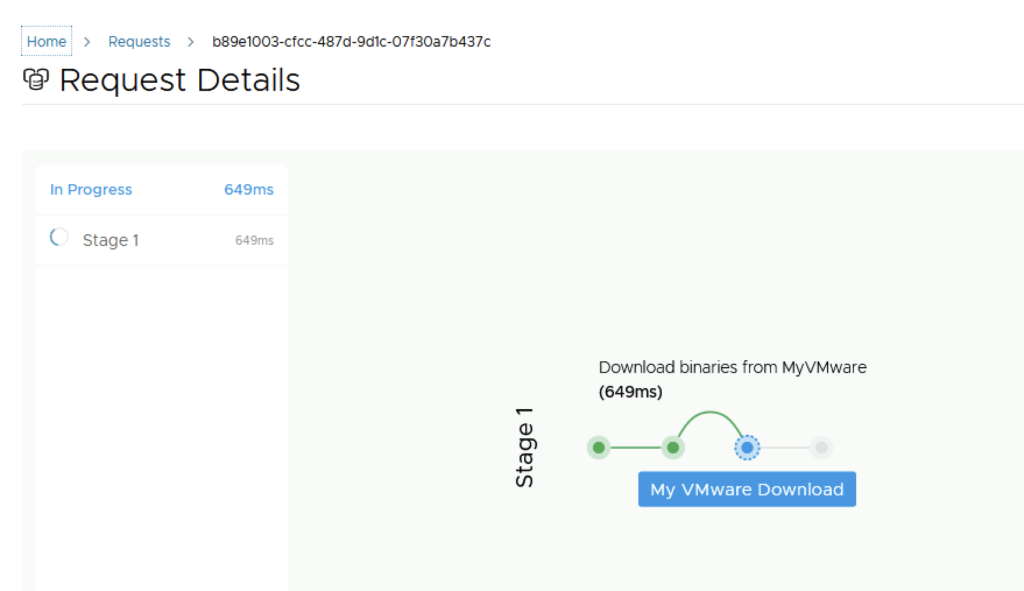
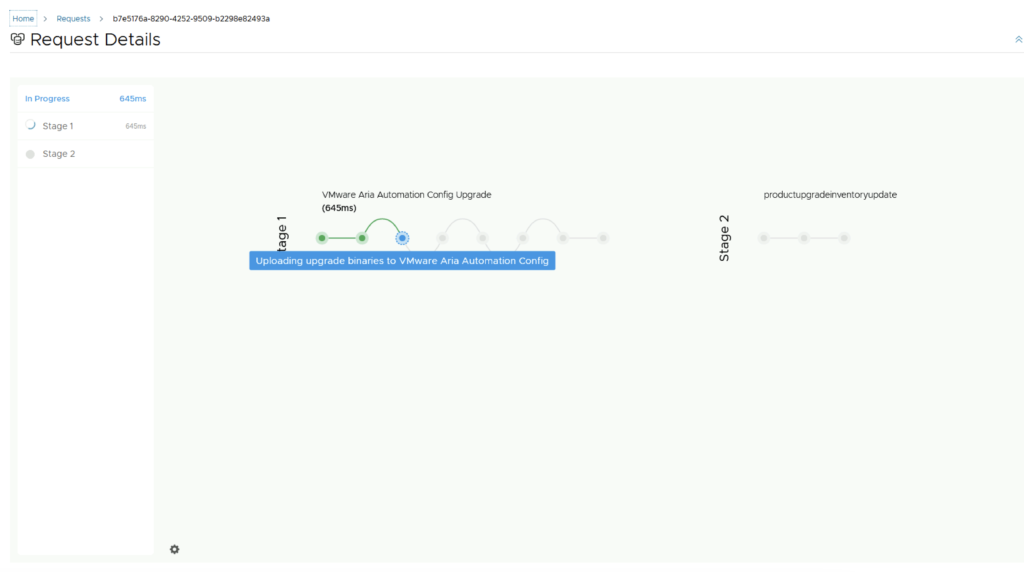
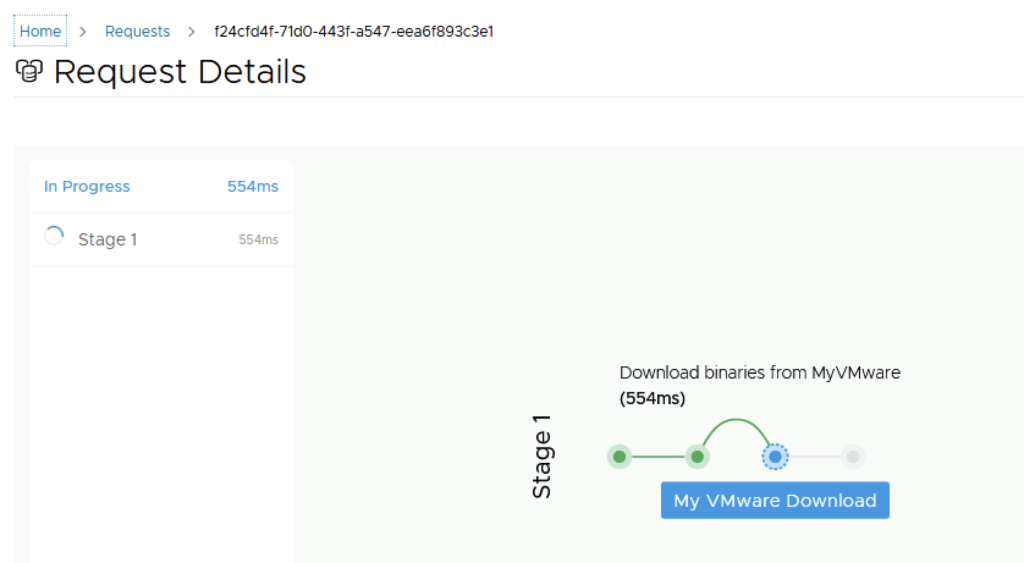
Click on the in Progress button to view the details

We now have to wait for the download to complete

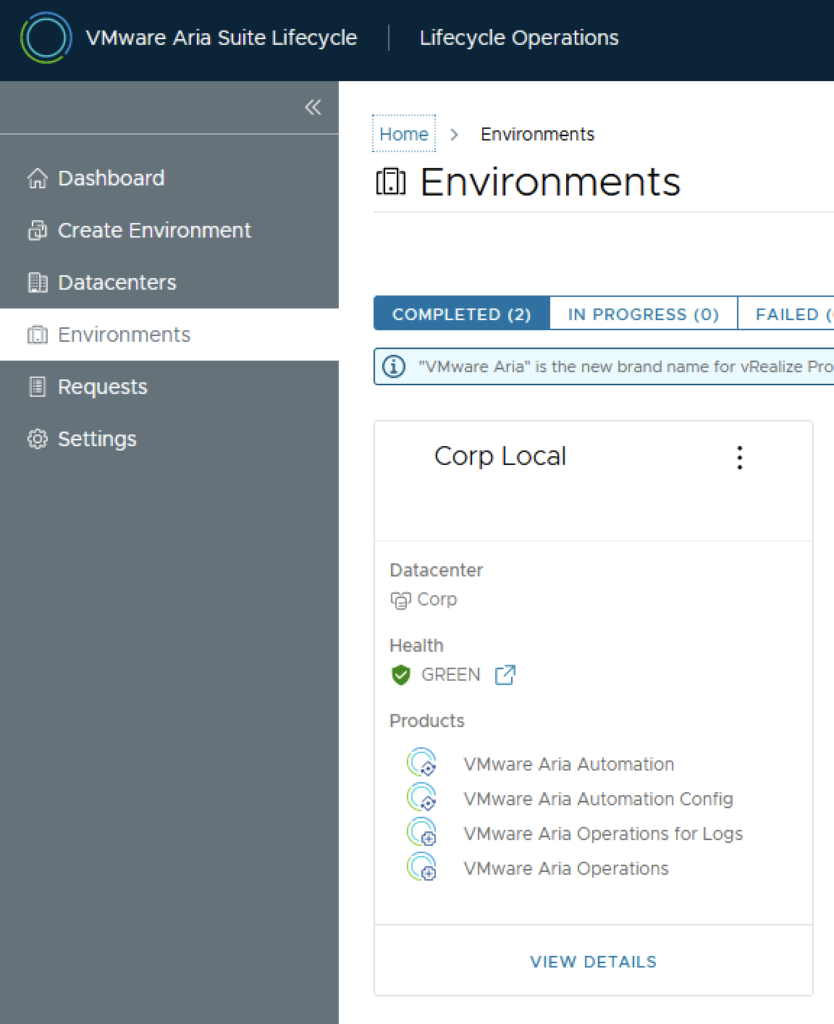
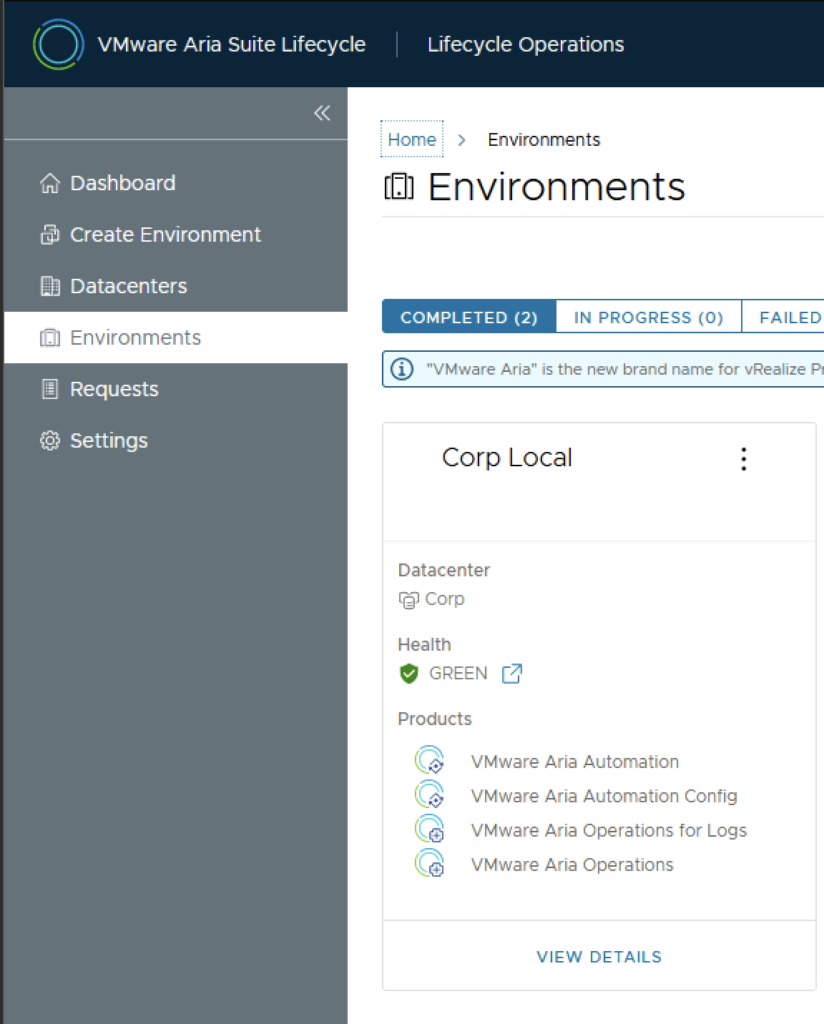
After the download is complete we can go to Environments -> View Details on the environment that includes the VMware Aria Automation Config

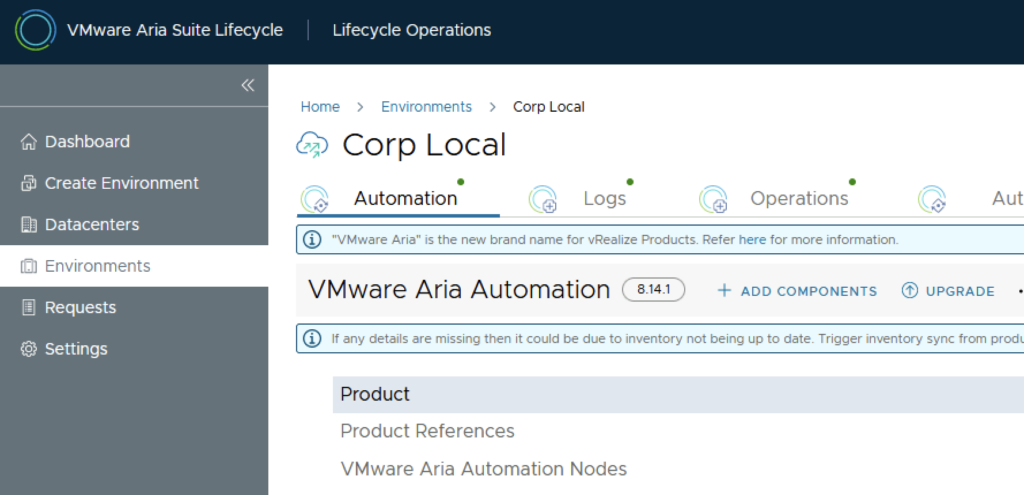
Under VMware Automation Config tab Click on Upgrade

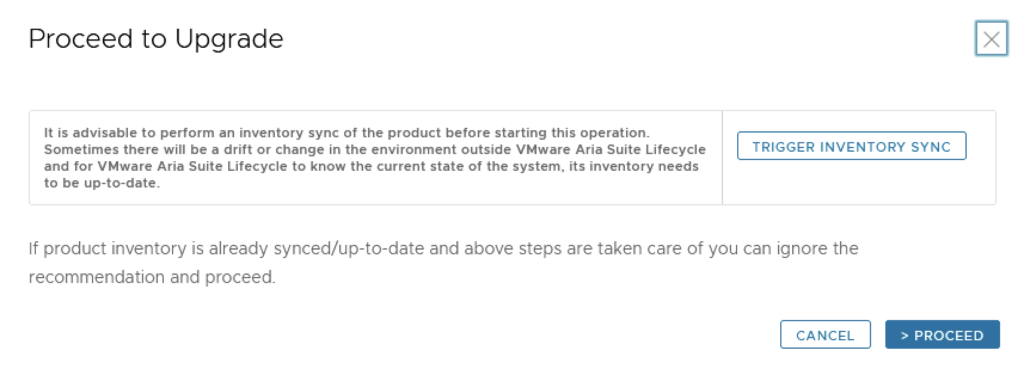
An Inventory sync is recommended if the environment has changed since Aria Suite Lifecycle performed the last sync. We trigger the sync from the UI or click on Proceed to continue

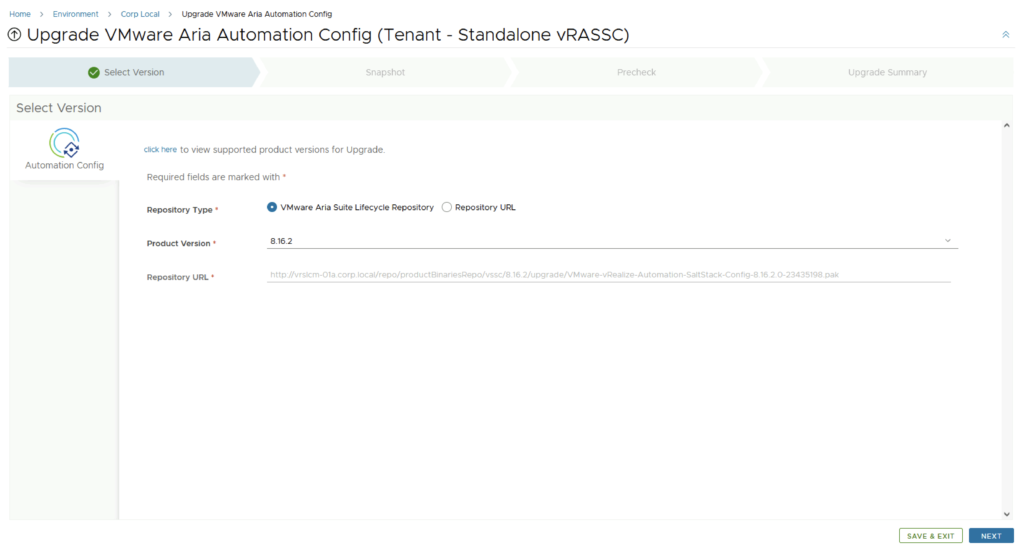
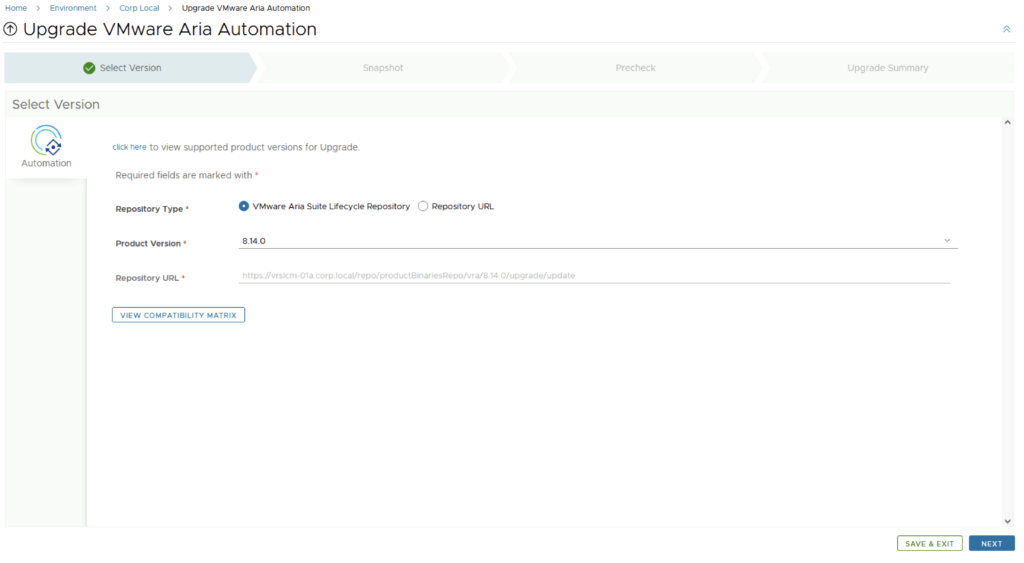
Select product Version 8.16.2 and click Next. We can also review the compatibility matrix to make sure the environment is compatible.

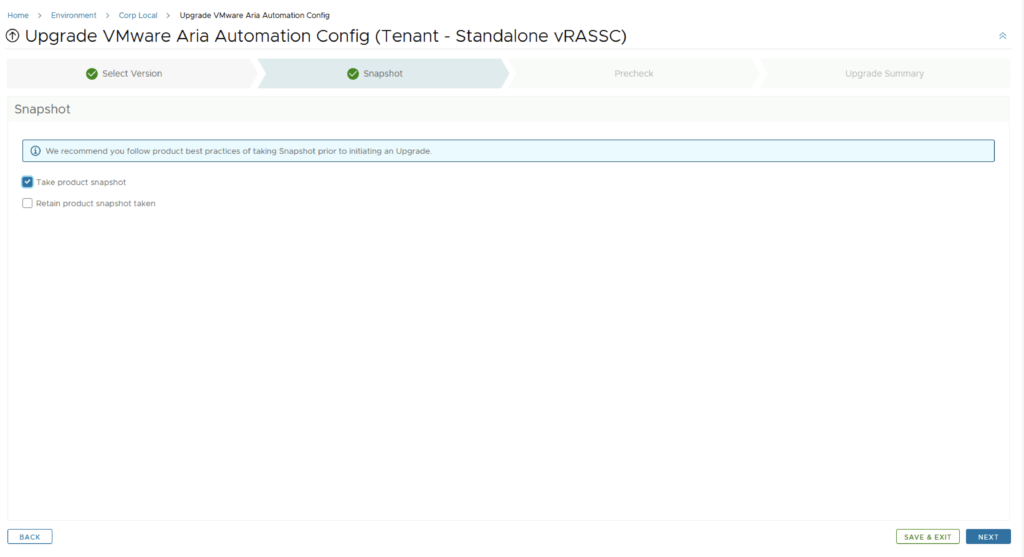
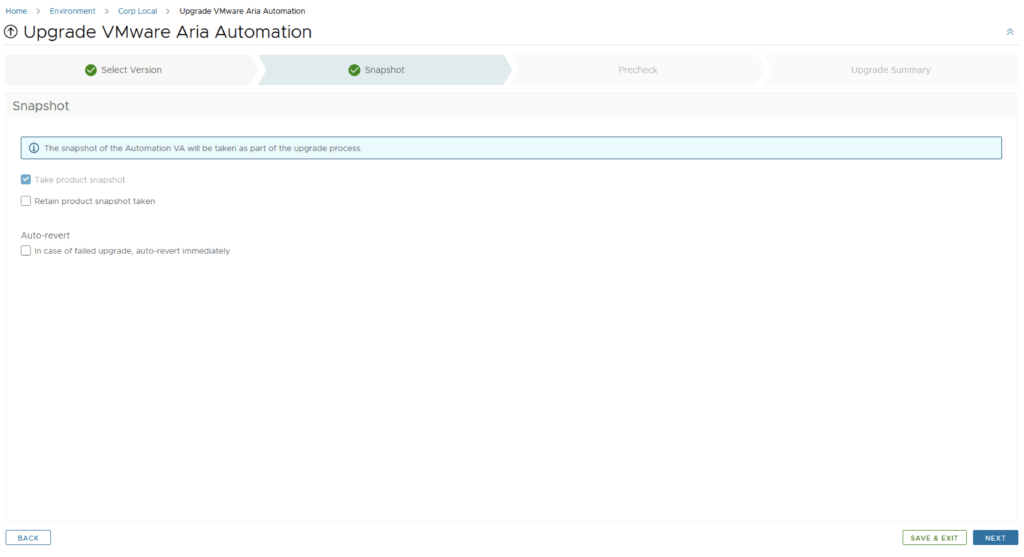
We can automatically create and delete a snapshot part of the upgrade process

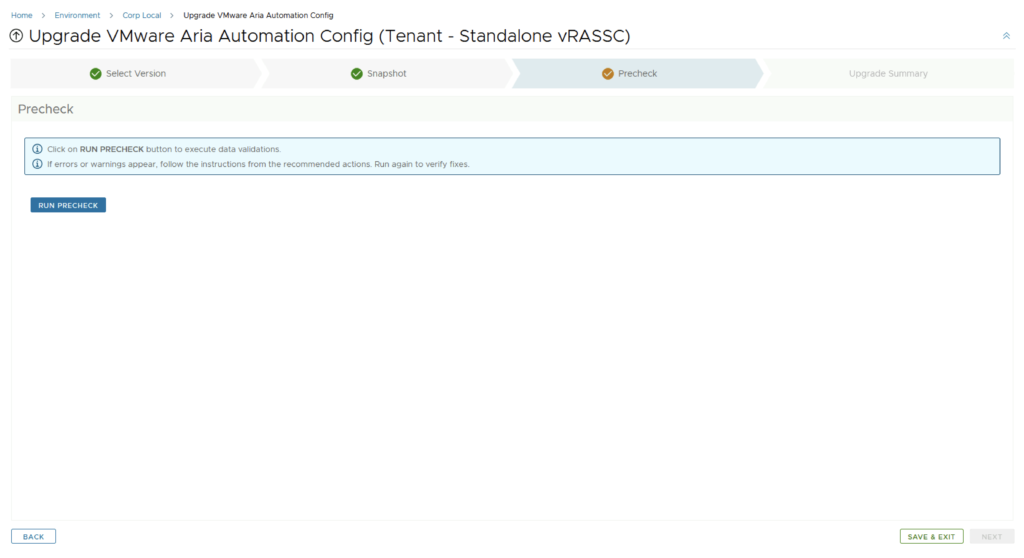
Run the Precheck to make sure there are no errors

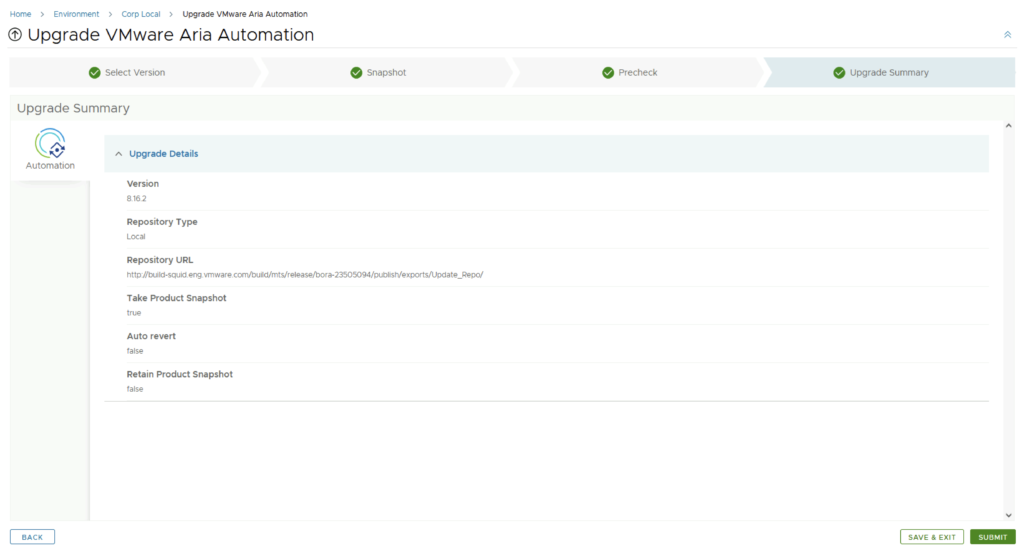
Once the check is complete, click on Next. Review the upgrade details and click on Next. We are taken to the progress screen where we can follow the progress.

The system will get rebooted and once its back up we will be on 8.16.2

Here are a few additional blogs that might be useful post upgrade:

Error Code: LCMVSSC10018

SSC 8.8 sseapi_rpc_queue: could not connect to SSE server

SSC 8.8 urllib3 (1.25.11) or chardet (4.0.0) doesn’t match a supported version

Authentication failed: no Authorization header

Upgrading VMware Aria Automation to 8.16.2

In this post i will go over upgrading my 8.x vRA appliance to 8.16.2. As a pre requirement we do need to have VMware Aria Suite Lifecycle upgraded to 8.16. Instructions can be found here. The upgrade does not include the latest PSPACK that contains the 8.16.2 VMware Aria Automation release. Instructions to get the PSPACK can be found on my other blog post here.

To get started we can go to VMware Aria Suite Lifecycle -> Lifecycle Operations -> Settings -> Binary Mapping. (If you haven’t added your My VMware credentials you will need to do that first by going to VMware Aria Suite Lifecycle -> Lifecycle Operations -> Settings -> My VMware)

Click on Add Binaries under Product Binaries

Select My VMware and click on Discover

We can see a list of binaries that have been discovered. We can select what we need and click on Add

This will create a request and start downloading the package. To view the progress we can click on the Click Here hyperlink

Click on the in Progress button to view the details ex:

We now have to wait for the download to complete

After the download is complete we can go to Environments -> View Details on the environment that includes vRA

Click on Upgrade

An Inventory sync is recommended if the environment has changed since LCM performed the last sync. We trigger the sync from the UI or click on Proceed to continue

Select product Version 8.16.2 and click Next. We can also review the compatibility matrix to make sure the environment is compatible.

A new feature that was added was the capability to automatically create a snapshot prior to the upgrade and remove it after the upgrade. On this screen we also have the ability to chose if we want to keep the snapshots post upgrade for validation testing for example. Click next

Run the Precheck to make sure there are no errors

The next screen remind us of hardware requirements for vRA which can be checked here and vIDM which can be checked here. As far as i can tell they haven’t changed since the 8.3 release. Check the I took care of the manual steps above and am ready to proceed check mark and click on Run Precheck

Once the check is complete we can review the checks that were performed and we can continue by clicking Next.

Review the upgrade details and click on Submit. We are taken to the progress screen where we can follow the progress.

The system will get rebooted and once its back up we will be on 8.16.2

Since we are doing a major upgrade i strongly recommend to clean the cache before using the new vRA version.

VMware Aria Suite Lifecycle Product Support Pack (PSPAK) Upgrade

In this guide i will go over the steps of getting an existing 8.x VMware Aria Suite Lifecycle (formerly vRSLCM vRealize Lifecycle Manager) appliance to support the latest product releases available. Here is a great blog that goes in to the details about what the Product Support Pack is https://blogs.vmware.com/management/2019/01/vrslcm-pspak.html. Typically the newer Product Support Pack is included part of the upgrade for LCM, however sometimes there are product releases in between releases where product support packs come in handy.

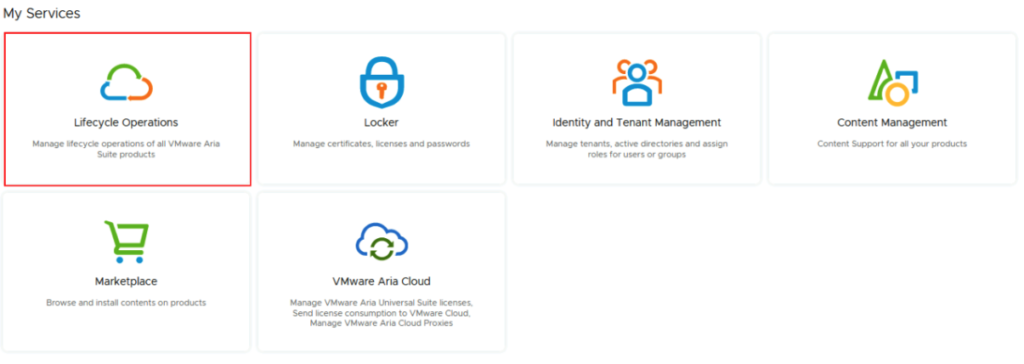
The first step is to log in to vRealize Suite Lifecycle Manager under the Lifecycle Operations section

Go to settings -> Product Support Pack

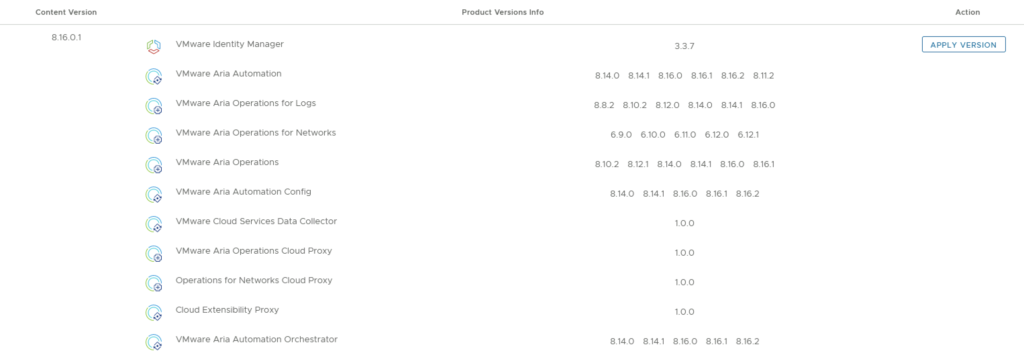
We can see that i recently upgraded to 8.16.0.0 however a new update is available 8.16.0.1. Based on what we can see in the details the new support pack adds support for the Aria 8.16.2 products. If an update is not available click on the Check Support Packs Online button and refresh the screen within a few minutes

Click on Apply Version

Verify that a snapshot or a backup exists and click Submit

We can view the progress by clicking on the Click Here link after submitting the request

Once the process is complete the system will most likely reboot. To check the status we can go back to settings -> Product Support Pack. As we can see we are now at the updated patch level

If you get an error when logging in, clear the browser cache and try again

VMware Aria Suite Lifecycle upgrade to 8.16

In this guide i will go over the steps of getting an existing 8.x vRSLCM appliance upgraded to the latest 8.16 release. The release notes can be found here. We can upgrade from vRealize Lifecycle Manager to VMware Aria Suite Lifecycle.

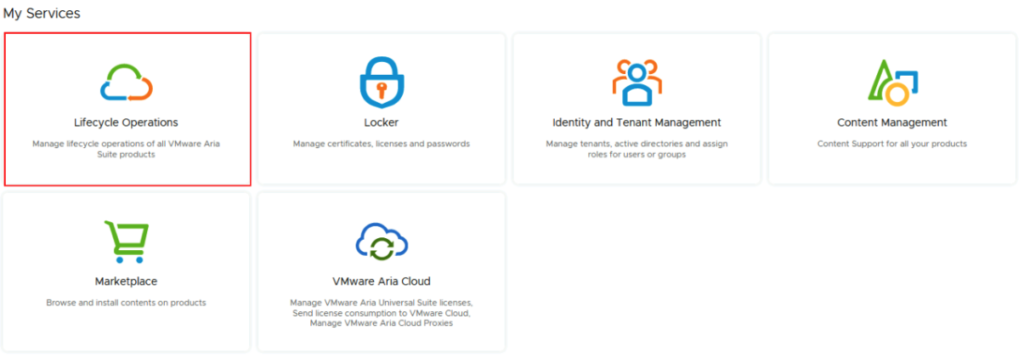
The first step is to log in to VMware Aria Suite Lifecycle under the Lifecycle Operations section

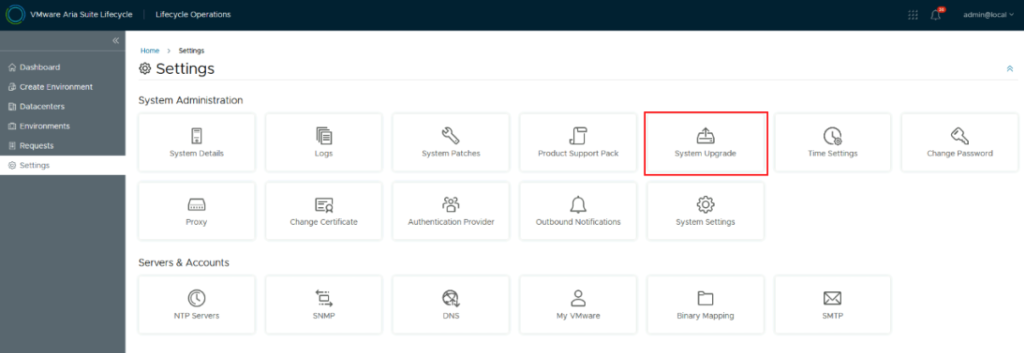
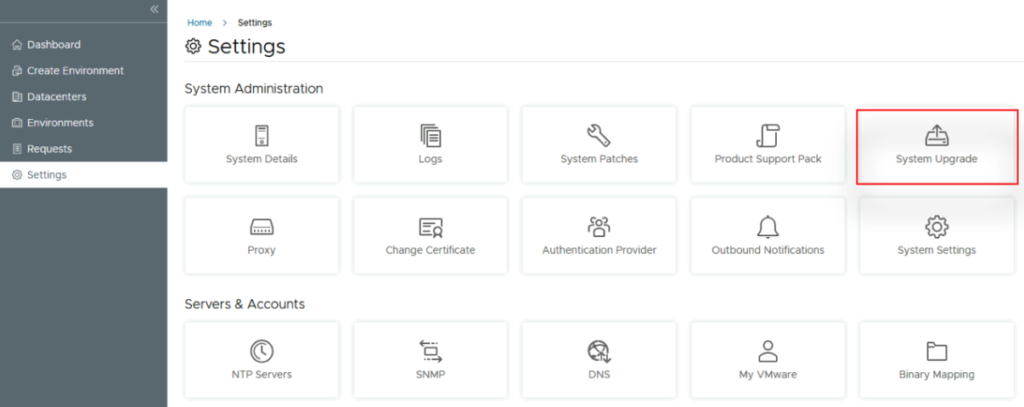
Go to Settings -> System Upgrade

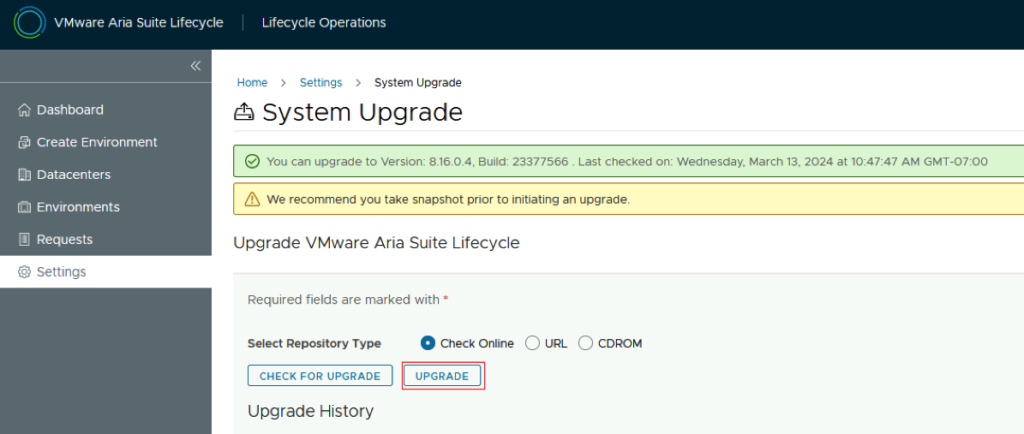
Click on Check for Upgrade

We can see that the check found a new version available for 8.16. Click on Upgrade

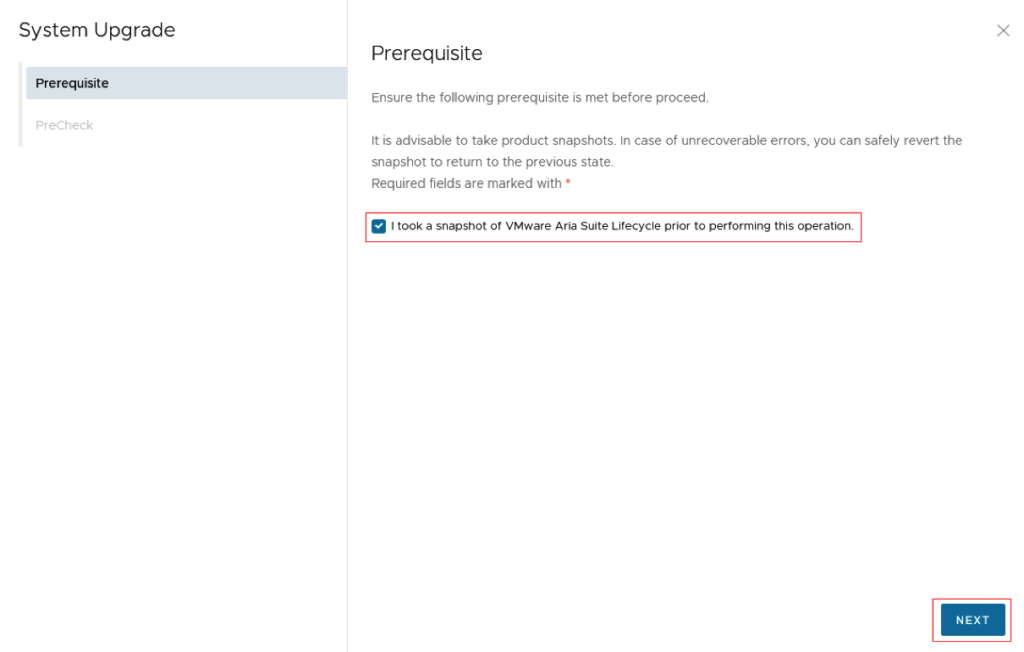
Verify that a snapshot or backup exists in case the process fails. Check the check mark for I took a snapshot of the vRealize Suite Lifecycle Manager before I performed this operation. Click Next

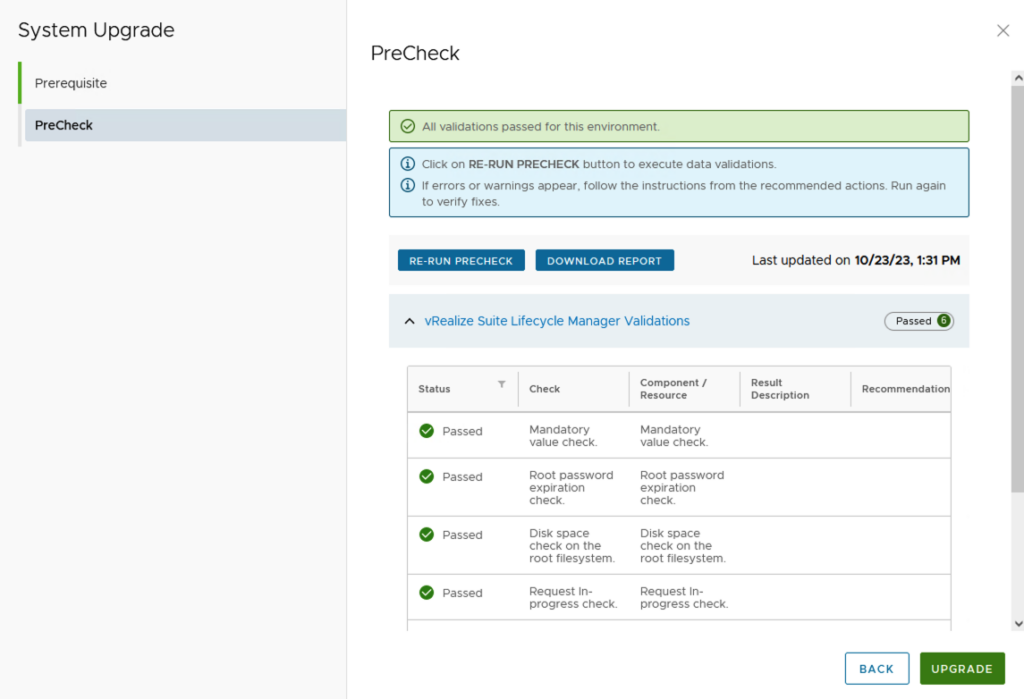
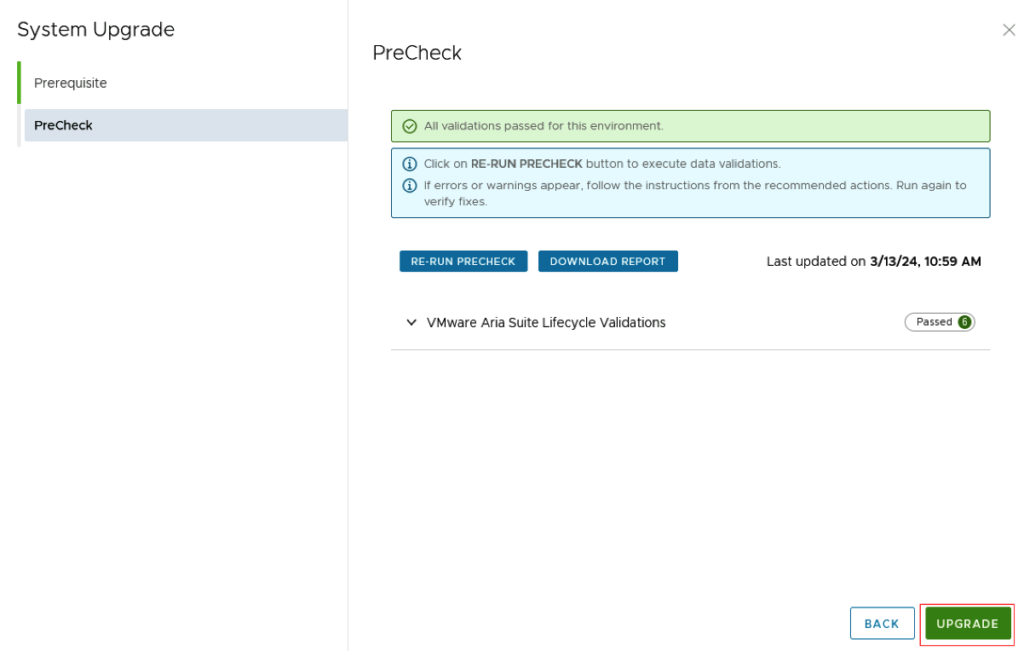
Click on Run Precheck, verify that all check have passed, and click on Upgrade

This will fire up the upgrade process and start upgrading packages. The system will automatically reboot on 8.16 once completed. We can check the version by going to Settings -> System Details

Don’t forget to clear the browser cache in order to avoid any caching issues.

Downloading specific VCF bundles via CLI

I wanted to reuse my VCF downloaded bundles on another SDDC Manager system so that i wont have to download it from internet again. I found an easy guide here in the VMware documentation. My goal was to download the specific bundle once and upload it on other SDDC Managers.

The first command from SDDC manager was to list the bundles. The lcm bundle transfer utility can be found in /opt/vmware/vcf/lcm/lcm-tools/bin

./lcm-bundle-transfer-util -du ${depotUser} -l -p ${product_version}

I replaced the ${depotUser} with my vmware email address and ${product_version} with the version of the VCF product i wanted to install in my case 5.0.0.0. I was greeted with a list of bundle IDs and the specific component that it was for:

Enter Myvmware user password:
Validating the depot user credentials...

Bundle         Product  Bundle Size  Components
               Version  (in MB)
bundle-80035   5.0.0.0  599.5 MB     ESX_HOST-8.0.1-21813344
bundle-80031   5.0.0.0  10089.9 MB   NSX_T_MANAGER-4.1.0.2.0-21761691
bundle-80029   5.0.0.0  2044.7 MB    SDDC_MANAGER_VCF-5.0.0.0-21822418
bundle-80030   5.0.0.0  251.3 MB     SDDC_MANAGER_VCF-5.0.0.0-21822418
bundle-80033   5.0.0.0  9867.6 MB    VCENTER-8.0.1.00100-21815093

In my case i need the installer. To download a specific bundle we run

./lcm-bundle-transfer-util --download --outputDirectory ${absolute-path-output-dir} --depotUser ${depotUser} -b ${bundle_name}

in my case it was:

./lcm-bundle-transfer-util --download --outputDirectory /some/temporary/location --depotUser [email protected] -b bundle-80029

This allowed me to grab the download from /some/temporary/path and save it/upload it on my other SDDC Managers that were missing it.

Finally before the patch can be used in SDDC Manager we need to upload it to the repo. Please note that once we issue the upload command the download gets deleted, so make sure you save the download ahead of time

./lcm-bundle-transfer-util --upload --bundleDirectory /some/temporary/path -b bundle-80029

or via API

curl -k http://127.0.0.1/lcm/bundle/upload -X POST -d ‘{“bundle”:”/some/temporary/path/bundle-80029.tar”,”manifest”:”/some/temporary/path/bundle-80029.manifest”, “signature”:”/some/temporary/path/bundle-80029.manifest.sig”}’ -H ‘Content-Type:application/json’

Once the upload was complete i was able to see it in SDDC Manager as a package that i can apply.

A list of bundles can be found here

VCF depot build numbers

VCF VersionBundle NameSizeComponentTypeBundle ID
5.1.0.0bundle-99536640.0MBESX_HOST-8.0.2-22380479PATCHefca585c-4fd8-4ec4-9b08-c50701aa2f7d
bundle-9954110500.4MBNSX_T_MANAGER-4.1.2.1.0-22667789PATCH39759b15-d985-4c15-85d6-7d44fd24df45
bundle-995392089.2MBSDDC_MANAGER_VCF-5.1.0.0-22688368PATCHb9308692-c98a-4afc-b49f-601f16105d92
bundle-995400.0MBSDDC_MANAGER_VCF-5.1.0.0-22688368PATCH(Drift)f3a11b49-4209-4c2b-8b26-aea98b1f8450
bundle-9953716801.6MBVCENTER-8.0.2.00100-22617221PATCH0a1ba239-eab9-41c6-b0e6-9738a463bdbe
bundle-9954214606.2MBNSX_T_MANAGER-4.1.2.1.0-22667789INSTALLc5a39cf5-eca2-4206-8375-082f827612b8
bundle-9953810493.0MBVCENTER-8.0.2.00100-22617221INSTALL96cf61e1-85b3-461f-8dfe-5abbeed33ab7
5.0.0.1bundle-943752044.9MBSDDC_MANAGER_VCF-5.0.0.1-22485660PATCH8fe51a93-ff6b-45e1-b9b9-49ad60612703
bundle-94376251.5MBSDDC_MANAGER_VCF-5.0.0.1-22485660PATCH(Drift)0602cf8f-9a37-4b38-90ba-f26a19a80cf6
5.0.0.0bundle-80035599.5MBESX_HOST-8.0.1-21813344PATCHef970211-02bf-429a-8edd-91f3bc7c1b42
bundle-8003110089.9MBNSX_T_MANAGER-4.1.0.2.0-21761691PATCH3ae76665-4c93-422e-9af8-aafe79a1ee7f
bundle-800292044.7MBSDDC_MANAGER_VCF-5.0.0.0-21822418PATCHb562189e-0c93-489e-a0b9-e12b01efffb8
bundle-80030251.3MBSDDC_MANAGER_VCF-5.0.0.0-21822418PATCH(Drift)393fb05f-23ff-47d1-8b84-db39647677ce
bundle-800339867.6MBVCENTER-8.0.1.00100-21815093PATCHb862f68d-22a8-457d-a85d-56d72370076e
bundle-8003213874.6MBNSX_T_MANAGER-4.1.0.2.0-21761691INSTALL7df70351-902f-49e4-a366-553f340d2f3a
bundle-800349867.6MBVCENTER-8.0.1.00100-21815093INSTALLb1f5bf8e-c133-44a3-9393-efa772c9c0ce
4.5.2.0bundle-83610382.1MBESX_HOST-7.0.3-21930508PATCHb9462fde-a7d0-4965-b217-cd09bd21bcc5
bundle-873188615.4MBNSX_T_MANAGER-3.2.3.1.0-22104592PATCH259b722b-f8b5-4b4c-9e71-4ebe135cd38e
bundle-884452012.6MBSDDC_MANAGER_VCF-4.5.2.0-22223457PATCH363bd141-7d19-4287-9c7a-091c11042ca0
bundle-88446250.5MBSDDC_MANAGER_VCF-4.5.2.0-22223457PATCH(Drift)85192dee-1d47-4211-bbdb-999d604f601f
bundle-811466420.0MBVCENTER-7.0.3.01500-21784236PATCH4ac2b679-5e5b-43a6-b74b-5fd4e3c978c0
bundle-8731910618.2MBNSX_T_MANAGER-3.2.3.1.0-22104592INSTALLfcde592c-7a6c-4c92-a6b3-669833dc6910
bundle-811478575.4MBVCENTER-7.0.3.01500-21784236INSTALL659351d3-9d66-45d6-84b0-14451f54cd6f
4.5.1.0bundle-73789381.8MBESX_HOST-7.0.3-21424296PATCH2b458531-b783-458e-bc43-3da1ddcd096f
bundle-737858402.7MBNSX_T_MANAGER-3.2.2.1.0-21487560PATCHe5f9e44f-9123-425e-bee9-07806379d671
bundle-772612150.0MBSDDC_MANAGER_VCF-4.5.1.0-21682411PATCH65b6d750-5ef3-4456-b4c2-65ef96048fb6
bundle-77262250.2MBSDDC_MANAGER_VCF-4.5.1.0-21682411PATCH(Drift)8a132cc7-f9b7-4f69-b654-7ea8f7059905
bundle-737876419.8MBVCENTER-7.0.3.01400-21477706PATCH3b8ae94b-582b-4356-b152-2b01e947a072
bundle-7378610461.8MBNSX_T_MANAGER-3.2.2.1.0-21487560INSTALLf90627d1-a038-4771-9a8a-dfbe1ffa760b
bundle-737888575.1MBVCENTER-7.0.3.01400-21477706INSTALL37ec3570-d827-4f32-8eac-92e2b6e21964
4.5.0.0bundle-61598382.9MBESX_HOST-7.0.3-20328353PATCHc6a50311-47be-4b53-891d-9f5ecb75d087
bundle-627688064.0MBNSX_T_MANAGER-3.2.1.2.0-20541212PATCH4f2f5d65-53ca-4b58-a85c-49d5b337cc64
bundle-635992106.0MBSDDC_MANAGER_VCF-4.5.0.0-20612863PATCHb984c5e4-167a-4886-8f23-be34c9176ca9
bundle-63600247.6MBSDDC_MANAGER_VCF-4.5.0.0-20612863PATCH(Drift)4581e5e3-b82f-46b9-99cc-e35584f14de0
bundle-615946381.1MBVCENTER-7.0.3.01000-20395099PATCH34b75350-c552-4c93-b306-75658a3332a4
bundle-6276910053.7MBNSX_T_MANAGER-3.2.1.2.0-20541212INSTALL4fe5a96f-d5c3-4730-9970-6d94bc5a63af
bundle-615968344.2MBVCENTER-7.0.3.01000-20395099INSTALL8da5d209-c8ac-493f-9e6a-f00a5bd5f155
4.4.1.1bundle-5834710246.1MBSDDC_MANAGER_VCF-4.4.1.1-19948546PATCH193486eb-53f5-40c7-8012-b5dcab515ebf
bundle-58348233.8MBSDDC_MANAGER_VCF-4.4.1.1-19948546PATCH(Drift)3c32c5d6-b5e0-49c6-9a86-90bcd3de671e
4.4.1.0bundle-56937395.5MBESX_HOST-7.0.3-19482537PATCH043e2b99-b36f-45b9-a4a2-1632a24764ef
bundle-573477127.2MBNSX_T_MANAGER-3.1.3.7.4-19762317PATCH193486eb-53f5-40c7-8012-b5dcab515ebf
bundle-5734410246.2MBSDDC_MANAGER_VCF-4.4.1.0-19766960PATCH13d87a53-298d-4ee5-98ca-b9e10eece7a5
bundle-57346233.8MBSDDC_MANAGER_VCF-4.4.1.0-19766960PATCH(Drift)8c178f33-b28d-47d0-88da-aa94f309a042
bundle-557437139.0MBVCENTER-7.0.3.00500-19480866PATCH05be2afd-990d-45bd-9472-fab032e8c696
bundle-573488535.7MBNSX_T_MANAGER-3.1.3.7.4-19762317INSTALL3c32c5d6-b5e0-49c6-9a86-90bcd3de671e
bundle-557459202.7MBVCENTER-7.0.3.00500-19480866INSTALL4073e1c9-4eeb-4d46-97b5-374daa24be41
4.4.0.0bundle-52995395.3MBESX_HOST-7.0.3-19193900PATCHd214e445-8509-4d50-adac-59d56acd86ae
bundle-529807154.5MBNSX_T_MANAGER-3.1.3.5.0-19068434PATCH348187d2-9930-41d6-9ee1-345857e53a3f
bundle-5343110188.6MBSDDC_MANAGER_VCF-4.4.0.0-19312029PATCH4f22c22f-441d-4ed9-bb70-697d10bcf028
bundle-53432230.3MBSDDC_MANAGER_VCF-4.4.0.0-19312029PATCH(Drift)54485cb4-8db2-4e86-8962-5c4fc54d5727
bundle-56535230.4MBSDDC_MANAGER_VCF-4.4.0.0-19617653PATCH(Drift)b27c6275-742c-4d51-a907-eba0e158ede3
bundle-529867223.8MBVCENTER-7.0.3.00300-19234570PATCH3bbd1018-1e3f-478d-b201-4287aeb136d8
bundle-529828610.0MBNSX_T_MANAGER-3.1.3.5.0-19068434INSTALL7ae68403-5863-4fcf-8886-f27460c59e85
bundle-529909244.9MBVCENTER-7.0.3.00300-19234570INSTALL7b7816d6-64f9-42a1-be35-3c5d185f08a3
4.3.1.1bundle-5270410695.5MBSDDC_MANAGER_VCF-4.3.1.1-19235535PATCH4ea809be-5359-4ac8-b32f-2337c0820d8b
bundle-52705230.5MBSDDC_MANAGER_VCF-4.3.1.1-19235535PATCH(Drift)fd85a861-a972-4da8-b708-8b35aa897e25
4.3.1.0bundle-47505389.4MBESX_HOST-7.0.2-18426014PATCH50f69840-b920-4d1b-81fa-bb934fa13c24
bundle-475017105.9MBNSX_T_MANAGER-3.1.3.1.0-18504668PATCH2f39eed1-94e3-4295-937d-2ea785a2485a
bundle-4839010336.5MBSDDC_MANAGER_VCF-4.3.1.0-18624509PATCH4162045d-0b25-4ca3-8e38-0371908ed9e6
bundle-48392230.5MBSDDC_MANAGER_VCF-4.3.1.0-18624509PATCH(Drift)8f26c34a-7488-4960-aaf7-276ba313846b
bundle-475035394.0MBVCENTER-7.0.2.00500-18455184PATCH47d01e0c-ae43-4f74-a57a-b8b3ecbe878b
bundle-475028501.4MBNSX_T_MANAGER-3.1.3.1.0-18504668INSTALL9e3175b7-57bc-49cf-8e22-c3885061b48a
bundle-475047383.3MBVCENTER-7.0.2.00500-18455184INSTALLc49b858d-ed29-48bb-9d13-403d96a3ece3
4.3.0.0bundle-43745390.1MBESX_HOST-7.0.2-17867351PATCH1625a9f9-a96b-4dda-98c6-58938fb29667
bundle-464667123.1MBNSX_T_MANAGER-3.1.3.0.0-18328989PATCH104298b4-bee8-4eae-9791-fc8ff5516f31
bundle-4700610331.2MBSDDC_MANAGER_VCF-4.3.0.0-18433963PATCH3f44edc1-6862-4d85-b646-a6bc24698c32
bundle-47008230.3MBSDDC_MANAGER_VCF-4.3.0.0-18433963PATCH(Drift)5c1a58d6-2e2d-45bf-960a-5d05b7fee2e3
bundle-464685394.4MBVCENTER-7.0.2.00400-18356314PATCH8d83266a-3b96-467c-8071-74617e10da05
bundle-464678568.5MBNSX_T_MANAGER-3.1.3.0.0-18328989INSTALLf14e528f-df76-447d-a235-93b069291f5c
bundle-464697383.7MBVCENTER-7.0.2.00400-18356314INSTALL3f560300-18e9-4d9b-bcf5-0b4688c7612b
4.2.1.0bundle-425156995.1MBNSX_T_MANAGER-3.1.2.0.0-17883596PATCHc6550bcc-9519-423f-b383-625774fed5a6
bundle-4290510142.7MBSDDC_MANAGER_VCF-4.2.1.0-18016307PATCHdf3c4a11-cca4-4cad-b776-35f2035633dd
bundle-42906209.3MBSDDC_MANAGER_VCF-4.2.1.0-18016307PATCH(Drift)a534958a-5af3-4728-bcfc-4196e813f6fe
bundle-425215114.4MBVCENTER-7.0.1.00301-17956102PATCH731433e4-122e-40a9-aaba-3ebc1be133d3
bundle-425198394.9MBNSX_T_MANAGER-3.1.2.0.0-17883596INSTALL5881bb39-180f-4563-b434-824d9aa10413
bundle-425227722.8MBVCENTER-7.0.1.00301-17956102INSTALL300a8dcd-c774-4c22-9ea0-b0f08d38e004
4.2.0.0bundle-37983369.0MBESX_HOST-7.0.1-17551050PATCHe7ee206d-069f-4982-8271-38e7970dcf9a
bundle-328107057.7MBNSX_T_MANAGER-3.1.0.0.0-17107167PATCHff249395-d58a-4d3d-8111-9237fe6a6a45
bundle-3797910070.0MBSDDC_MANAGER_VCF-4.2.0.0-17559673PATCH906c8d8f-c28d-4122-8720-43be7af2cbfd
bundle-37982209.3MBSDDC_MANAGER_VCF-4.2.0.0-17559673PATCH(Drift)e53edad7-26df-4282-8874-d1724e63ac5b
bundle-353215140.8MBVCENTER-7.0.1.00200-17327517PATCHa9938c7e-d30c-4ce9-adab-831f835e6c12
bundle-328118427.7MBNSX_T_MANAGER-3.1.0.0.0-17107167INSTALL1cce3a86-7292-4c91-b0db-20274f2c741d
bundle-353227749.3MBVCENTER-7.0.1.00200-17327517INSTALL9d272a97-9a55-492e-b661-0a8f3f2dfd4a

Source https://kb.vmware.com/s/article/96099

How to use: Downloading specific VCF bundles via CLI

Upgrading Aria Automation without Lifecycle Manager: A Step-by-Step Guide

Upgrading Aria Automation (formerly known as vRealize Automation, vRA) is crucial for maintaining the efficiency, security, and compatibility of your automation tasks. For environments without VMware Aria Suite Lifecycle, you can still perform the upgrade using the vracli command-line utility. This blog post will guide you through the process of upgrading Aria Automation using two different methods: from a mounted ISO (CD-ROM) and from an online update repository URL.

Prerequisites

  • SSH access to your Aria Automation appliance.
  • Sufficient backup of your Aria Automation environment.
  • Downloaded ISO for the Aria Automation upgrade, if using the CD-ROM method.
  • Access to the Aria Automation appliance with root privileges.

Method 1: Upgrading from a Mounted ISO (CD-ROM)

  1. Prepare the ISO Image: Before starting, ensure that the ISO image for the Aria Automation upgrade is downloaded and available.
  2. Mount the ISO to the Appliance: Mount the ISO image to your Aria Automation appliance. This step might require physical access to the server or through the management interface provided by your hypervisor (e.g., ESXi). To mount the CD-ROM we can use:
mount /dev/sr0 /mnt/cdrom
  1. SSH into the Aria Automation Appliance: Access your appliance via SSH as the root user.
  2. Execute the Upgrade Command: Run the following command to start the upgrade process:
vracli upgrade exec -y --profile lcm --repo cdrom://
  1. This command will automatically start the upgrade process using the ISO mounted on the CD-ROM drive. The -y flag automates the acceptance of the upgrade process, and --profile lcm specifies the use of the lifecycle manager upgrade profile, even though the Lifecycle Manager itself is not being used.
  2. Monitor the Upgrade Process: The upgrade process will provide output to the console. Monitor this output for any errors or prompts that require manual intervention.
  3. Use 'vracli upgrade status --follow' to monitor the progress.
  4. Finalize the Upgrade: Once the upgrade completes, follow any on-screen instructions to finalize the upgrade. This may include rebooting the Aria Automation appliance.

Method 2: Upgrading from an Online Update Repository URL

  1. SSH into the Aria Automation Appliance: Ensure you have SSH access to the appliance as the root user.
  2. Determine the Repository URL: Identify the URL of the update repository you intend to use for the upgrade. This URL should point to the VMware online repository or an internally hosted repository mirror.
  3. Execute the Upgrade Command: Use the following command to initiate the upgrade from the online repository:
vracli upgrade exec --profile lcm -r <url>
  1. Replace <url> with the actual URL of your update repository. Similar to the CD-ROM method, --profile lcm indicates the lifecycle manager upgrade profile.
  2. Monitor the Upgrade Process: As with the ISO method, keep an eye on the console output for any actions required on your part.
  3. Use 'vracli upgrade status --follow' to monitor the progress.
  4. Complete the Upgrade: After the upgrade process finishes, perform any additional steps prompted by the system, which may include system reboots.

Post-Upgrade Steps

  • Verify the Upgrade: Log in to the Aria Automation user interface to verify that the upgrade was successful and all services are running correctly.
  • Review Logs: Check the upgrade logs for any warnings or errors that might need attention.
  • Test Deployments: Execute a few test deployments to ensure that all functionalities are working as expected.

Conclusion

Upgrading Aria Automation without the Lifecycle Manager is straightforward with the vracli utility. Whether you’re upgrading from a mounted ISO or an online repository, the process is designed to be seamless. Always ensure that you have backups and a rollback plan in case of any issues.