Browse Author

admin

Automating Legacy Boot Option Checks Across ESXi Hosts with PowerShell and Plink

In the evolving landscape of VMware ESXi environments, maintaining compatibility and ensuring that systems adhere to specific boot requirements is essential. As more environments transition towards UEFI, there might still be a need to check or enforce legacy BIOS boot methods on certain ESXi servers, especially for compatibility with older hardware or specific operational requirements. This blog post will guide VMware administrators on how to automate the process of checking the boot option (UEFI or Legacy BIOS) on multiple ESXi hosts using PowerShell and Plink.

Understanding the Need for Legacy Boot Options

Legacy BIOS and UEFI are two different types of firmware interfaces for computers, with UEFI being the modern replacement offering advantages like secure boot, faster boot times, and support for larger hard drives. However, certain scenarios or legacy applications may require maintaining the Legacy BIOS boot method. Identifying which ESXi hosts are not configured with the required boot method can be tedious in large environments. Automation to the rescue!

Setting Up Plink for Automation

Plink (PuTTY Link) is a command-line connection tool that simplifies automated tasks requiring SSH connections. Before you begin, download Plink from the official PuTTY download page and ensure it’s accessible in your system’s PATH, or specify its full path in the scripts.

For security and ease of use, setting up SSH key-based authentication for your ESXi hosts is recommended. This method enhances security by avoiding password storage in scripts and facilitates seamless SSH connections without interactive logins.

Automating Boot Option Checks

Our goal is to automate the detection of the boot method used by ESXi hosts managed by a vCenter Server. This involves two primary steps: gathering the hostnames of your ESXi servers and executing a command on each host to check the boot method.

Step 1: Gathering ESXi Hostnames

First, we’ll use VMware PowerCLI to connect to your vCenter Server and compile a list of all managed ESXi hosts, saving their names to a file.

# Connect to vCenter
$vCenterServer = "your-vcenter-server"
$vCenterUsername = "your-vcenter-username"
$vCenterPassword = ConvertTo-SecureString "your-vcenter-password" -AsPlainText -Force
$Credential = New-Object System.Management.Automation.PSCredential($vCenterUsername, $vCenterPassword)

Connect-VIServer -Server $vCenterServer -Credential $Credential

# Get all ESXi hosts and output to a file
$hostsFile = "C:\path\to\your\esxi_hosts.txt"
Get-VMHost | Select-Object -ExpandProperty Name | Out-File -FilePath $hostsFile

# Disconnect from vCenter
Disconnect-VIServer -Server $vCenterServer -Confirm:$false -Force

Step 2: Checking Boot Methods Using Plink

With the hostnames ready, we’ll utilize Plink to execute a command on each host that determines its boot method, capturing the results for review.

$plinkPath = "C:\path\to\plink.exe"
$sshUsername = "your-ssh-username"
$sshPassword = "your-ssh-password"
$hostsFile = "C:\path\to\your\esxi_hosts.txt"
$resultsFile = "C:\path\to\your\boot_methods.txt"

if (Test-Path $resultsFile) {
    Remove-Item $resultsFile
}

# Read the hostnames from the file
$hosts = Get-Content -Path $hostsFile

foreach ($esxiHost in $hosts) {
    try {
        # Build the command for Plink, escaping the password for use in a command line
        $sshPasswordEscaped = $sshPassword -replace '(["$`])', '`$1'
        $command = "vsish -e get /hardware/firmwareType"
        $plinkCommand = "$plinkPath -ssh -l $sshUsername -pw $sshPasswordEscaped -batch -no-antispoof $esxiHost $command"
        
        $result = & cmd /c $plinkCommand
        $output = "Firmware Type for $esxiHost $result"
        Write-Host $output
        $output | Out-File -FilePath $resultsFile -Append
    } catch {
        $errorMessage = "An error occurred processing $esxiHost $_"
        Write-Host $errorMessage
        $errorMessage | Out-File -FilePath $resultsFile -Append
    }
}

Interpreting the Results

After running the script, the boot_methods.txt file will contain the boot method (UEFI or Legacy BIOS) for each ESXi host. Review this file to identify which hosts are not configured according to your operational requirements.

Conclusion

Automating the check for legacy boot options across multiple ESXi hosts simplifies compliance with specific operational standards or compatibility requirements. By leveraging PowerShell and Plink, VMware administrators can efficiently ensure their environments align with the necessary boot methods, saving time and enhancing system reliability.

Happy automating, and here’s to maintaining optimal configurations across your VMware landscape!
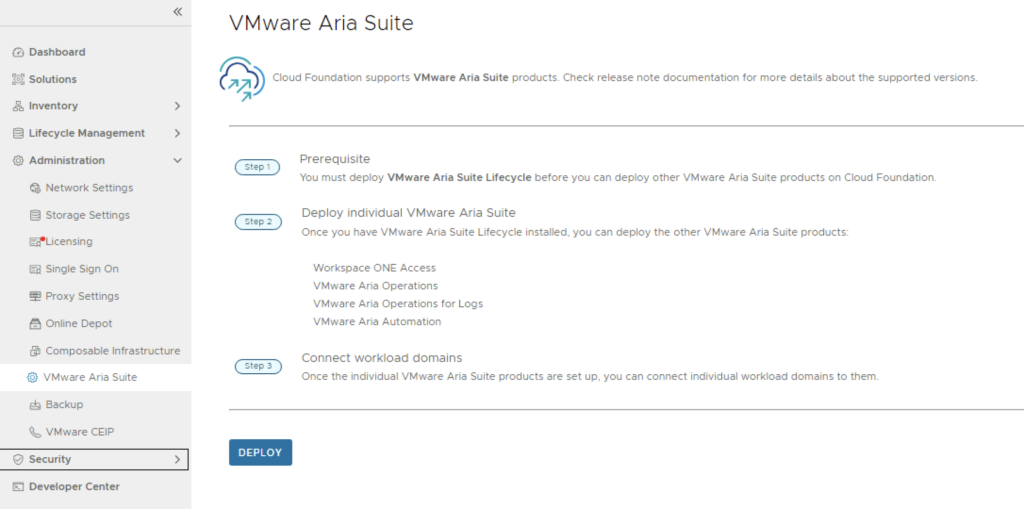
Deploying the Aria Suite Lifecycle using VCF 5

The official documentation for deploying the Aria Suite can be found here

First step is to download the bundle by going to sddc-manager -> Repository -> Bundle management. Look for VMware Software Install Bundle – vRealize Suite Lifecycle Manager 8.16.0-23377566

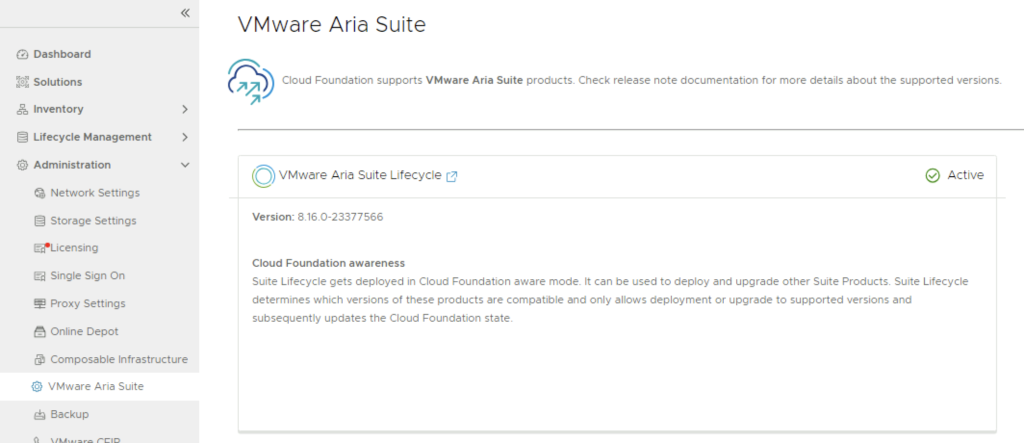
After the download is complete we can go to Administration -> VMware Aria Suite and a deploy button should be available. If the deploy button is not available due to X-Region Application Virtual Network is not created error please follow the instructions found here:

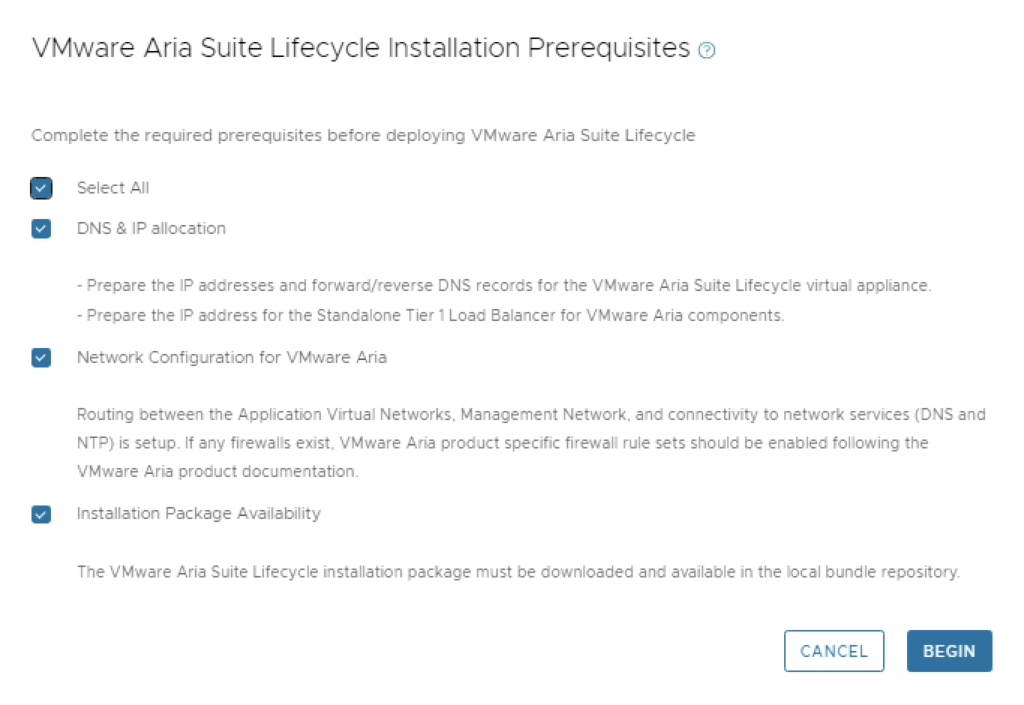
Verify the Prerequisites and click on begin

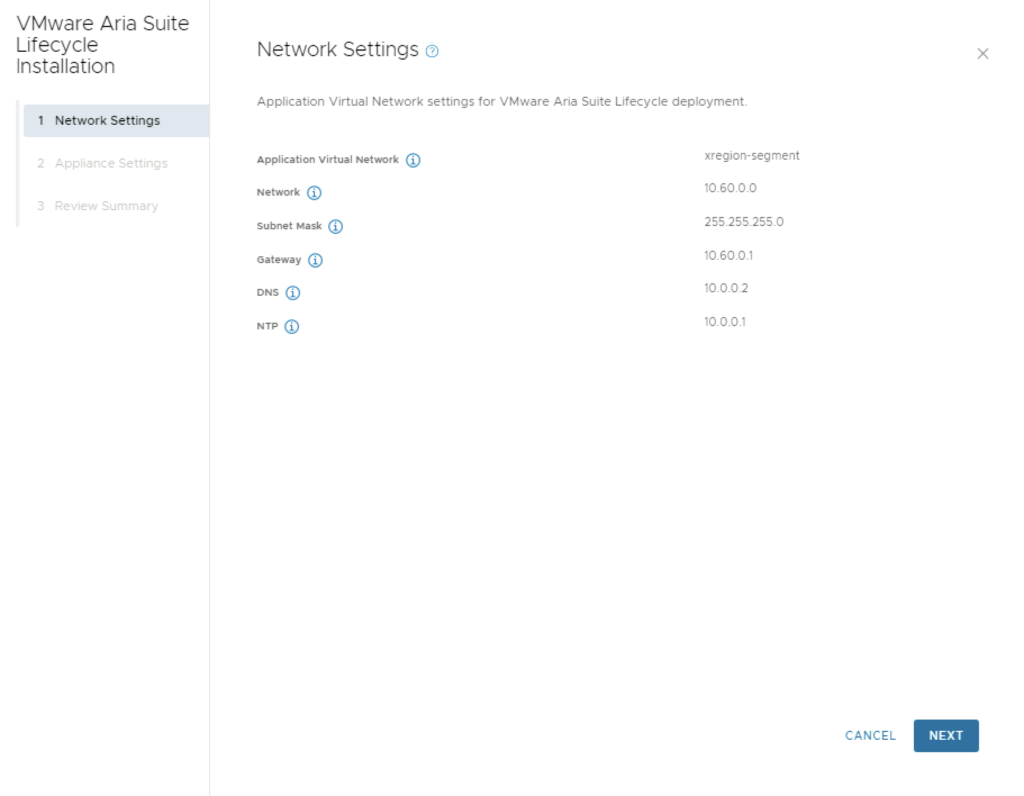
Verify the network settings and click Next

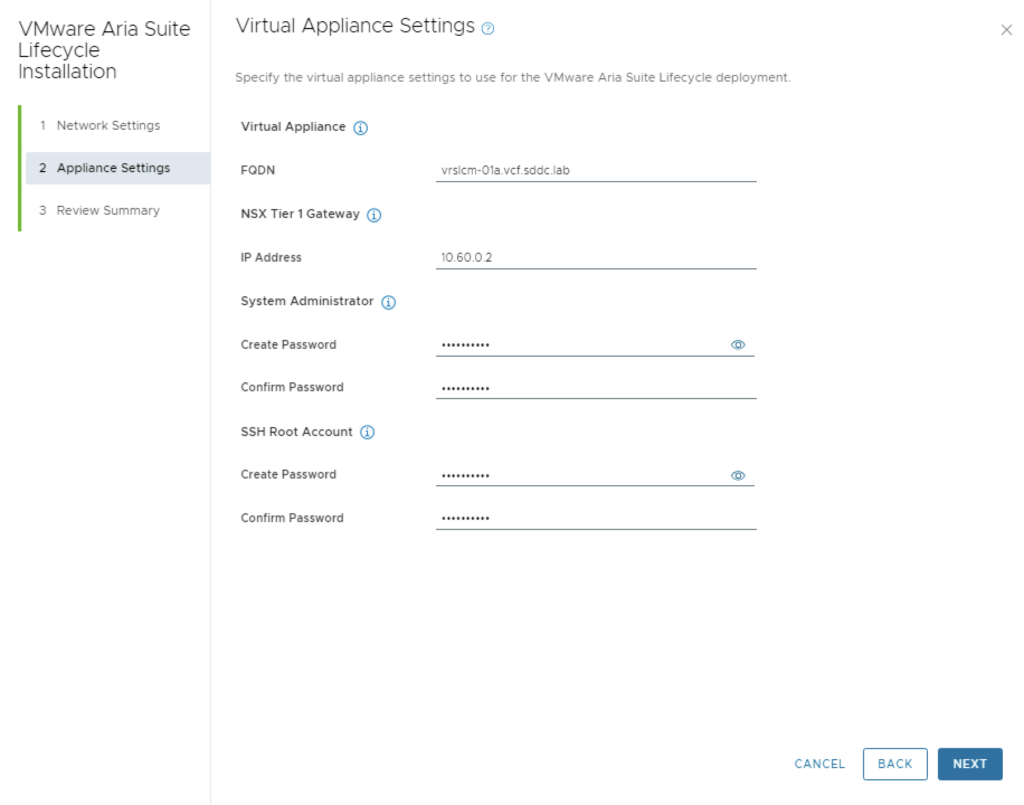
Fill up the network and appliance settings and click next

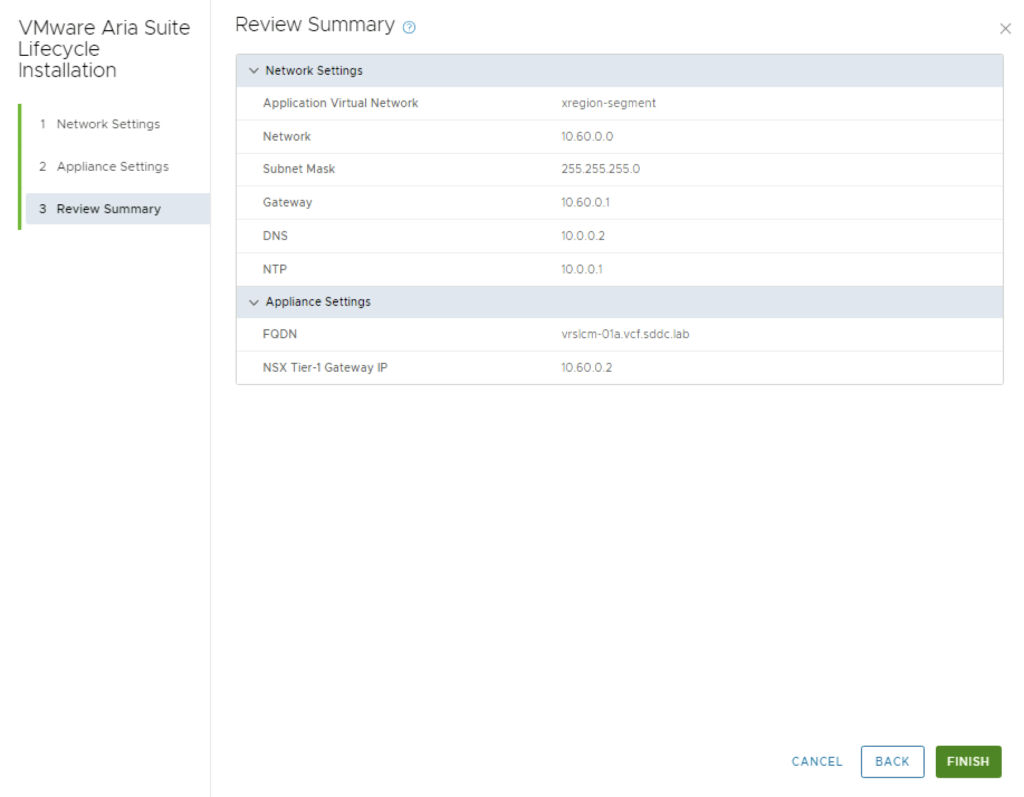
Review the summary and click Finish

We can follow the progress by click on the Task on the bottom of the screen

This allows me to see the subtasks that are running

Once the deployment is complete we can open the Aria Suite Lifecycle by clicking on the Window icon link

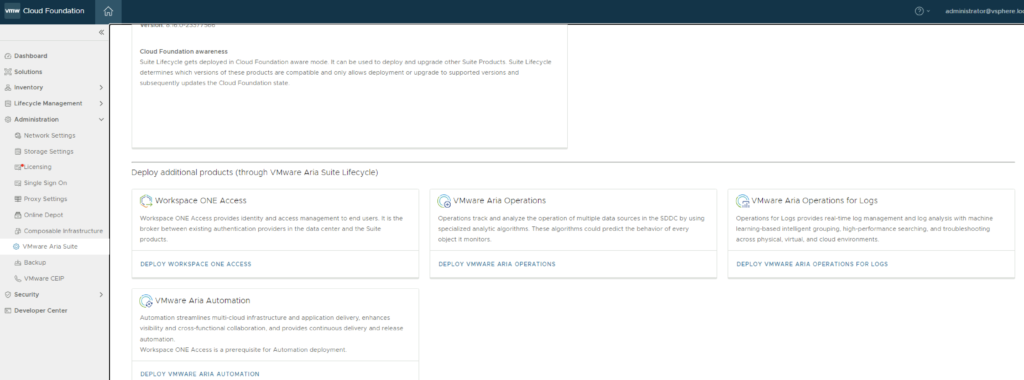
Additionally towards the bottom of the page we can see the rest of the Aria Suite components that can be deployed.

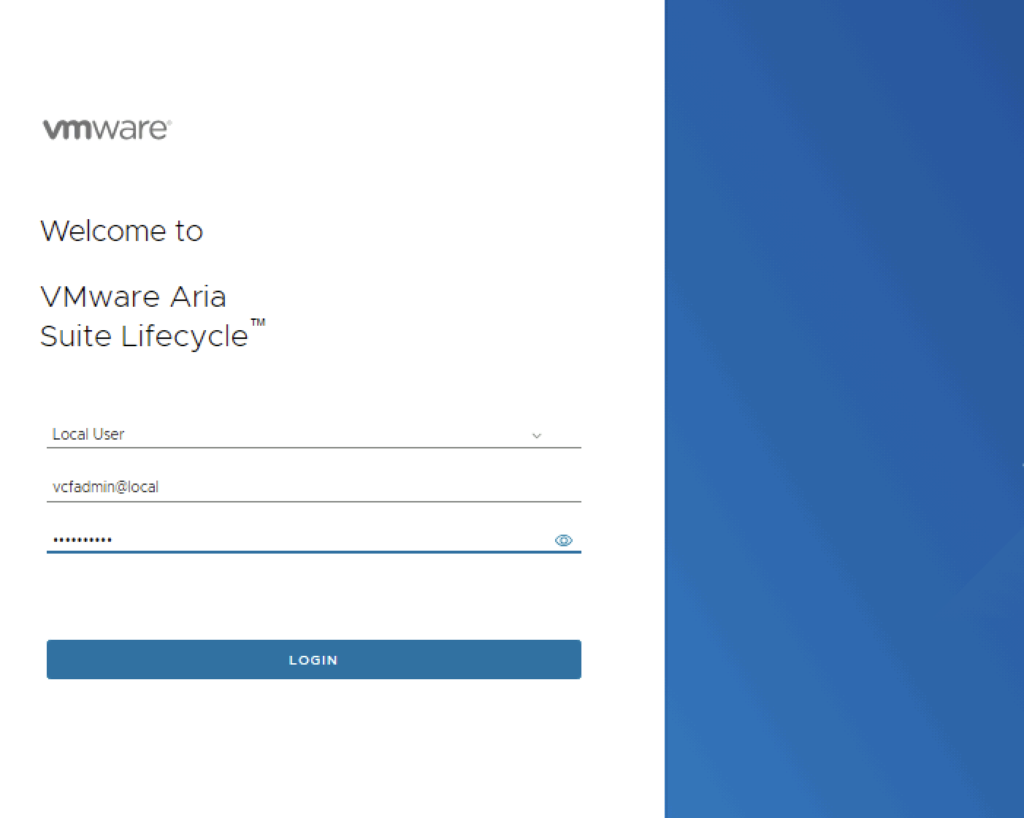
We can then log in to the Aria Suite Lifecycle using vcfadmin@local with the credentials used during the deployment.

We can see that the deployment wizard also created a few configurations items.

We can now proceed with the deployment of the rest of the components. The deployments will be done from Aria Suite Lifecycle.

How to Enable SSH on the NSX appliance

Enabling SSH on NSX appliances via the CLI (Command Line Interface) is an essential skill for VMware administrators, providing a more direct and scriptable approach to managing and configuring the NSX environment. Here’s how to enable SSH on NSX from the CLI, allowing for secure, remote administration of your virtual network infrastructure.

Pre-Requisites

Ensure you have local or console access to the NSX appliance (NSX Manager, NSX Edge, or Controller) for initial setup. Administrative credentials will be required to execute the following commands. The instructions have been tested on NSX 4.1.2.3

Steps to Enable SSH on NSX via CLI

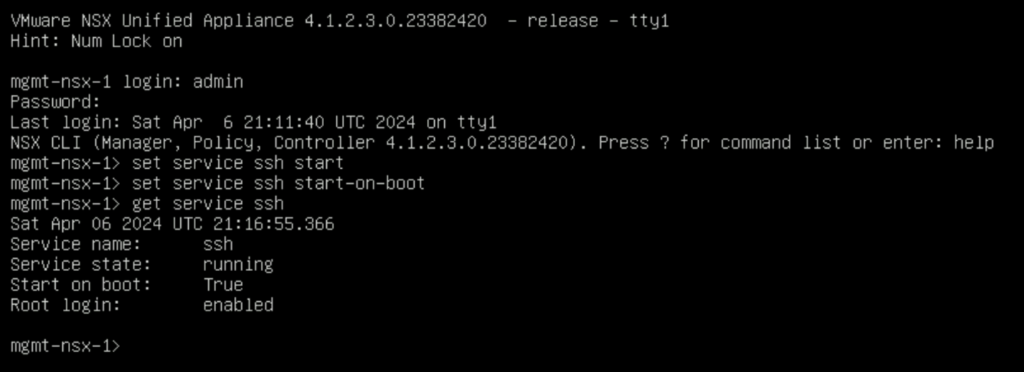
  1. Access the NSX Appliance CLI: Connect to the console of the NSX appliance.
  2. Log in as Admin: Use the username admin and the password configured during the NSX appliance setup to log in.
  3. Enable SSH Service: Execute the command set service ssh start to enable the SSH service. This command starts the SSH daemon, allowing SSH connections to the appliance.
  4. (Optional) Configure SSH Service to Start on Boot: To ensure the SSH service is automatically started upon system reboot, execute set service ssh start-on-boot. This step is crucial for maintaining remote access after system restarts.
  5. Verify SSH Service Status: To confirm the SSH service is running, you can use the command get service ssh. This command displays the current status of the SSH service, including whether it’s running and if it’s configured to start on boot.

Security Considerations

When enabling SSH, consider implementing security measures to protect your NSX environment:

  • Use Strong Passwords: Ensure that all user accounts have strong, complex passwords.
  • Implement Access Control: Restrict SSH access to trusted hosts or networks using firewall rules.
  • SSH Key Authentication: For enhanced security, use SSH key-based authentication instead of passwords.
  • Regularly Update and Patch: Keep your NSX and all connected systems up to date with the latest security patches.

Conclusion

Enabling SSH on NSX via the CLI is a straightforward process that enhances the manageability and accessibility of your network virtualization environment. With SSH enabled, administrators can securely manage the NSX appliances from remote locations, streamlining operations and maintenance tasks. Always follow security best practices to safeguard your environment against unauthorized access.

Properly cleaning up VCF bundles

With all the recent releases for VCF i noticed that my file system was getting full and once the updates are complete i wanted to reclaim all that used space.

The first step was to identify the Bundle ID. We can find this by going to the bundle itself and checking out the details by clicking on View Details

For example this specific Bundle ID is 86da0038-b68d-4368-8be1-576568a68c54

At this point i had to log in to the sddc manager and issue the following command:

/opt/vmware/vcf/lcm/lcm-app/bin/bundle_cleanup.py 86da0038-b68d-4368-8be1-576568a68c54

We can also specify multiple bundle IDs:

/opt/vmware/vcf/lcm/lcm-app/bin/bundle_cleanup.py 96368be7-554c-40d1-81ef-3ad0b47c16f0 7d5af5d8-0f01-4fc5-b22b-c805f5cd00fb cf4ab52f-b999-4f6a-8c29-2db829110925

I hope this helps

Upgrading VCF 5.x to VCF 5.1.1 Step by Step

With the release of of VCF 5.1.1 I wanted to get my lab upgraded. The release blog can be found here and the release notes are here

Please note that some of the components within the VCF will still need additional upgrading. Please read the release notes for additional details.

We can start by going to Inventory -> Workload Domains -> Select the domain -> Update/Patches -> Select the VCF version -> Download now. If you do not see the newest releases go to Administration -> Online Depot and add a VMware Customer Connect account that has access to perform downloads.

The next step is to upgrade VCF by going to Inventory -> Workload Domains -> Select the workload domain -> Update/Patches -> Select the cloud foundation version we’re upgrading to and click on Update Now for the VMware Cloud Foundation Update 5.1.1

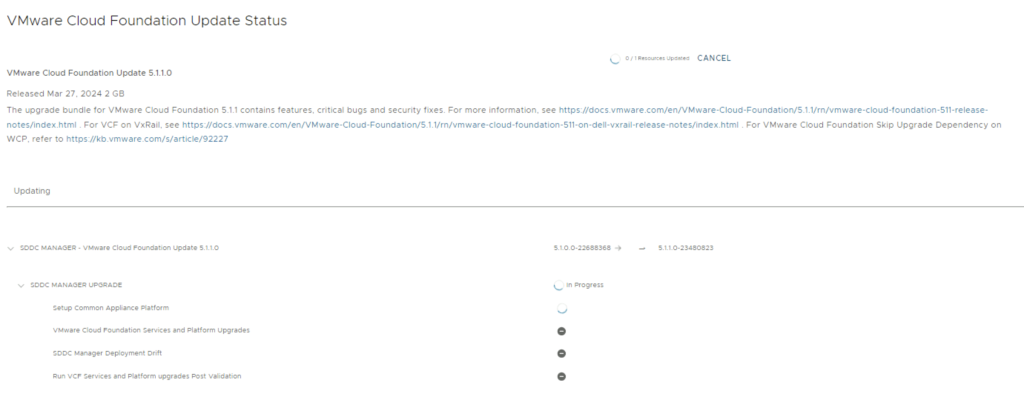
Next we are taken to the Upgrade page where we can follow the upgrade for each one of the components

Once the upgrade is complete we can click Finish to be returned back to the main screen

Because we are changing the SDDC-Manager versions i would strongly recommend to clear cache and log back in before going forward.

Next step is to upgrade NSX-T installation to NSX-T 4.1.2.3. The release notes can be found here.

We can also download it directly from the workload domain by going to Inventory -> Workload Domains -> Select the domain -> Update/Patches -> Download now

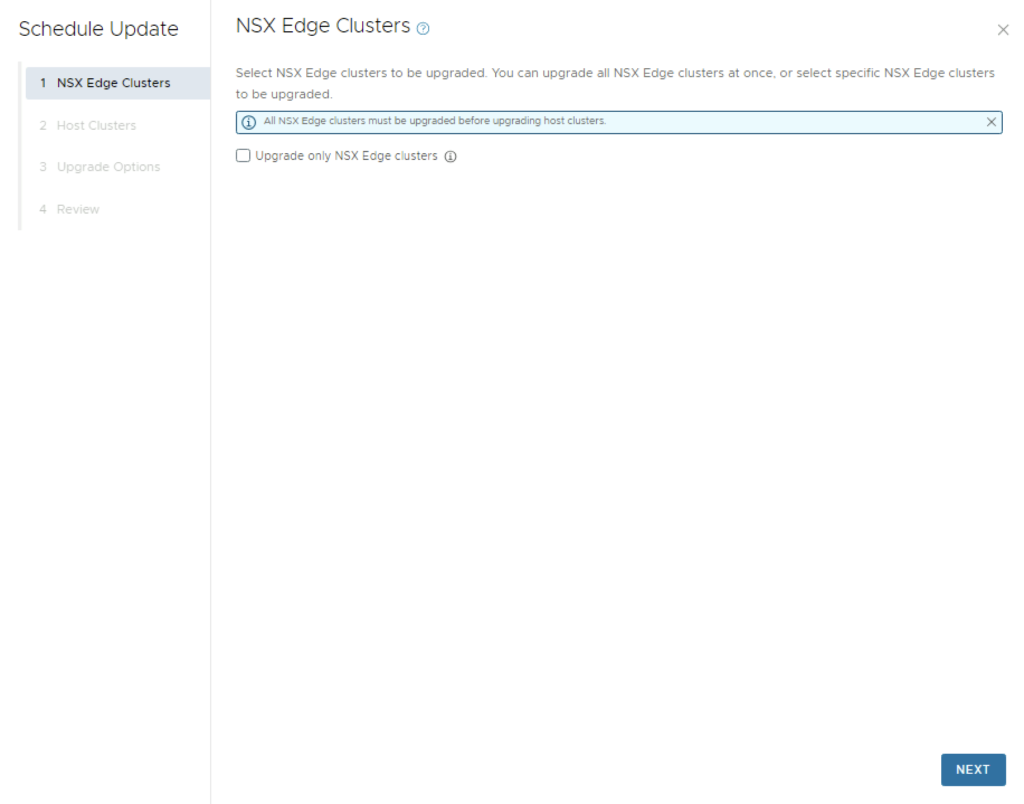
Once the download is complete we can proceed with updating the NSX components by clicking on the update now

Make the proper selection and click next

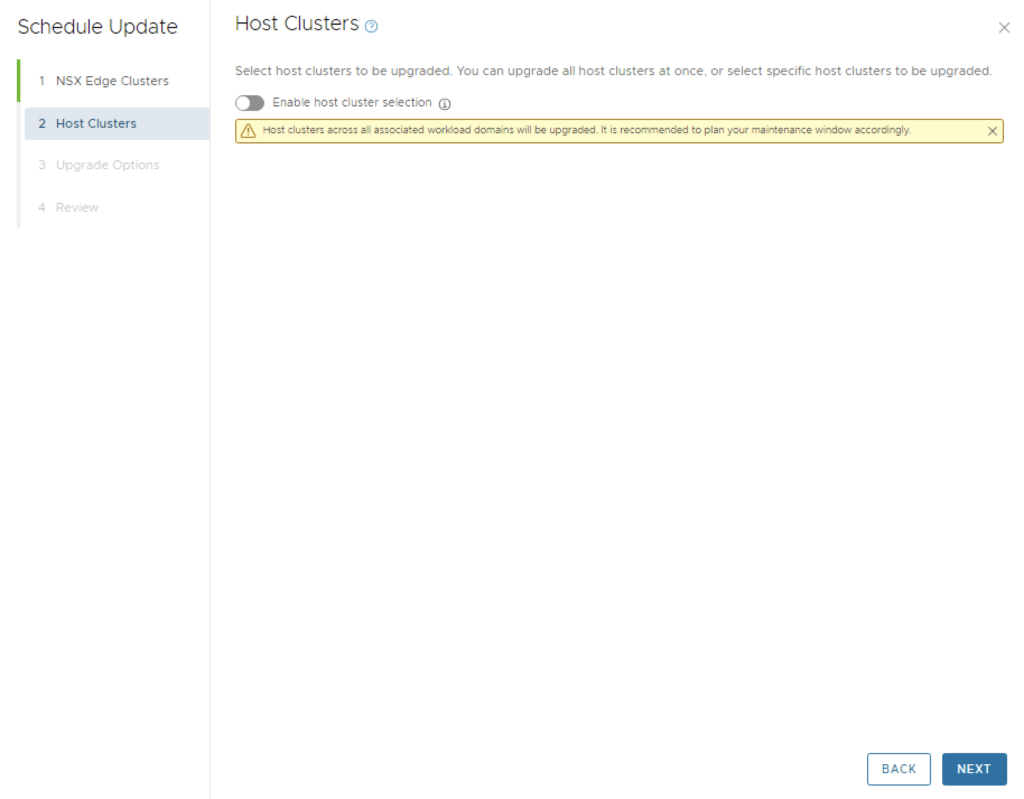
Make the proper selection and click next

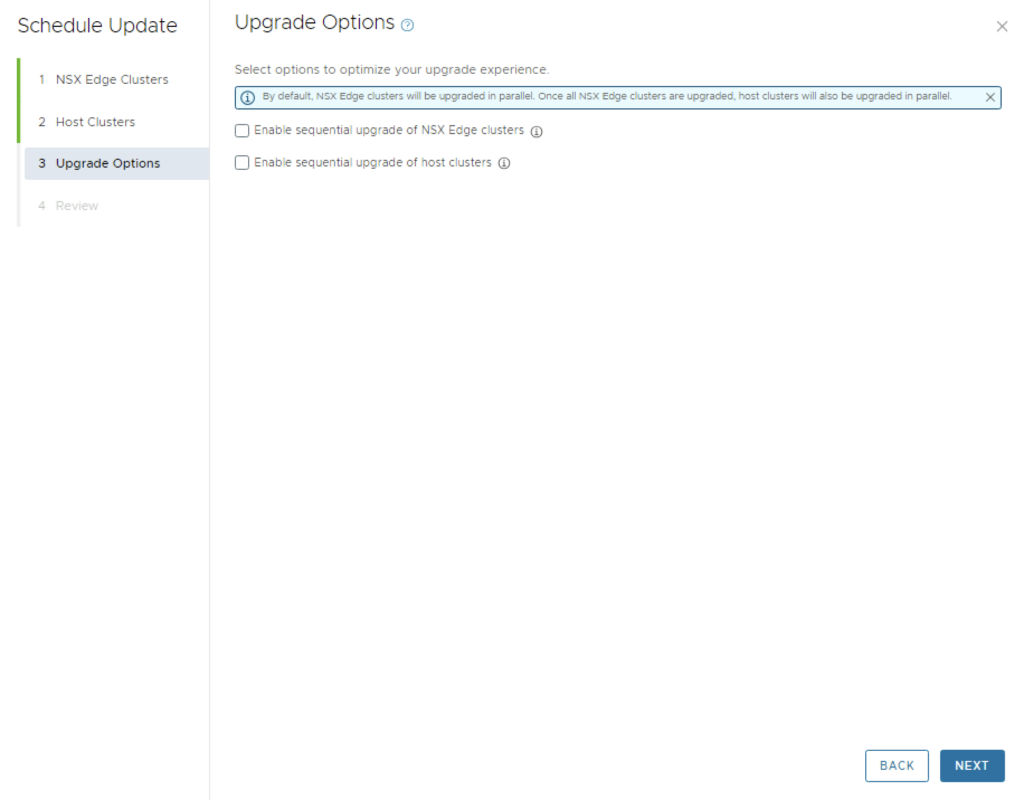
Make the proper selection and click next

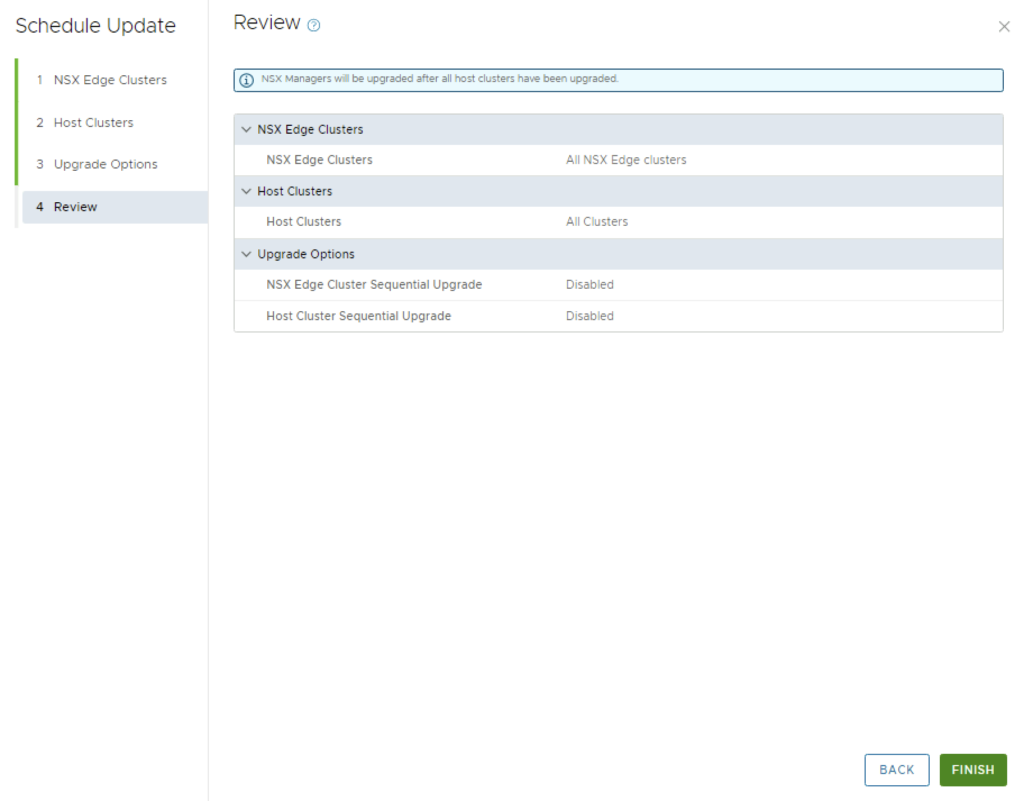
Review the options and click on Finish

The upgrade will go thought upgrading the NSX edges. We can view the upgrade status by clicking on view status

Once the upgrade is complete we can proceed with the vCenter Upgrade. VCF 5.1.1 comes with vCenter Server 8.0 Updated 2b. The release notes can be found here. We can go to Inventory -> Workload Domains -> Select the workload domain -> Update/Patches -> Under Available updates click on Download now.

Once the download is complete we can click on Update now

Confirm that we have a backup

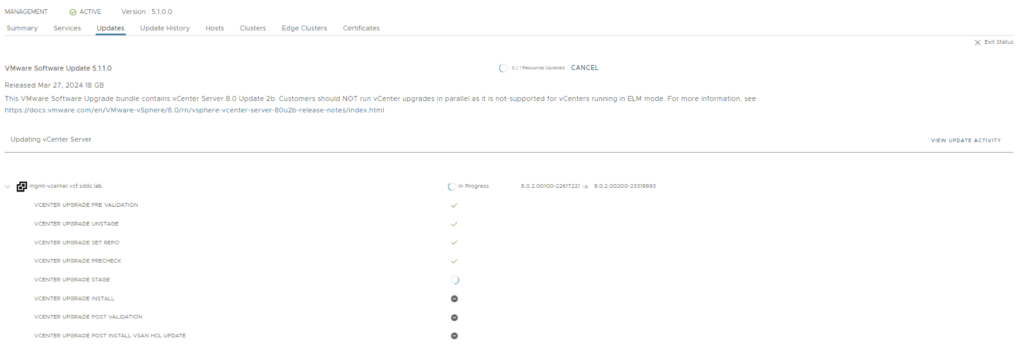
We can follow the status of the upgrade by clicking on the view status tab

Here we can see the different components that are getting upgraded

Once the upgrade is complete we are taken back to the previous page where we can see that the ESXi servers are next. The release notes can be found here. Click on Download Now.

Once the download is complete we can click on Update now

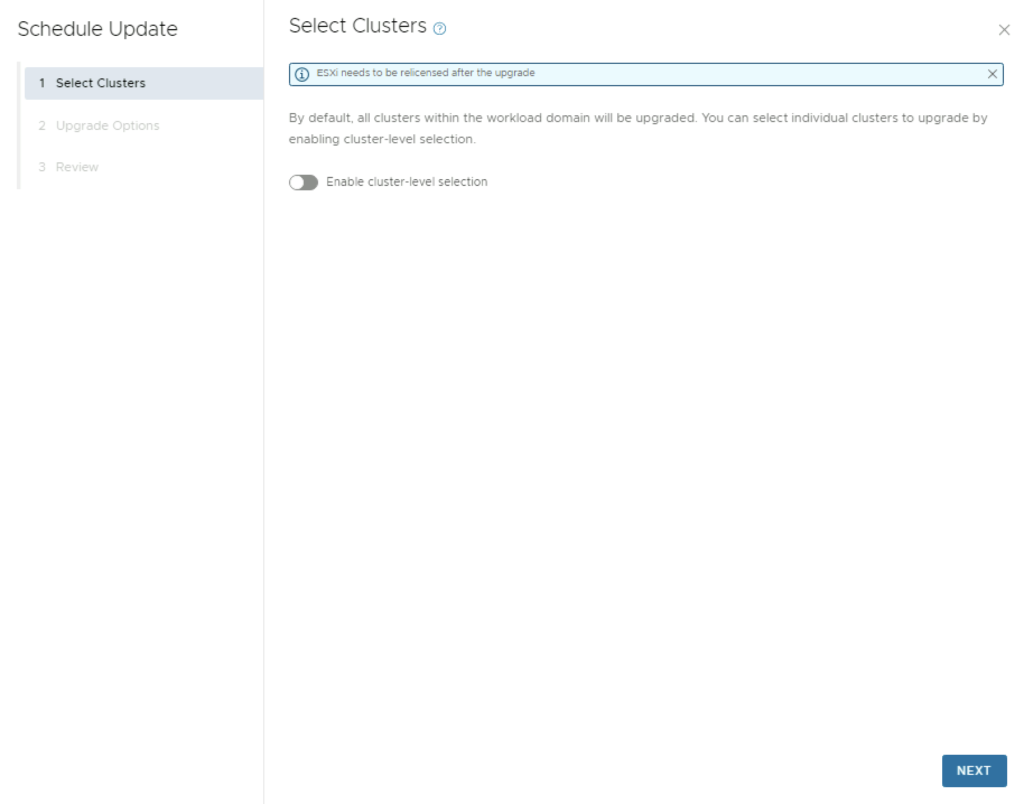
If we have multiple clusters we can enable Cluster-level selection and select the specific cluster(s) we want to upgrade.

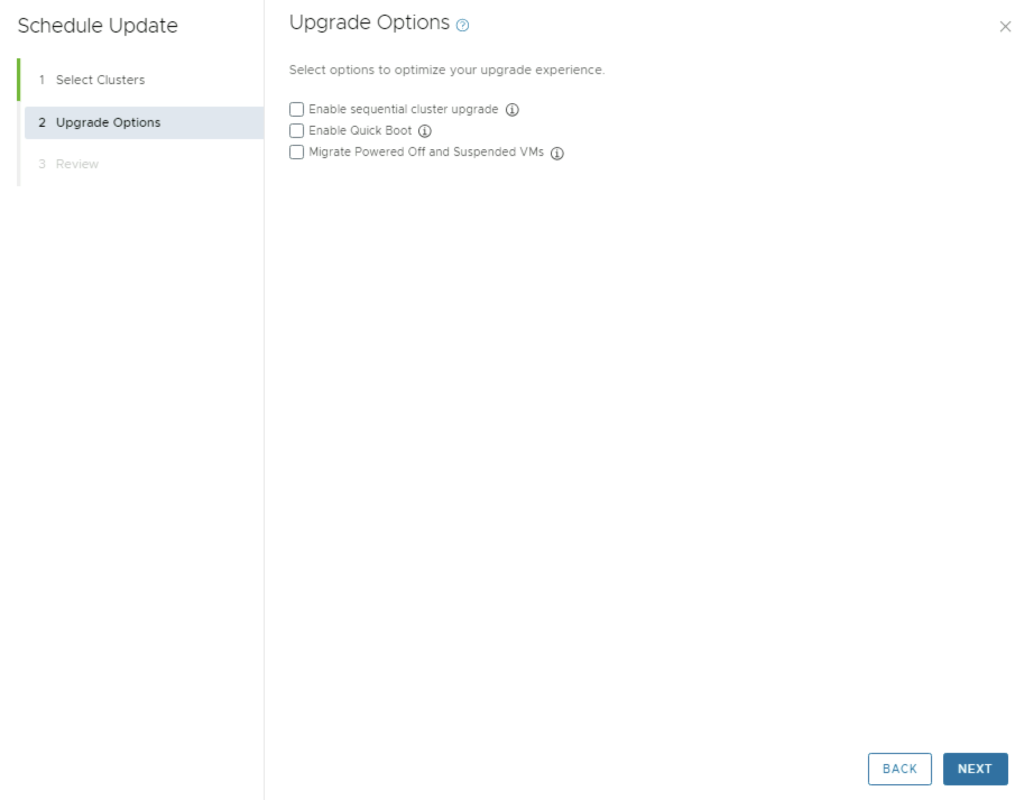
We can also enable sequential cluster upgrade, quick boot and the ability to evacuate offline VMs part of the maintenance. Click Next

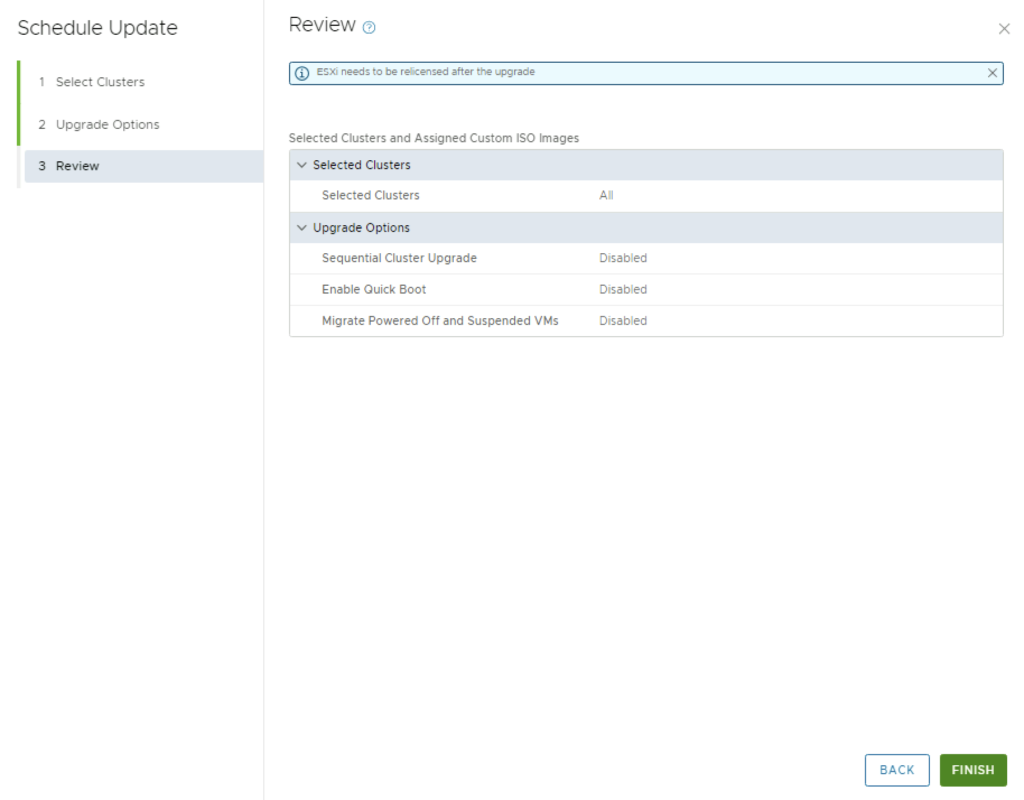
We get to review the options once again before we click finish to to submit the task

Once submitted we can view the status by clicking on View Status

And with that we are finished with the workload domain. We can follow the same steps for the other domains

Don’t forget to clean up the download bundles by following the steps from my other blog here

VCF depot build numbers

Bundle	Product Version	Size	Bundle	Component	Bundle Type
bundle-111778	5.1.1.0	605.7	ESX_HOST-8.0.2-23305546	PATCH	
bundle-111779	5.1.1.0	11381.3	NSX_T_MANAGER-4.1.2.3.0-23382408	PATCH	
bundle-111777	5.1.1.0	0	SDDC_MANAGER_VCF-5.1.1.0-23480823	PATCH	(Drift)
bundle-111776	5.1.1.0	2331.6	SDDC_MANAGER_VCF-5.1.1.0-23480823	PATCH	
bundle-111781	5.1.1.0	17064.2	VCENTER-8.0.2.00200-23319993	PATCH	
bundle-111780	5.1.1.0	14664.6	NSX_T_MANAGER-4.1.2.3.0-23382408	INSTALL	
bundle-111782	5.1.1.0	10742.4	VCENTER-8.0.2.00200-23319993	INSTALL	
bundle-110346	5.1.1.0	1847.9	VRSLCM-8.16.0-23377566	INSTALL	
bundle-99536	5.1.0.0	640	ESX_HOST-8.0.2-22380479	PATCH	
bundle-99541	5.1.0.0	10500.4	NSX_T_MANAGER-4.1.2.1.0-22667789	PATCH	
bundle-99539	5.1.0.0	2089.2	SDDC_MANAGER_VCF-5.1.0.0-22688368	PATCH	
bundle-99540	5.1.0.0	0	SDDC_MANAGER_VCF-5.1.0.0-22688368	PATCH	(Drift)
bundle-99537	5.1.0.0	16801.6	VCENTER-8.0.2.00100-22617221	PATCH	
bundle-99542	5.1.0.0	14606.2	NSX_T_MANAGER-4.1.2.1.0-22667789	INSTALL	
bundle-99538	5.1.0.0	10493	VCENTER-8.0.2.00100-22617221	INSTALL	
bundle-98366	5.1.0.0	1817.8	VRSLCM-8.14.0-22630472	INSTALL	
bundle-94375	5.0.0.1	2044.9	SDDC_MANAGER_VCF-5.0.0.1-22485660	PATCH	
bundle-94376	5.0.0.1	251.5	SDDC_MANAGER_VCF-5.0.0.1-22485660	PATCH	(Drift)
bundle-80035	5.0.0.0	599.5	ESX_HOST-8.0.1-21813344	PATCH	
bundle-80031	5.0.0.0	10089.9	NSX_T_MANAGER-4.1.0.2.0-21761691	PATCH	
bundle-80030	5.0.0.0	251.3	SDDC_MANAGER_VCF-5.0.0.0-21822418	PATCH	(Drift)
bundle-80029	5.0.0.0	2044.7	SDDC_MANAGER_VCF-5.0.0.0-21822418	PATCH	
bundle-80033	5.0.0.0	9867.6	VCENTER-8.0.1.00100-21815093	PATCH	
bundle-80032	5.0.0.0	13874.6	NSX_T_MANAGER-4.1.0.2.0-21761691	INSTALL	
bundle-80034	5.0.0.0	9867.6	VCENTER-8.0.1.00100-21815093	INSTALL	
bundle-79587	5.0.0.0	1091.8	VRSLCM-8.10.0-21331275	INSTALL	
bundle-83610	4.5.2.0	382.1	ESX_HOST-7.0.3-21930508	PATCH	
bundle-87318	4.5.2.0	8615.4	NSX_T_MANAGER-3.2.3.1.0-22104592	PATCH	
bundle-88445	4.5.2.0	2012.6	SDDC_MANAGER_VCF-4.5.2.0-22223457	PATCH	
bundle-88446	4.5.2.0	250.5	SDDC_MANAGER_VCF-4.5.2.0-22223457	PATCH	(Drift)
bundle-81146	4.5.2.0	6420	VCENTER-7.0.3.01500-21784236	PATCH	
bundle-87319	4.5.2.0	10618.2	NSX_T_MANAGER-3.2.3.1.0-22104592	INSTALL	
bundle-81147	4.5.2.0	8575.4	VCENTER-7.0.3.01500-21784236	INSTALL	
bundle-84015	4.5.2.0	1091.3	VRSLCM-8.10.0-21950667	INSTALL	
bundle-73789	4.5.1.0	381.8	ESX_HOST-7.0.3-21424296	PATCH	
bundle-73785	4.5.1.0	8402.7	NSX_T_MANAGER-3.2.2.1.0-21487560	PATCH	
bundle-77261	4.5.1.0	2150	SDDC_MANAGER_VCF-4.5.1.0-21682411	PATCH	
bundle-77262	4.5.1.0	250.2	SDDC_MANAGER_VCF-4.5.1.0-21682411	PATCH	(Drift)
bundle-73787	4.5.1.0	6419.8	VCENTER-7.0.3.01400-21477706	PATCH	
bundle-73786	4.5.1.0	10461.8	NSX_T_MANAGER-3.2.2.1.0-21487560	INSTALL	
bundle-73788	4.5.1.0	8575.1	VCENTER-7.0.3.01400-21477706	INSTALL	
bundle-61598	4.5.0.0	382.9	ESX_HOST-7.0.3-20328353	PATCH	
bundle-62768	4.5.0.0	8064	NSX_T_MANAGER-3.2.1.2.0-20541212	PATCH	
bundle-63600	4.5.0.0	247.6	SDDC_MANAGER_VCF-4.5.0.0-20612863	PATCH	(Drift)
bundle-63599	4.5.0.0	2106	SDDC_MANAGER_VCF-4.5.0.0-20612863	PATCH	
bundle-61594	4.5.0.0	6381.1	VCENTER-7.0.3.01000-20395099	PATCH	
bundle-62769	4.5.0.0	10053.7	NSX_T_MANAGER-3.2.1.2.0-20541212	INSTALL	
bundle-61596	4.5.0.0	8344.2	VCENTER-7.0.3.01000-20395099	INSTALL	
bundle-62801	4.5.0.0	1085.4	VRSLCM-8.8.2-20080494	INSTALL	
bundle-58347	4.4.1.1	10246.1	SDDC_MANAGER_VCF-4.4.1.1-19948546	PATCH	
bundle-58348	4.4.1.1	233.8	SDDC_MANAGER_VCF-4.4.1.1-19948546	PATCH	(Drift)
bundle-56937	4.4.1.0	395.5	ESX_HOST-7.0.3-19482537	PATCH	
bundle-57347	4.4.1.0	7127.2	NSX_T_MANAGER-3.1.3.7.4-19762317	PATCH	
bundle-57344	4.4.1.0	10246.2	SDDC_MANAGER_VCF-4.4.1.0-19766960	PATCH	
bundle-57346	4.4.1.0	233.8	SDDC_MANAGER_VCF-4.4.1.0-19766960	PATCH	(Drift)
bundle-55743	4.4.1.0	7139	VCENTER-7.0.3.00500-19480866	PATCH	
bundle-57348	4.4.1.0	8535.7	NSX_T_MANAGER-3.1.3.7.4-19762317	INSTALL	
bundle-55745	4.4.1.0	9202.7	VCENTER-7.0.3.00500-19480866	INSTALL	
bundle-52995	4.4.0.0	395.3	ESX_HOST-7.0.3-19193900	PATCH	
bundle-52980	4.4.0.0	7154.5	NSX_T_MANAGER-3.1.3.5.0-19068434	PATCH	
bundle-56535	4.4.0.0	230.4	SDDC_MANAGER_VCF-4.4.0.0-19617653	PATCH	(Drift)
bundle-53432	4.4.0.0	230.3	SDDC_MANAGER_VCF-4.4.0.0-19312029	PATCH	(Drift)
bundle-53431	4.4.0.0	10188.6	SDDC_MANAGER_VCF-4.4.0.0-19312029	PATCH	
bundle-52986	4.4.0.0	7223.8	VCENTER-7.0.3.00300-19234570	PATCH	
bundle-52611	4.4.0.0	905.6	VRSLCM-8.6.2-19221620	PATCH	
bundle-52982	4.4.0.0	8610	NSX_T_MANAGER-3.1.3.5.0-19068434	INSTALL	
bundle-52990	4.4.0.0	9244.9	VCENTER-7.0.3.00300-19234570	INSTALL	
bundle-52610	4.4.0.0	1111.3	VRSLCM-8.6.2-19221620	INSTALL	
bundle-52704	4.3.1.1	10695.5	SDDC_MANAGER_VCF-4.3.1.1-19235535	PATCH	
bundle-52705	4.3.1.1	230.5	SDDC_MANAGER_VCF-4.3.1.1-19235535	PATCH	(Drift)
bundle-47505	4.3.1.0	389.4	ESX_HOST-7.0.2-18426014	PATCH	
bundle-47501	4.3.1.0	7105.9	NSX_T_MANAGER-3.1.3.1.0-18504668	PATCH	
bundle-48392	4.3.1.0	230.5	SDDC_MANAGER_VCF-4.3.1.0-18624509	PATCH	(Drift)
bundle-48390	4.3.1.0	10336.5	SDDC_MANAGER_VCF-4.3.1.0-18624509	PATCH	
bundle-47503	4.3.1.0	5394	VCENTER-7.0.2.00500-18455184	PATCH	
bundle-47700	4.3.1.0	6207.1	VRA-8.5.0-18472703	PATCH	
bundle-47696	4.3.1.0	759.9	VRLI-8.4.1-18136317	PATCH	
bundle-47698	4.3.1.0	3141.6	VROPS-8.5.0-18255622	PATCH	
bundle-47703	4.3.1.0	847.8	VRSLCM-8.4.1-18537943	PATCH	
bundle-47502	4.3.1.0	8501.4	NSX_T_MANAGER-3.1.3.1.0-18504668	INSTALL	
bundle-47504	4.3.1.0	7383.3	VCENTER-7.0.2.00500-18455184	INSTALL	
bundle-47701	4.3.1.0	6632.3	VRA-8.5.0-18472703	INSTALL	
bundle-47695	4.3.1.0	1414.8	VRLI-8.4.1-18136317	INSTALL	
bundle-47697	4.3.1.0	2563.3	VROPS-8.5.0-18255622	INSTALL	
bundle-47702	4.3.1.0	1037.1	VRSLCM-8.4.1-18537943	INSTALL	
bundle-43745	4.3.0.0	390.1	ESX_HOST-7.0.2-17867351	PATCH	
bundle-46466	4.3.0.0	7123.1	NSX_T_MANAGER-3.1.3.0.0-18328989	PATCH	
bundle-47006	4.3.0.0	10331.2	SDDC_MANAGER_VCF-4.3.0.0-18433963	PATCH	
bundle-47008	4.3.0.0	230.3	SDDC_MANAGER_VCF-4.3.0.0-18433963	PATCH	(Drift)
bundle-46468	4.3.0.0	5394.4	VCENTER-7.0.2.00400-18356314	PATCH	
bundle-40064	4.3.0.0	6360.7	VRA-8.4.1-18054500	PATCH	
bundle-43778	4.3.0.0	742.7	VRLI-8.4.0-17828109	PATCH	
bundle-39857	4.3.0.0	2191.3	VROPS-8.4.0-17863947	PATCH	
bundle-40066	4.3.0.0	841.3	VRSLCM-8.4.1-18067607	PATCH	
bundle-40908	4.3.0.0	3478.7	WSA-3.3.5-18049997	PATCH	
bundle-46467	4.3.0.0	8568.5	NSX_T_MANAGER-3.1.3.0.0-18328989	INSTALL	
bundle-46469	4.3.0.0	7383.7	VCENTER-7.0.2.00400-18356314	INSTALL	
bundle-40080	4.3.0.0	6773.8	VRA-8.4.1-18054500	INSTALL	
bundle-43777	4.3.0.0	1414.2	VRLI-8.4.0-17828109	INSTALL	
bundle-43774	4.3.0.0	2538.2	VROPS-8.4.0-17863947	INSTALL	
bundle-40906	4.3.0.0	1032.7	VRSLCM-8.4.1-18067607	INSTALL	
bundle-40907	4.3.0.0	4180.7	WSA-3.3.5-18049997	INSTALL	
bundle-42515	4.2.1.0	6995.1	NSX_T_MANAGER-3.1.2.0.0-17883596	PATCH	
bundle-42906	4.2.1.0	209.3	SDDC_MANAGER_VCF-4.2.1.0-18016307	PATCH	(Drift)
bundle-42905	4.2.1.0	10142.7	SDDC_MANAGER_VCF-4.2.1.0-18016307	PATCH	
bundle-42521	4.2.1.0	5114.4	VCENTER-7.0.1.00301-17956102	PATCH	
bundle-42519	4.2.1.0	8394.9	NSX_T_MANAGER-3.1.2.0.0-17883596	INSTALL	
bundle-42522	4.2.1.0	7722.8	VCENTER-7.0.1.00301-17956102	INSTALL	
bundle-37983	4.2.0.0	369	ESX_HOST-7.0.1-17551050	PATCH	
bundle-32810	4.2.0.0	7057.7	NSX_T_MANAGER-3.1.0.0.0-17107167	PATCH	
bundle-37979	4.2.0.0	10070	SDDC_MANAGER_VCF-4.2.0.0-17559673	PATCH	
bundle-37982	4.2.0.0	209.3	SDDC_MANAGER_VCF-4.2.0.0-17559673	PATCH	(Drift)
bundle-35321	4.2.0.0	5140.8	VCENTER-7.0.1.00200-17327517	PATCH	
bundle-31385	4.2.0.0	5706	VRA-8.2.0-17018654	PATCH	
bundle-31221	4.2.0.0	687.3	VRLI-8.2.0-16957702	PATCH	
bundle-31219	4.2.0.0	2560.1	VROPS-8.2.0-16949153	PATCH	
bundle-32076	4.2.0.0	947	VRSLCM-8.2.0-17513665	PATCH	
bundle-32079	4.2.0.0	3286.2	WSA-3.3.4-17498518	PATCH	
bundle-32811	4.2.0.0	8427.7	NSX_T_MANAGER-3.1.0.0.0-17107167	INSTALL	
bundle-35322	4.2.0.0	7749.3	VCENTER-7.0.1.00200-17327517	INSTALL	
bundle-30921	4.2.0.0	6515.4	VRA-8.2.0-16980951	INSTALL	
bundle-32927	4.2.0.0	1325.1	VRLI-8.2.0-16957702	INSTALL	
bundle-30919	4.2.0.0	2861.4	VROPS-8.2.0-16949153	INSTALL	
bundle-32074	4.2.0.0	1138.9	VRSLCM-8.2.0-17513665	INSTALL	
bundle-32078	4.2.0.0	4115.3	WSA-3.3.4-17498518	INSTALL	
bundle-33257	4.1.0.1	343.9	ESX_HOST-7.0.1-17168206	PATCH	
bundle-33416	4.1.0.1	9787.6	SDDC_MANAGER_VCF-4.1.0.1-17206953	PATCH	
bundle-52820	4.1.0.1	1132.9	SDDC_MANAGER_VCF-4.1.0.1-17206953	PATCH	(Drift)
					

How to use: Downloading specific VCF bundles via CLI

Error Code: LCMVSSC10013

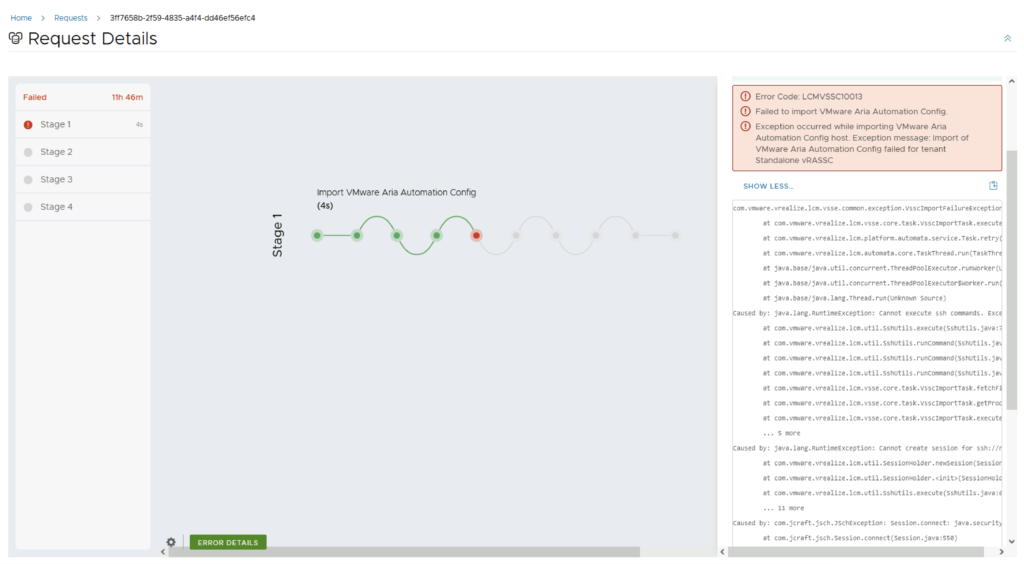
While trying to upgrade my SaltStack Config environment to 8.16.2 I encountered Error Code: LCMVSSC10013 in VMware Aria Suite Lifecycle.

The error details:

Error Code: LCMVSSC10013
Failed to import VMware Aria Automation Config.
Exception occurred while importing VMware Aria Automation Config host. Exception message: Import of VMware Aria Automation Config failed for tenant Standalone vRASSC

com.vmware.vrealize.lcm.vsse.common.exception.VsscImportFailureException: Import of VMware Aria Automation Config failed for tenant Standalone vRASSC
	at com.vmware.vrealize.lcm.vsse.core.task.VsscImportTask.execute(VsscImportTask.java:185)
	at com.vmware.vrealize.lcm.platform.automata.service.Task.retry(Task.java:158)
	at com.vmware.vrealize.lcm.automata.core.TaskThread.run(TaskThread.java:60)
	at java.base/java.util.concurrent.ThreadPoolExecutor.runWorker(Unknown Source)
	at java.base/java.util.concurrent.ThreadPoolExecutor$Worker.run(Unknown Source)
	at java.base/java.lang.Thread.run(Unknown Source)
Caused by: java.lang.RuntimeException: Cannot execute ssh commands. Exception encountered : Session.connect: java.security.spec.InvalidKeySpecException: key spec not recognized
	at com.vmware.vrealize.lcm.util.SshUtils.execute(SshUtils.java:721)
	at com.vmware.vrealize.lcm.util.SshUtils.runCommand(SshUtils.java:532)
	at com.vmware.vrealize.lcm.util.SshUtils.runCommand(SshUtils.java:516)
	at com.vmware.vrealize.lcm.util.SshUtils.runCommand(SshUtils.java:628)
	at com.vmware.vrealize.lcm.vsse.core.task.VsscImportTask.fetchFipsStatus(VsscImportTask.java:342)
	at com.vmware.vrealize.lcm.vsse.core.task.VsscImportTask.getProductDetails(VsscImportTask.java:260)
	at com.vmware.vrealize.lcm.vsse.core.task.VsscImportTask.execute(VsscImportTask.java:158)
	... 5 more
Caused by: java.lang.RuntimeException: Cannot create session for ssh://[email protected]
	at com.vmware.vrealize.lcm.util.SessionHolder.newSession(SessionHolder.java:57)
	at com.vmware.vrealize.lcm.util.SessionHolder.<init>(SessionHolder.java:37)
	at com.vmware.vrealize.lcm.util.SshUtils.execute(SshUtils.java:663)
	... 11 more
Caused by: com.jcraft.jsch.JSchException: Session.connect: java.security.spec.InvalidKeySpecException: key spec not recognized
	at com.jcraft.jsch.Session.connect(Session.java:550)
	at com.vmware.vrealize.lcm.util.SessionHolder.newSession(SessionHolder.java:53)
	... 13 more
Caused by: java.security.spec.InvalidKeySpecException: key spec not recognized
	at org.bouncycastle.jcajce.provider.asymmetric.util.BaseKeyFactorySpi.engineGeneratePublic(Unknown Source)
	at org.bouncycastle.jcajce.provider.asymmetric.edec.KeyFactorySpi.engineGeneratePublic(KeyFactorySpi.java:212)
	at java.base/java.security.KeyFactory.generatePublic(Unknown Source)
	at com.jcraft.jsch.jce.XDH.getSecret(XDH.java:71)
	at com.jcraft.jsch.DHXEC.next(DHXEC.java:134)
	at com.jcraft.jsch.Session.connect(Session.java:328)
	... 14 more

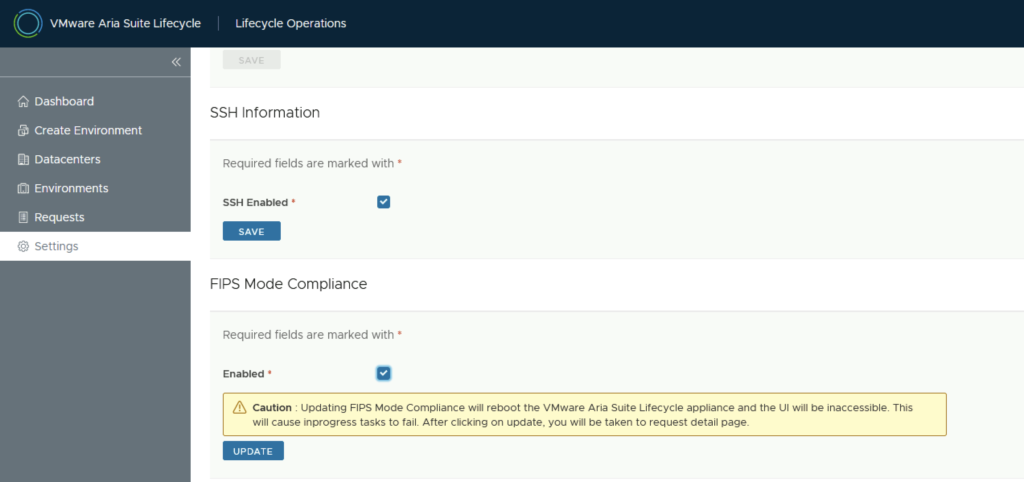
To get around it I had to enable FIPS mode in Aria Suite Lifecycle under Lifecycle Operations -> Settings -> Tips Mode Compliance -> check the enabled box -> Click Update

Wait for the services to restart ~3 minutes

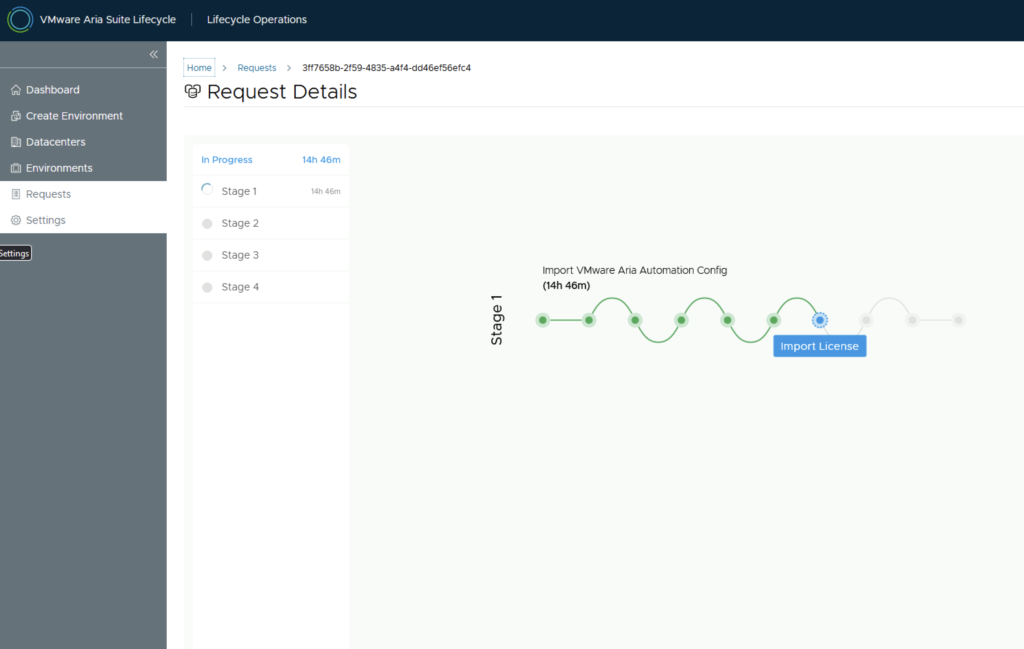
Upon retrying the request we can see that the request is now continuing.

Upgrading VMware Aria Automation Config to 8.16.2

In this post i will go over upgrading my 8.x SSC appliance to 8.16.2. As a pre requirement we do need to have VMware Aria Suite Lifecycle upgraded to 8.16. Instructions can be found here. The upgrade does not include the latest PSPACK that contains the 8.16.2 Aria Automation Config release. Instructions to get the PSPACK can be found on my other blog post here.

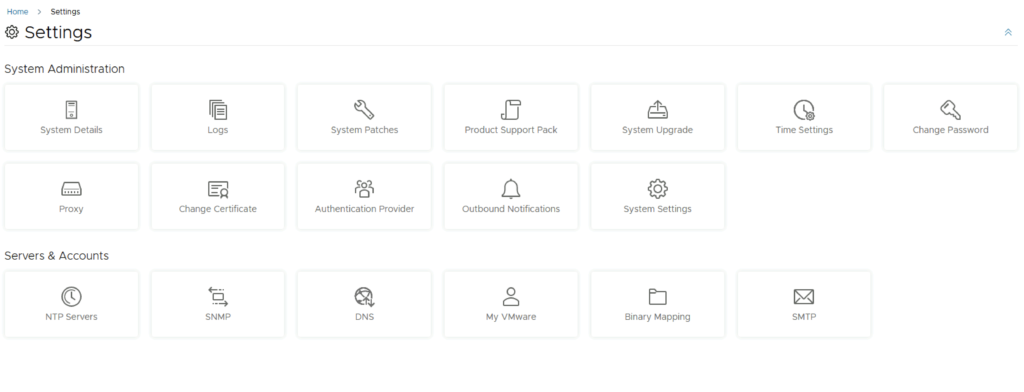
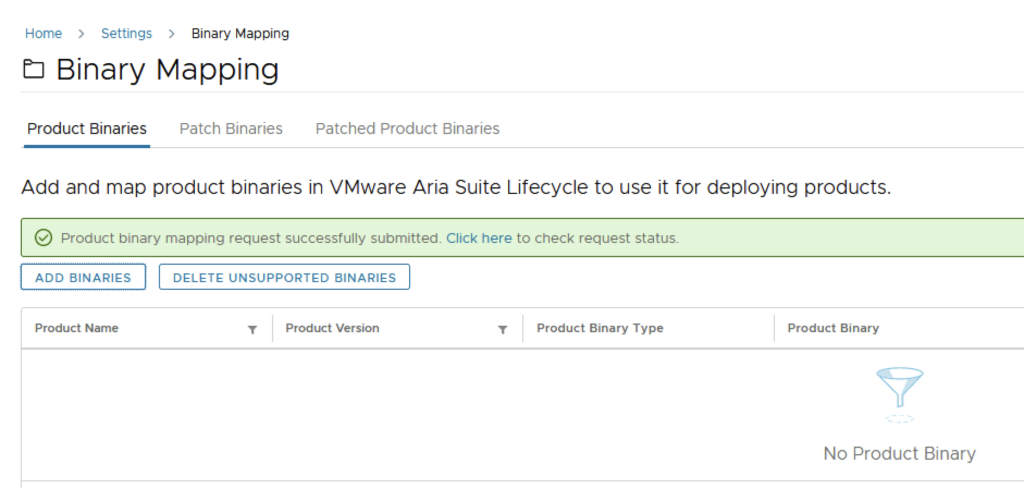
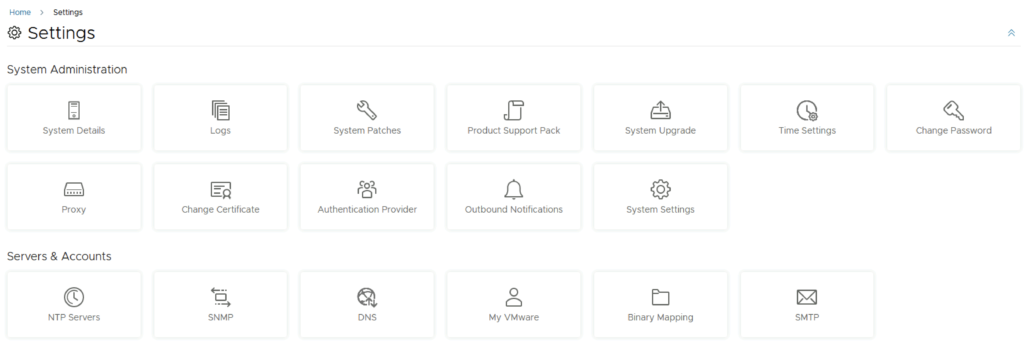
To get started we can go to VMware Aria Suite Lifecycle -> Lifecycle Operations -> Settings -> Binary Mapping. (If you haven’t added your My VMware credentials you will need to do that first by going to VMware Aria Suite Lifecycle -> Lifecycle Operations -> Settings -> My VMware)

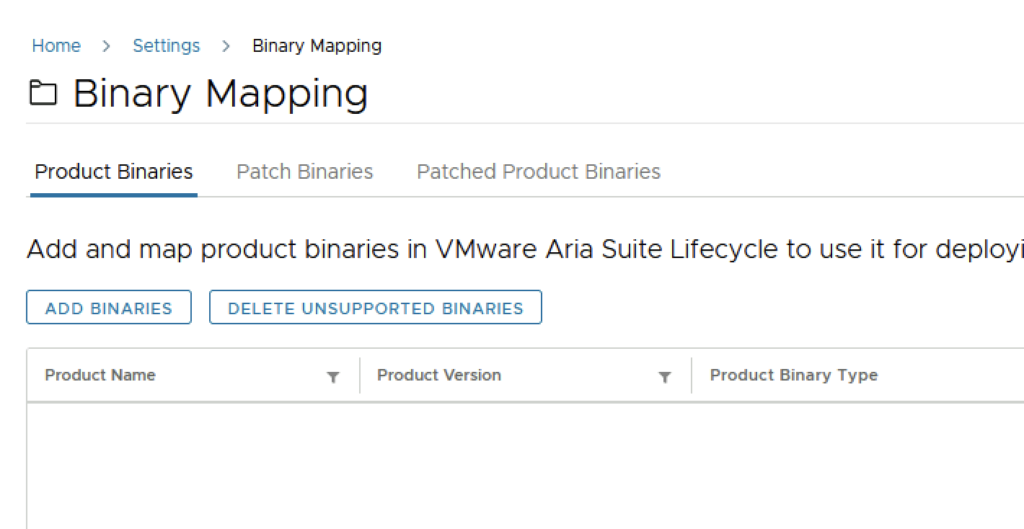
Click on Add Binaries under Product Binaries

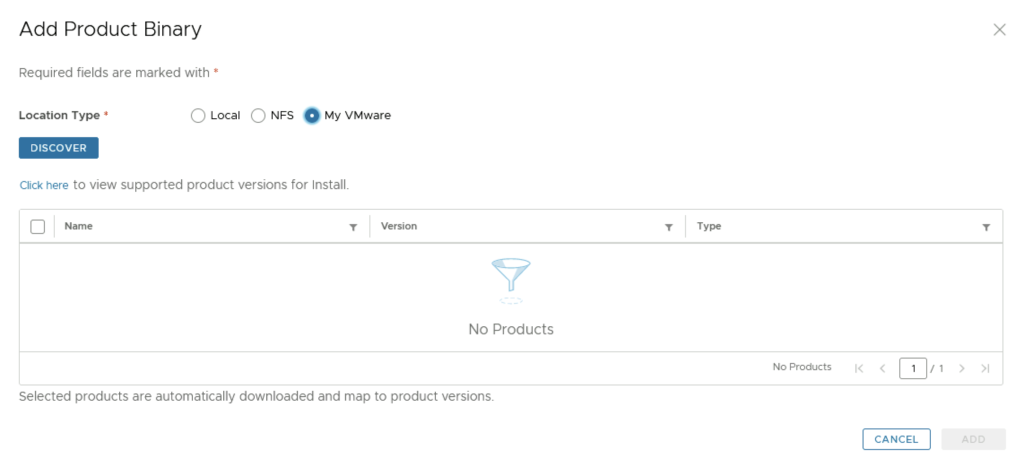
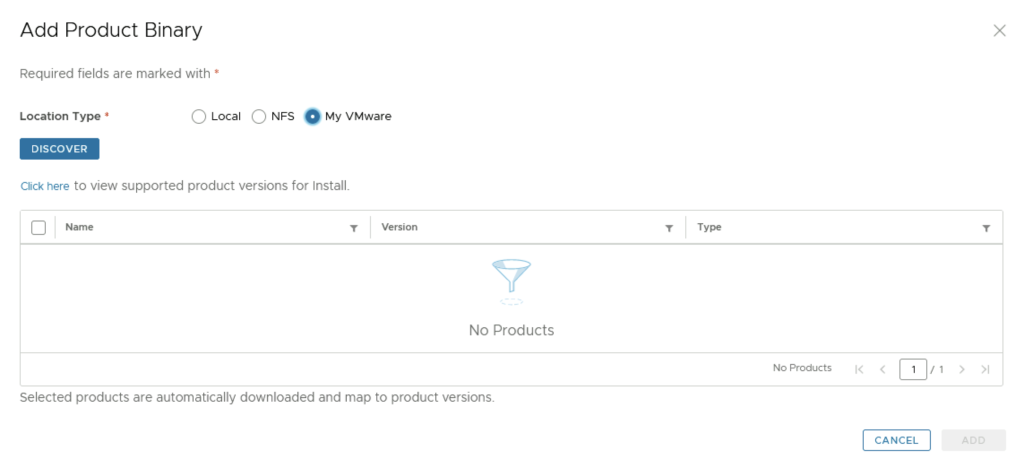
Select My VMware and click on Discover

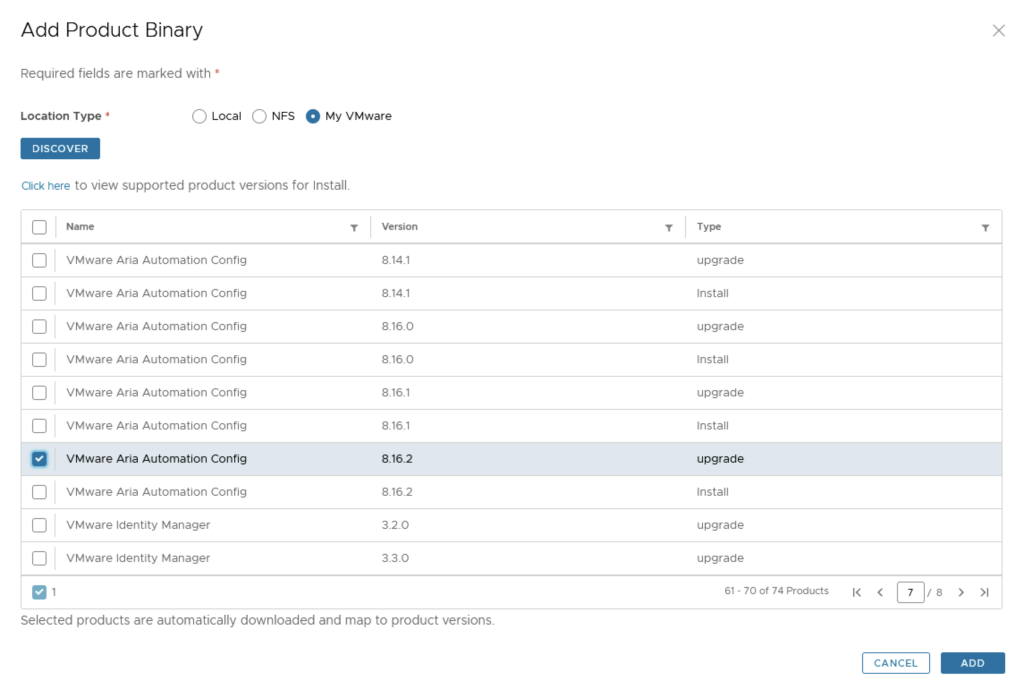
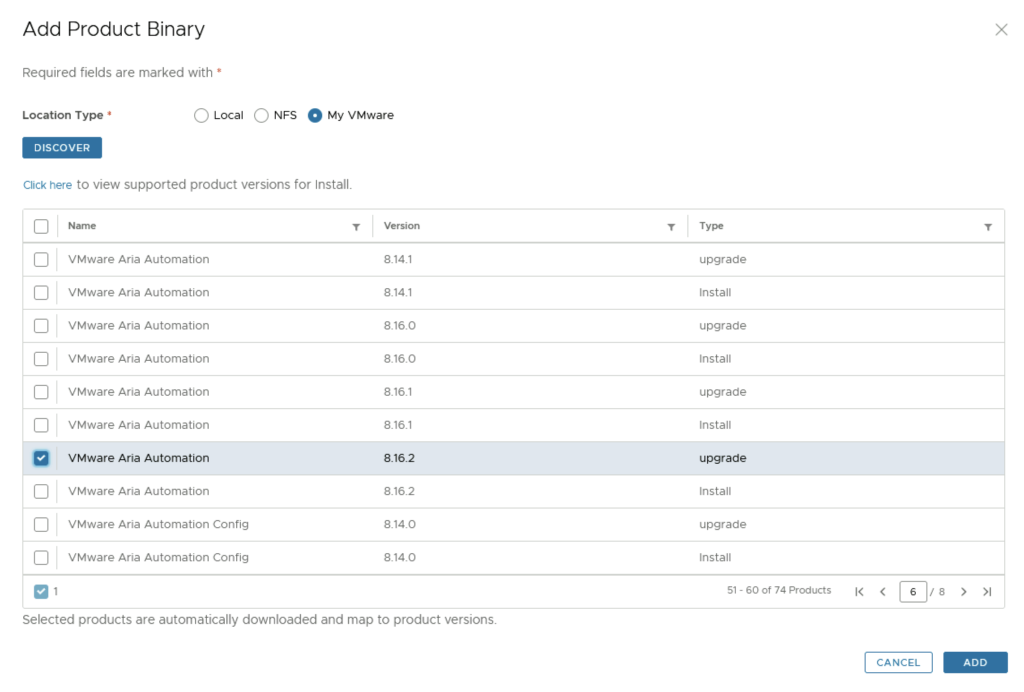
We can see a list of binaries that have been discovered. We can select what we need and click on Add

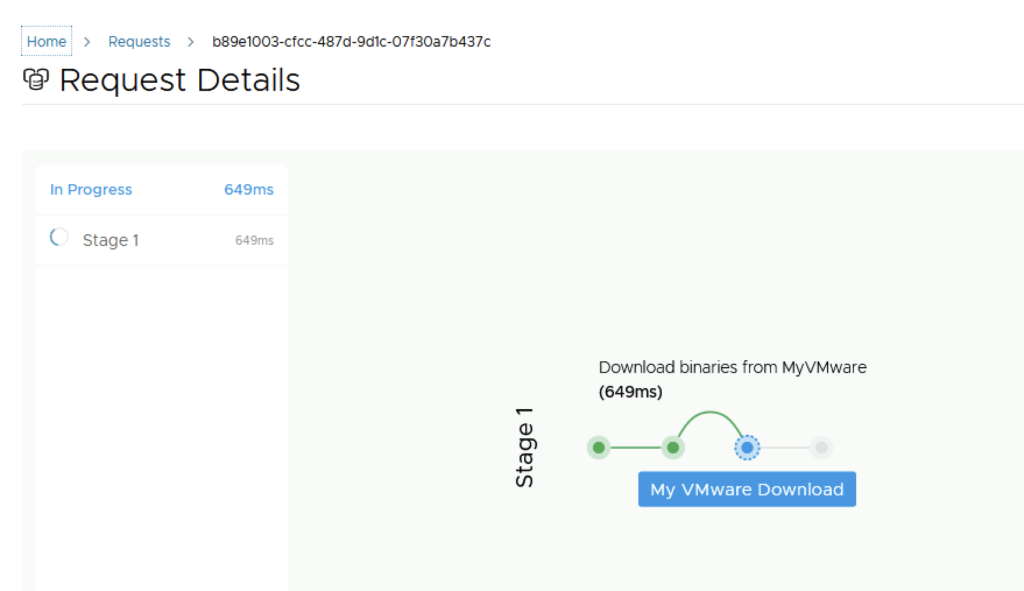
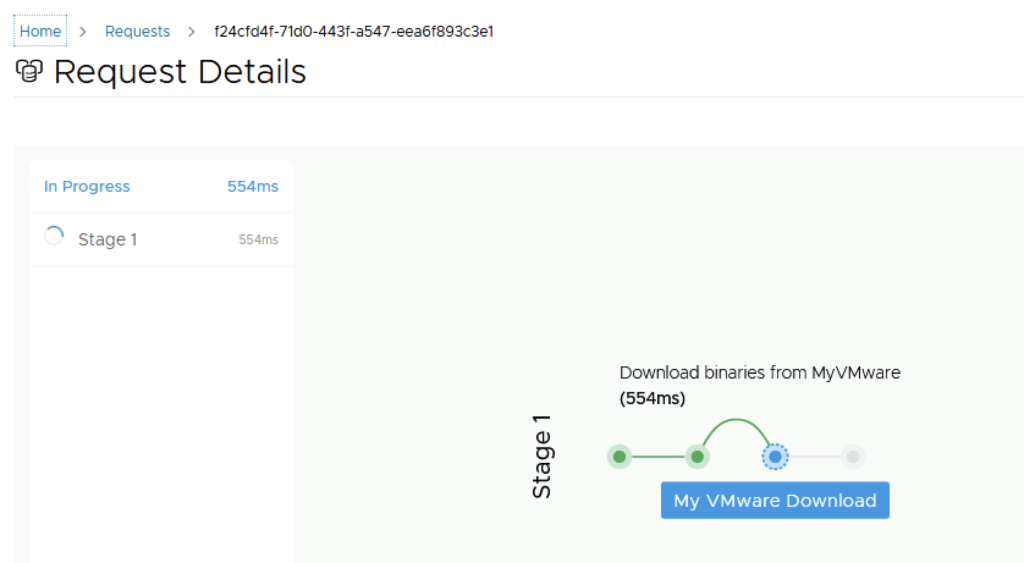
This will create a request and start downloading the package. To view the progress we can click on the Click Here hyperlink

Click on the in Progress button to view the details

We now have to wait for the download to complete

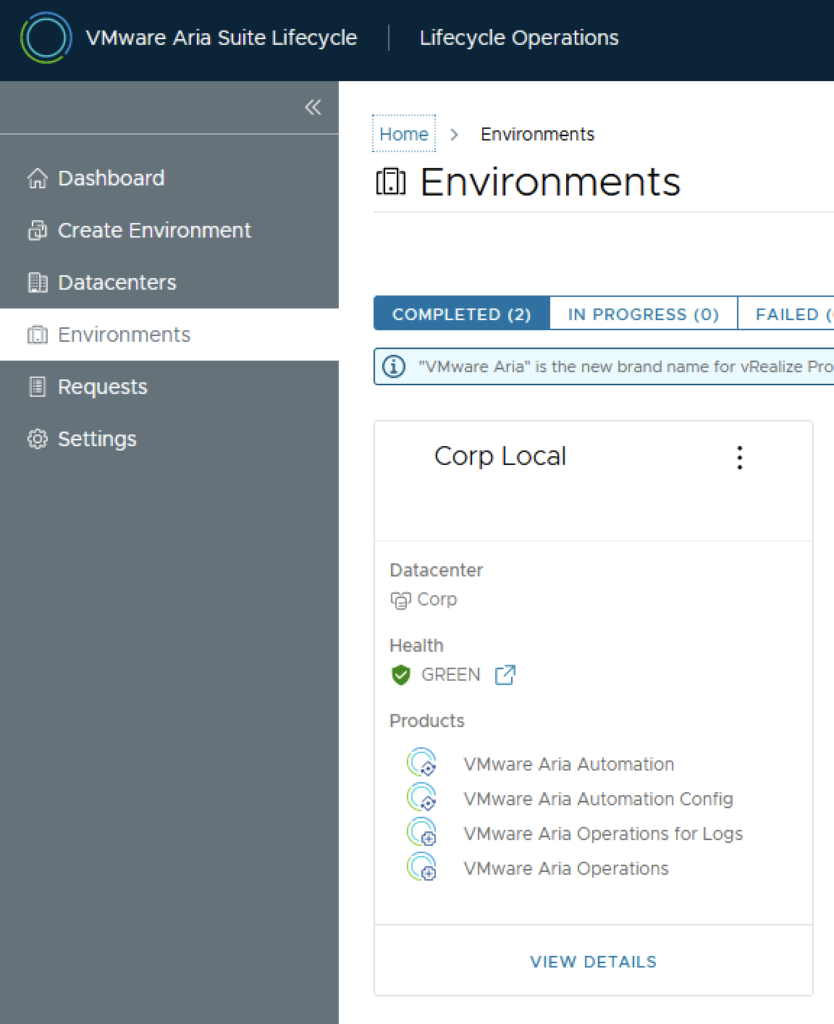
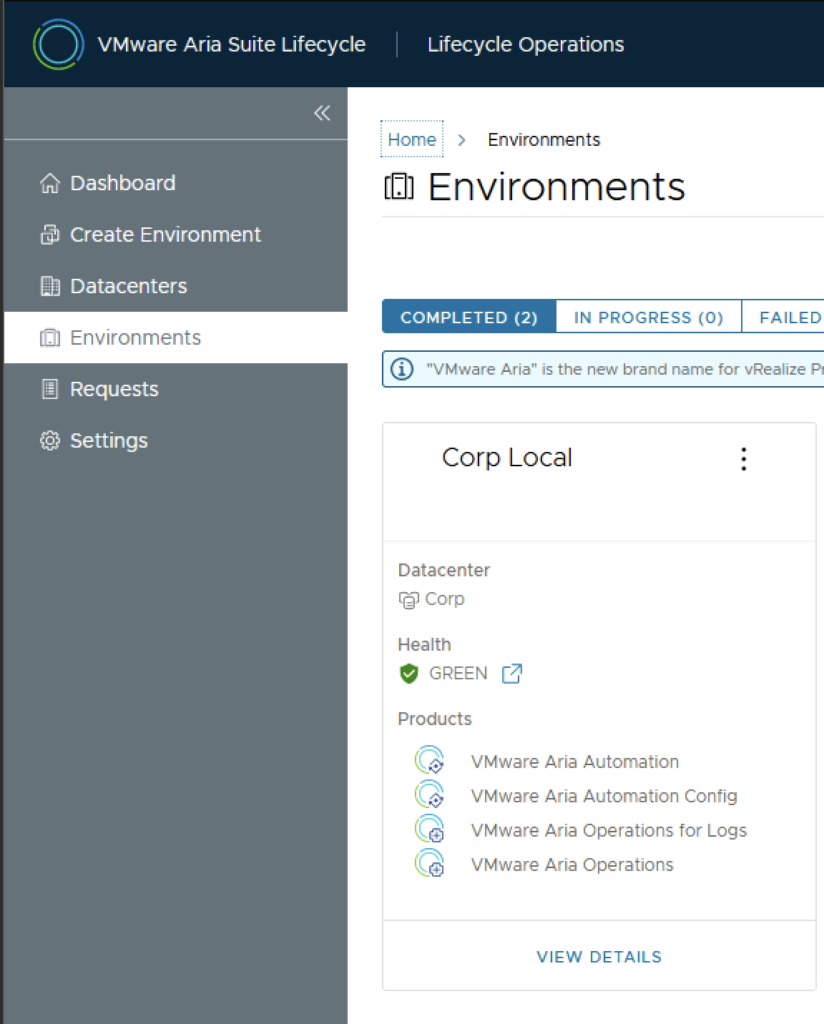
After the download is complete we can go to Environments -> View Details on the environment that includes the VMware Aria Automation Config

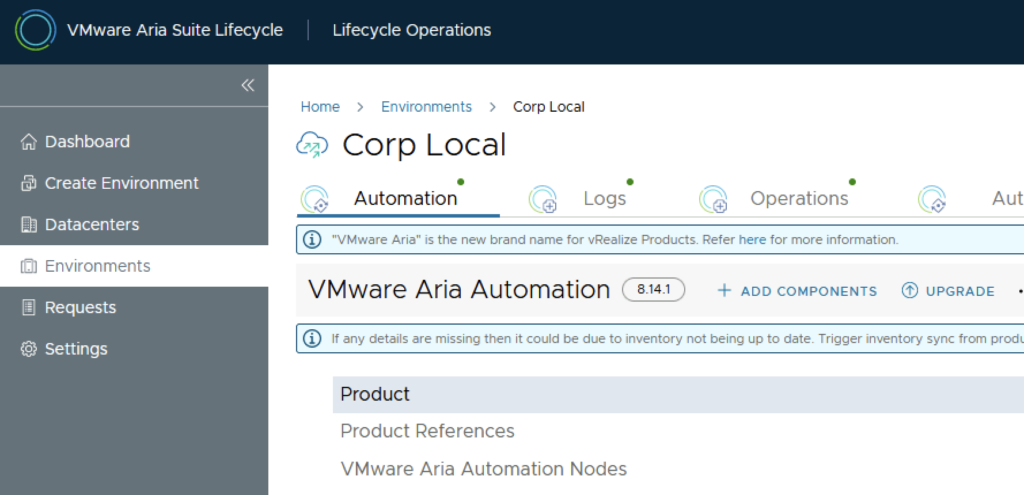
Under VMware Automation Config tab Click on Upgrade

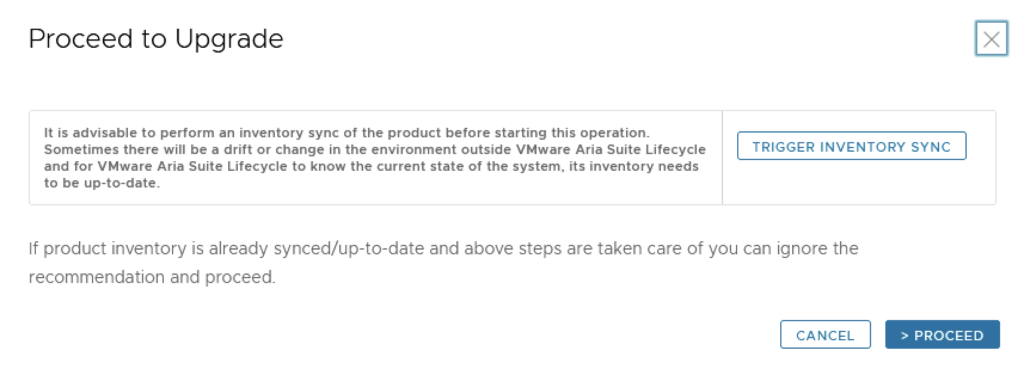
An Inventory sync is recommended if the environment has changed since Aria Suite Lifecycle performed the last sync. We trigger the sync from the UI or click on Proceed to continue

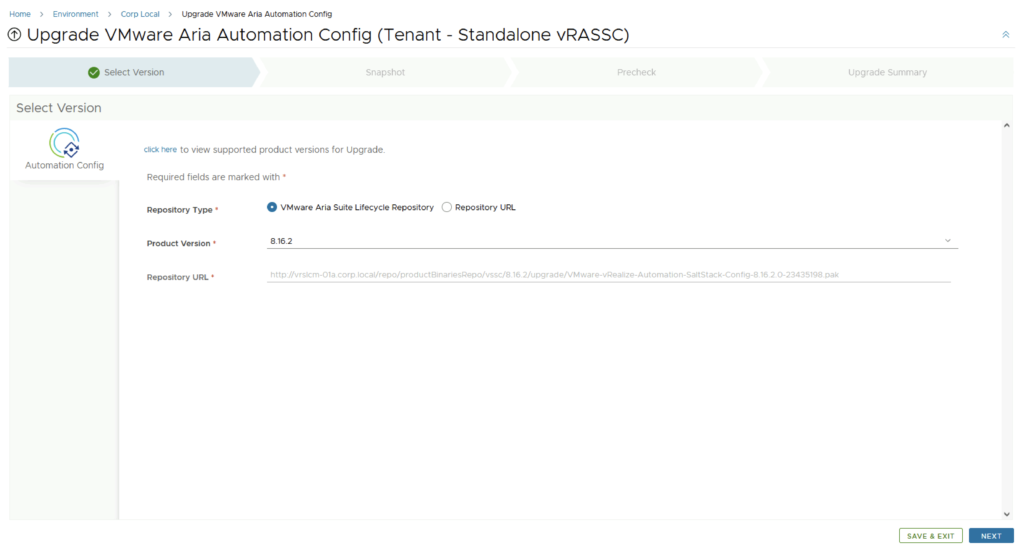
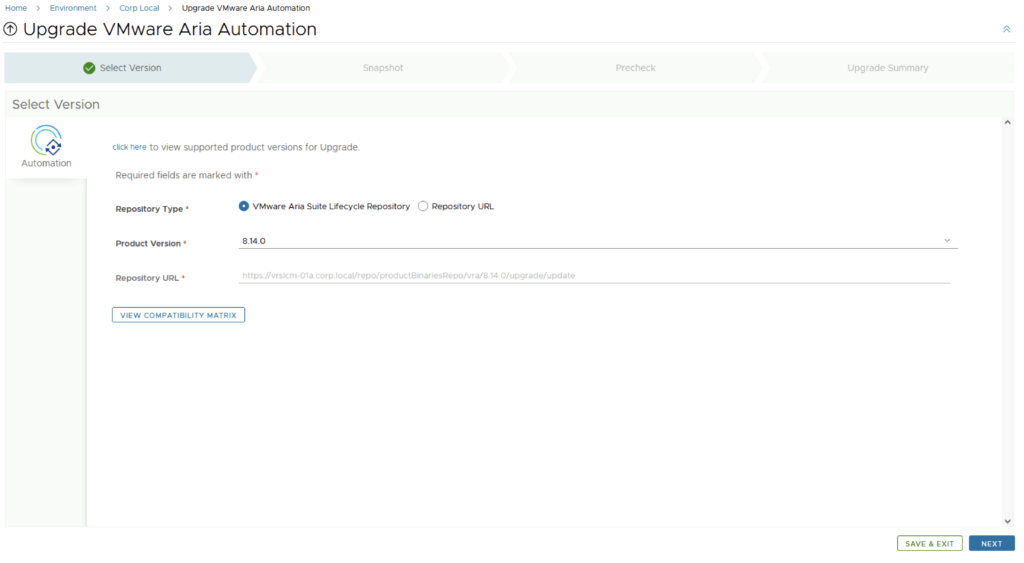
Select product Version 8.16.2 and click Next. We can also review the compatibility matrix to make sure the environment is compatible.

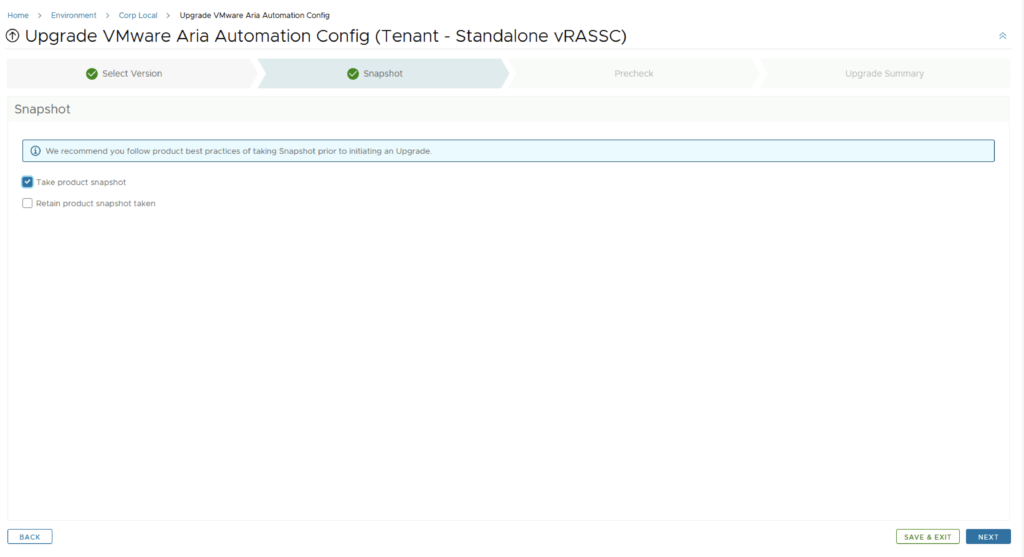
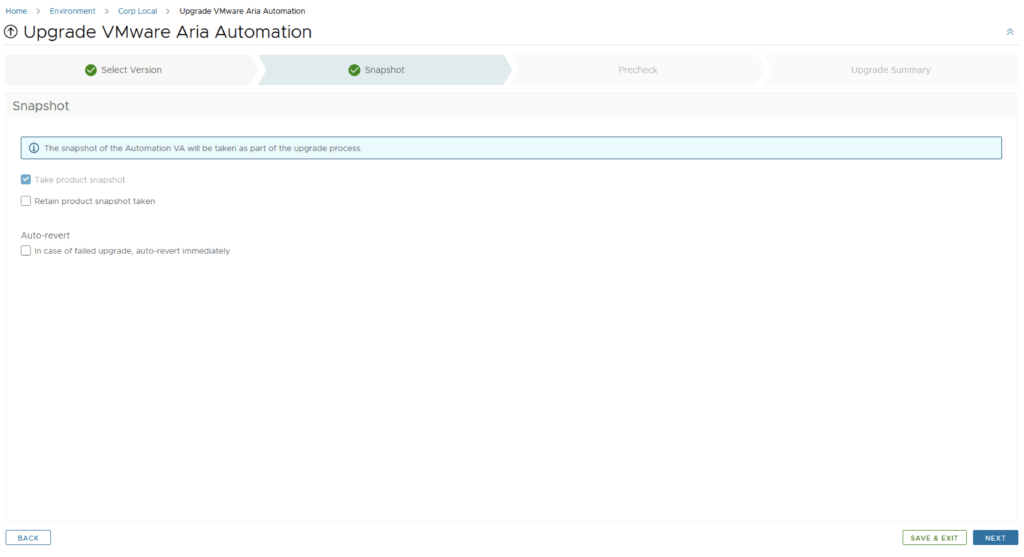
We can automatically create and delete a snapshot part of the upgrade process

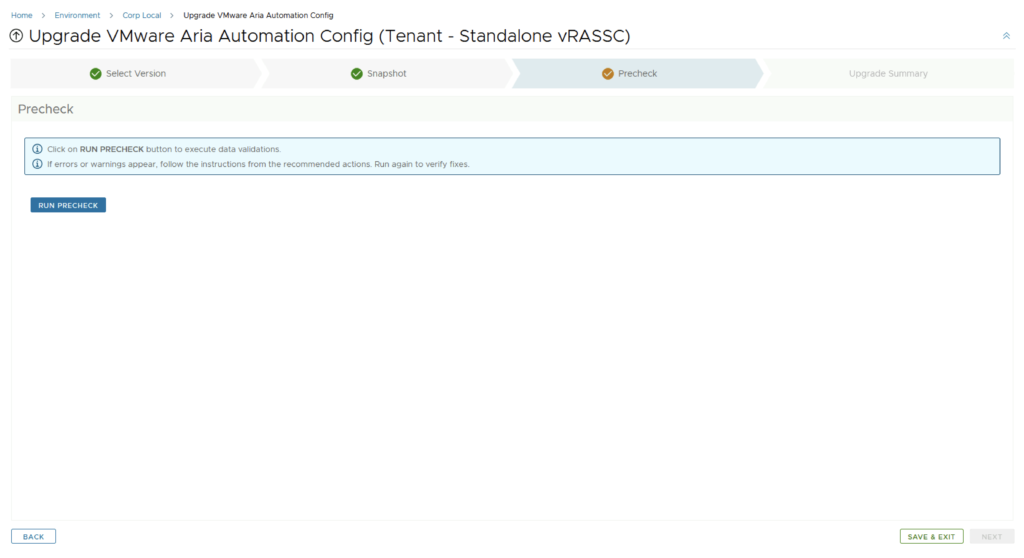
Run the Precheck to make sure there are no errors

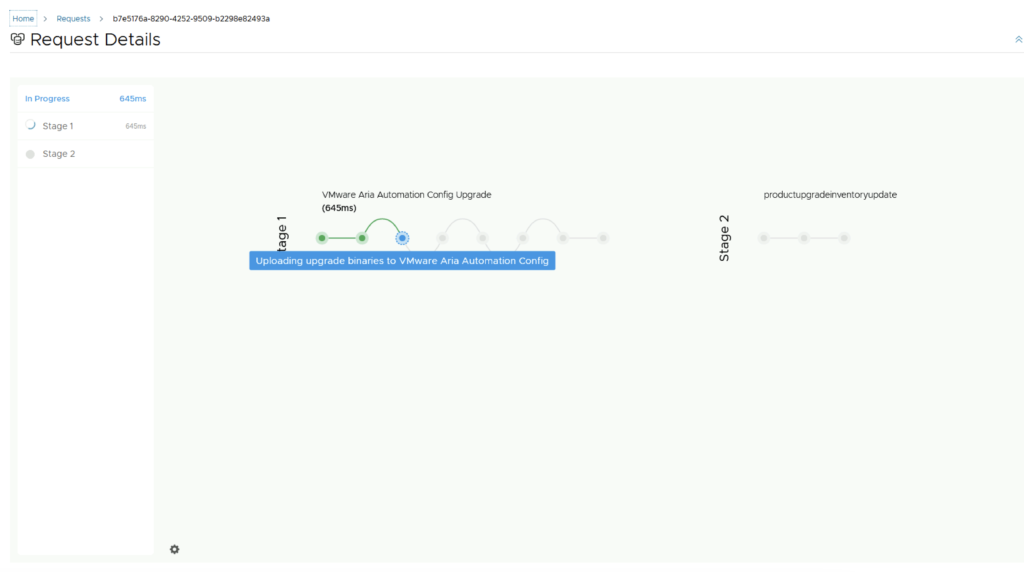
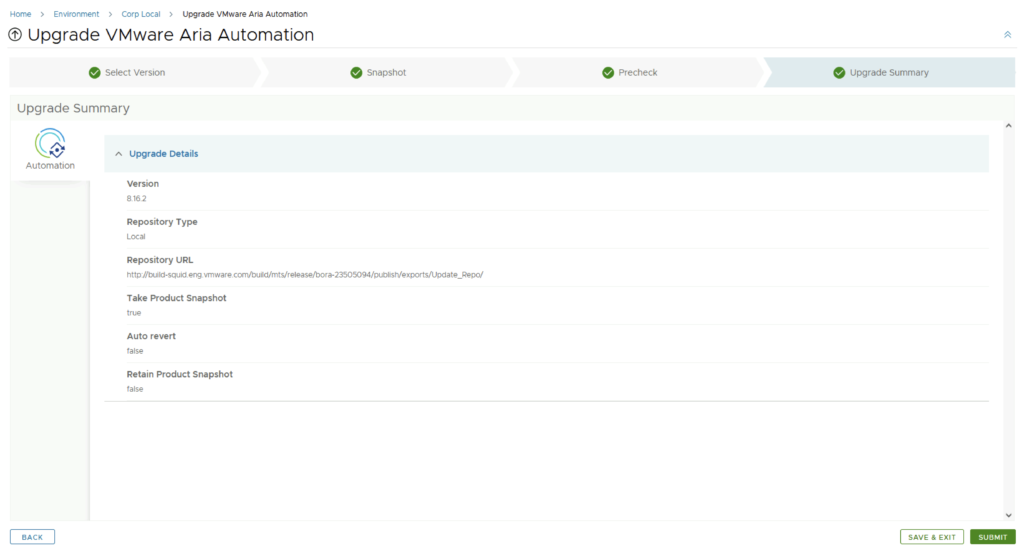
Once the check is complete, click on Next. Review the upgrade details and click on Next. We are taken to the progress screen where we can follow the progress.

The system will get rebooted and once its back up we will be on 8.16.2

Here are a few additional blogs that might be useful post upgrade:

Error Code: LCMVSSC10018

SSC 8.8 sseapi_rpc_queue: could not connect to SSE server

SSC 8.8 urllib3 (1.25.11) or chardet (4.0.0) doesn’t match a supported version

Authentication failed: no Authorization header

Upgrading VMware Aria Automation to 8.16.2

In this post i will go over upgrading my 8.x vRA appliance to 8.16.2. As a pre requirement we do need to have VMware Aria Suite Lifecycle upgraded to 8.16. Instructions can be found here. The upgrade does not include the latest PSPACK that contains the 8.16.2 VMware Aria Automation release. Instructions to get the PSPACK can be found on my other blog post here.

To get started we can go to VMware Aria Suite Lifecycle -> Lifecycle Operations -> Settings -> Binary Mapping. (If you haven’t added your My VMware credentials you will need to do that first by going to VMware Aria Suite Lifecycle -> Lifecycle Operations -> Settings -> My VMware)

Click on Add Binaries under Product Binaries

Select My VMware and click on Discover

We can see a list of binaries that have been discovered. We can select what we need and click on Add

This will create a request and start downloading the package. To view the progress we can click on the Click Here hyperlink

Click on the in Progress button to view the details ex:

We now have to wait for the download to complete

After the download is complete we can go to Environments -> View Details on the environment that includes vRA

Click on Upgrade

An Inventory sync is recommended if the environment has changed since LCM performed the last sync. We trigger the sync from the UI or click on Proceed to continue

Select product Version 8.16.2 and click Next. We can also review the compatibility matrix to make sure the environment is compatible.

A new feature that was added was the capability to automatically create a snapshot prior to the upgrade and remove it after the upgrade. On this screen we also have the ability to chose if we want to keep the snapshots post upgrade for validation testing for example. Click next

Run the Precheck to make sure there are no errors

The next screen remind us of hardware requirements for vRA which can be checked here and vIDM which can be checked here. As far as i can tell they haven’t changed since the 8.3 release. Check the I took care of the manual steps above and am ready to proceed check mark and click on Run Precheck

Once the check is complete we can review the checks that were performed and we can continue by clicking Next.

Review the upgrade details and click on Submit. We are taken to the progress screen where we can follow the progress.

The system will get rebooted and once its back up we will be on 8.16.2

Since we are doing a major upgrade i strongly recommend to clean the cache before using the new vRA version.

VMware Aria Suite Lifecycle Product Support Pack (PSPAK) Upgrade

In this guide i will go over the steps of getting an existing 8.x VMware Aria Suite Lifecycle (formerly vRSLCM vRealize Lifecycle Manager) appliance to support the latest product releases available. Here is a great blog that goes in to the details about what the Product Support Pack is https://blogs.vmware.com/management/2019/01/vrslcm-pspak.html. Typically the newer Product Support Pack is included part of the upgrade for LCM, however sometimes there are product releases in between releases where product support packs come in handy.

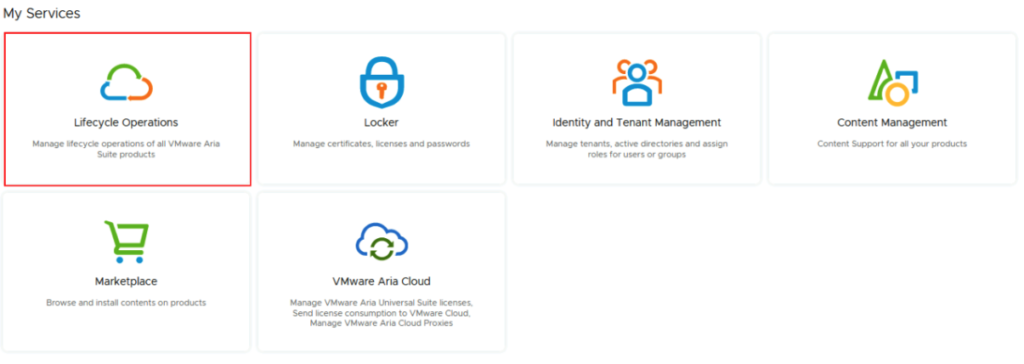
The first step is to log in to vRealize Suite Lifecycle Manager under the Lifecycle Operations section

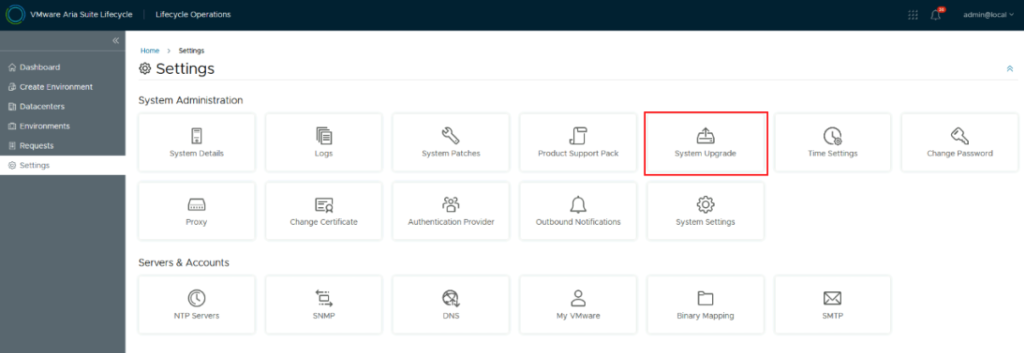
Go to settings -> Product Support Pack

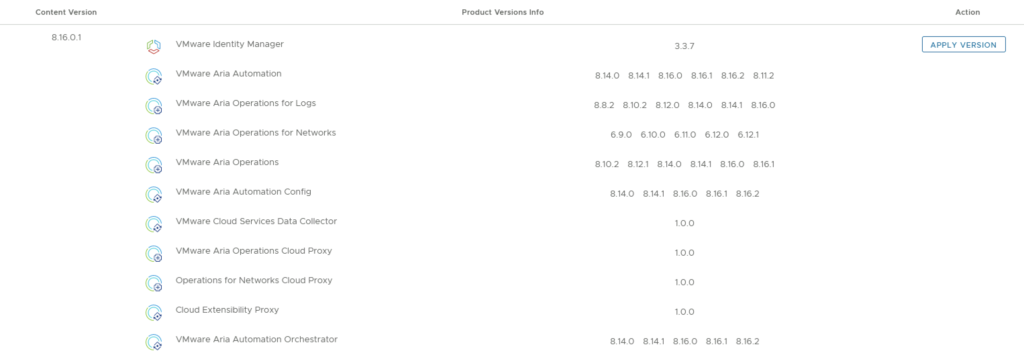
We can see that i recently upgraded to 8.16.0.0 however a new update is available 8.16.0.1. Based on what we can see in the details the new support pack adds support for the Aria 8.16.2 products. If an update is not available click on the Check Support Packs Online button and refresh the screen within a few minutes

Click on Apply Version

Verify that a snapshot or a backup exists and click Submit

We can view the progress by clicking on the Click Here link after submitting the request

Once the process is complete the system will most likely reboot. To check the status we can go back to settings -> Product Support Pack. As we can see we are now at the updated patch level

If you get an error when logging in, clear the browser cache and try again